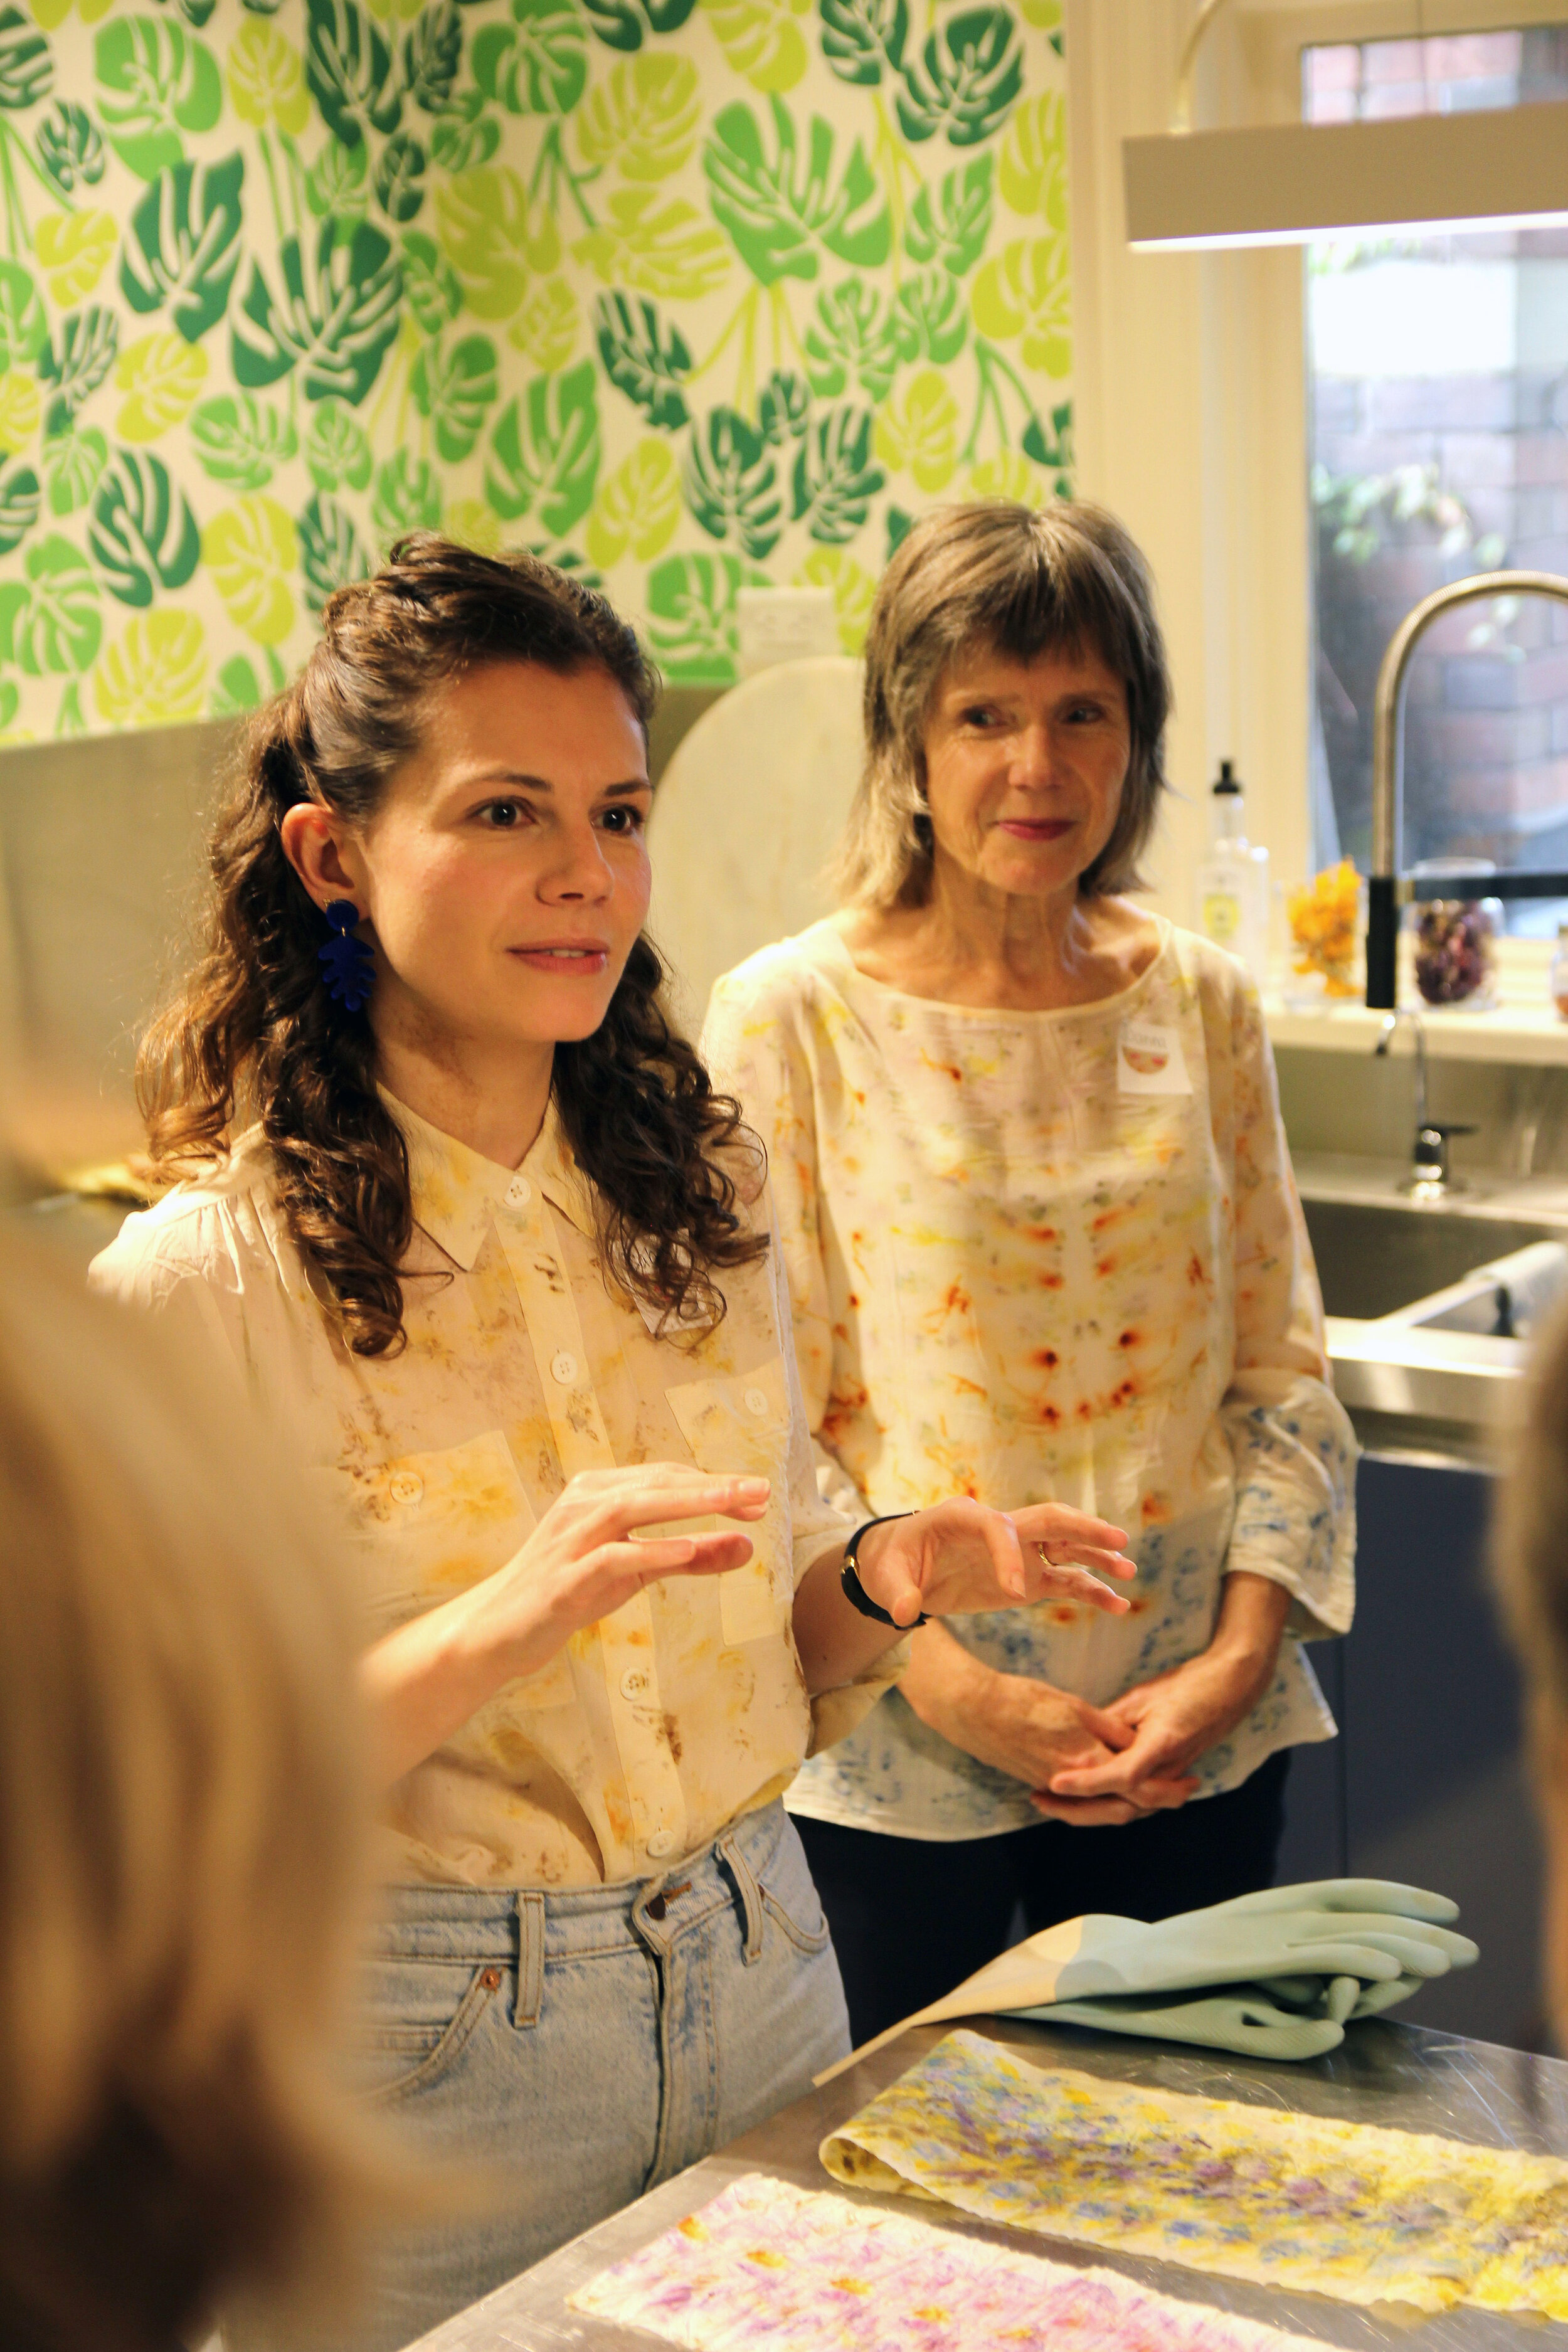
Isabel & Joanna joined the St. James Town ‘Craft Social’ to lead an introductory workshop on natural dyeing.
Read MoreWindeyer workshop at 'The Corner' St. James Town
in Events


Isabel & Joanna joined the St. James Town ‘Craft Social’ to lead an introductory workshop on natural dyeing.
Read MoreOn Saturday April 23rd we were so pleased to participate in the Toronto Botanical Garden’s first annual Earth Day Eco Market.

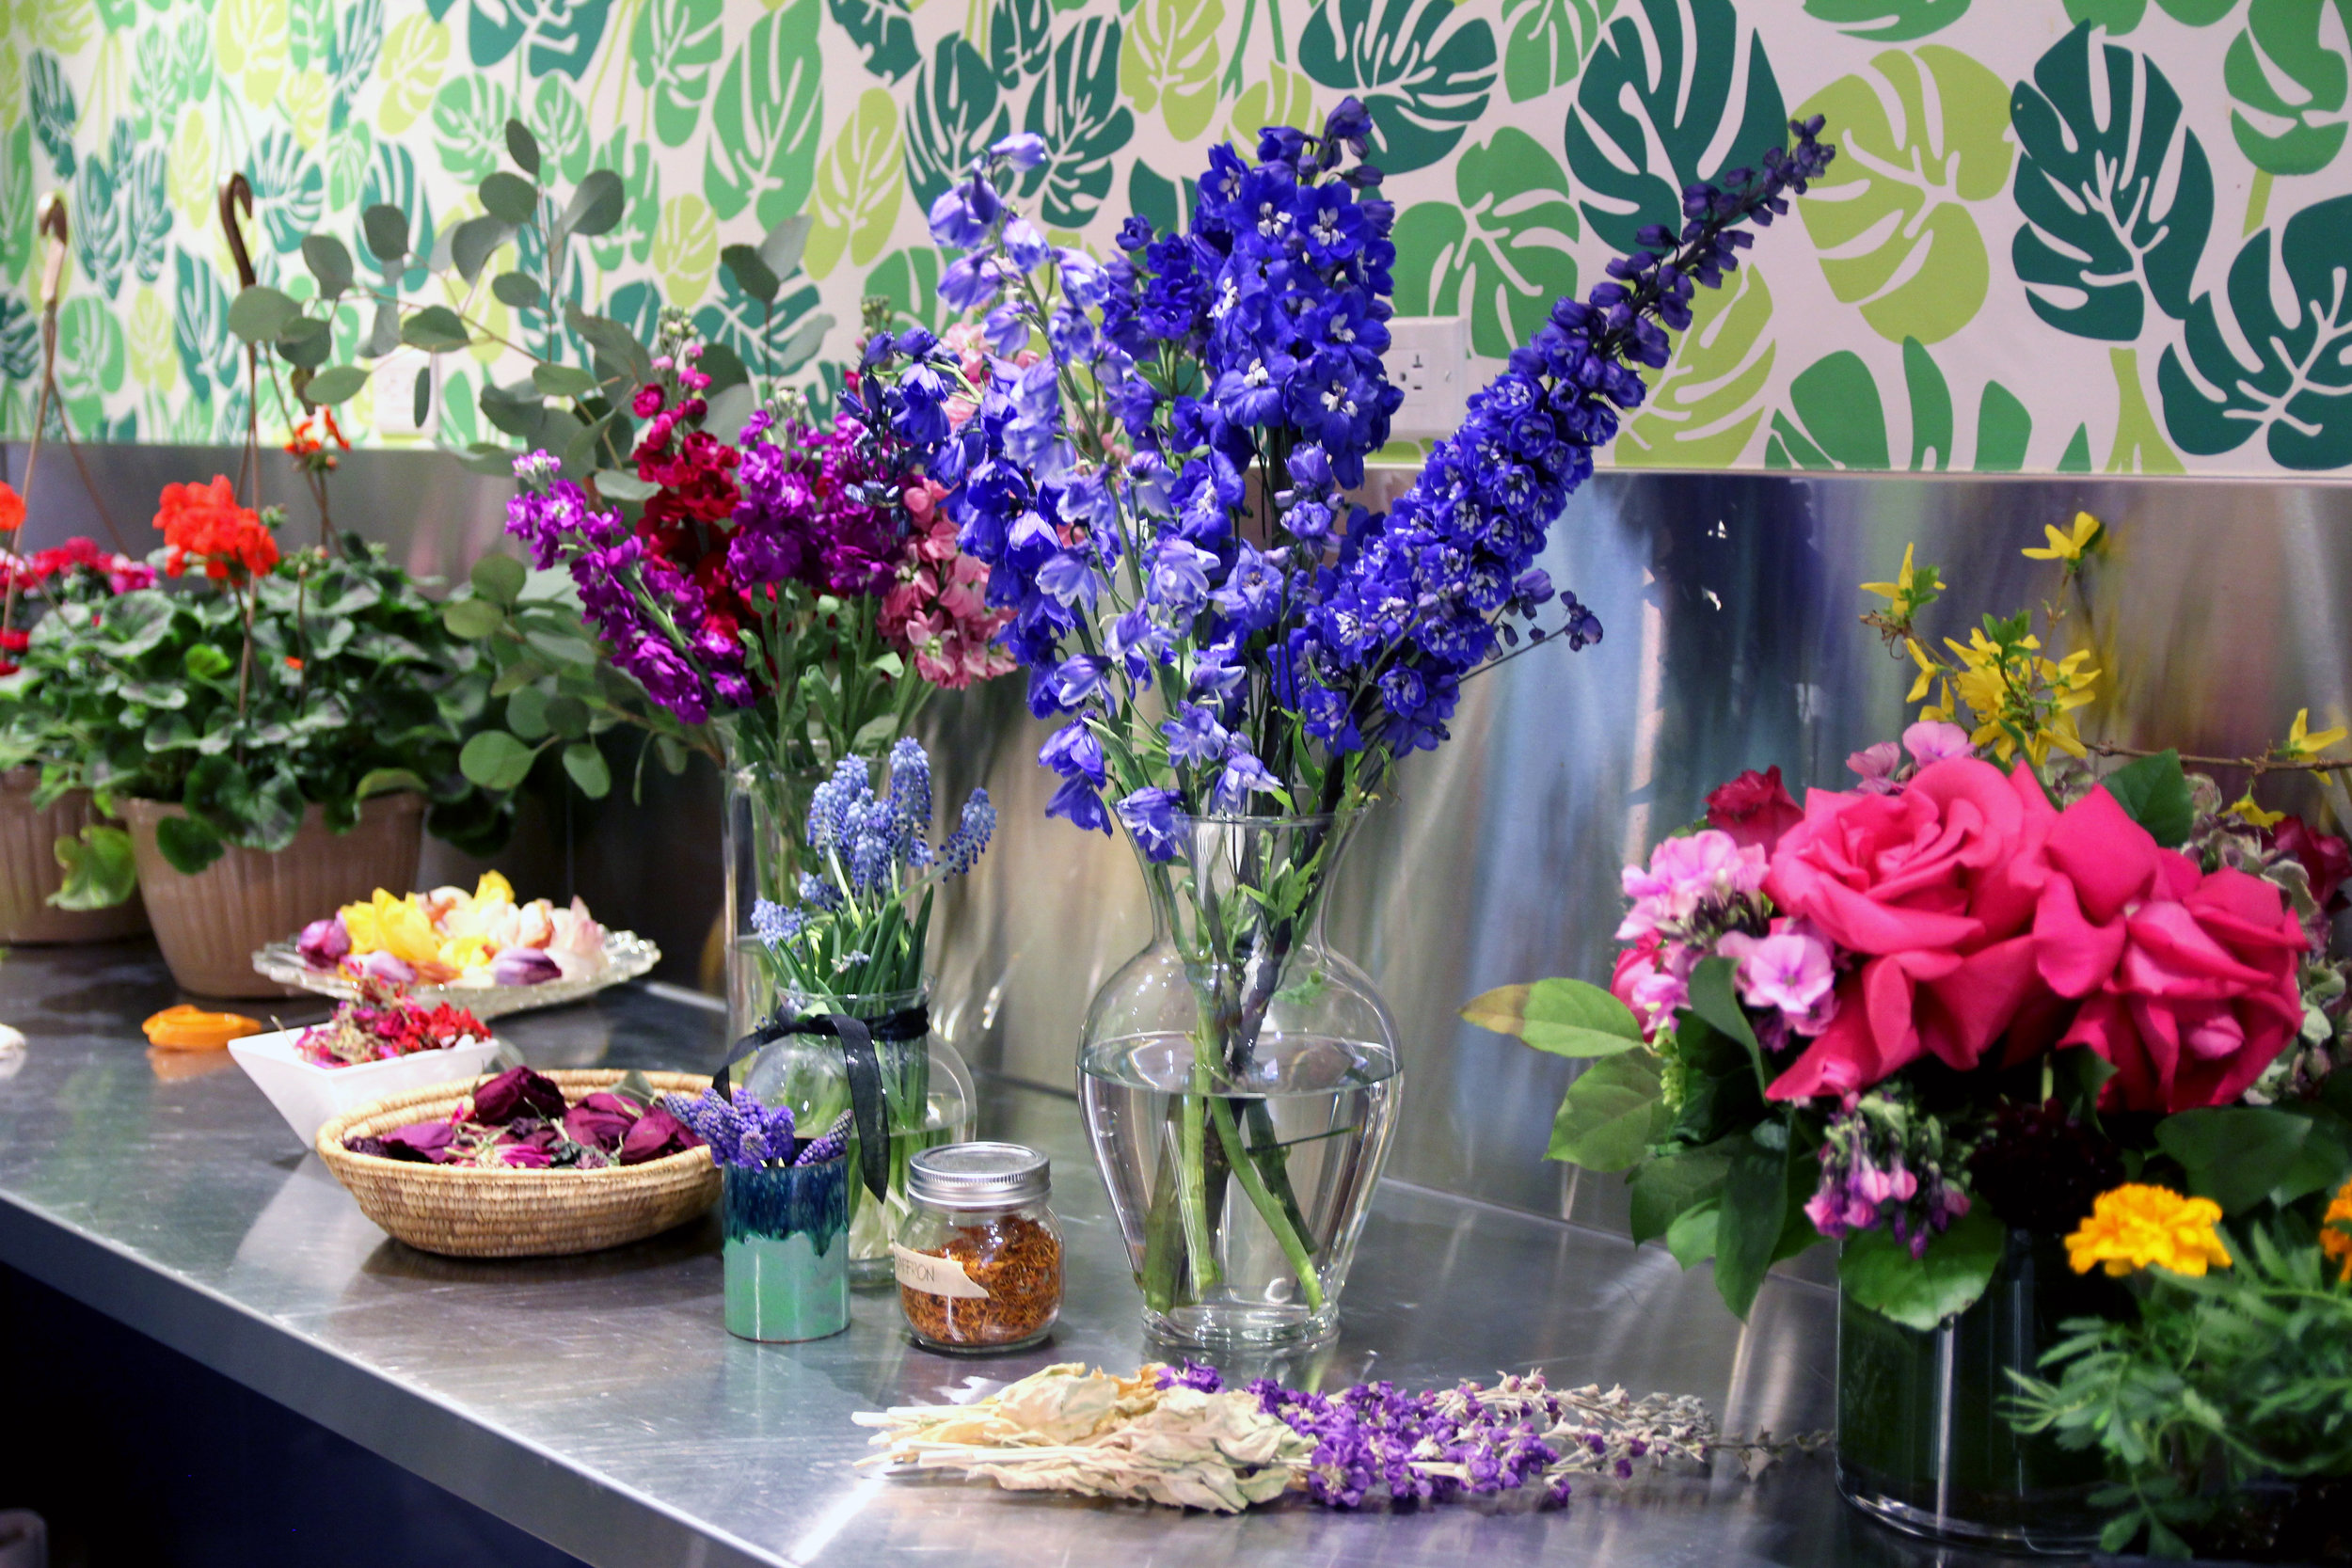
Windeyer Studio joins the Toronto Botanical Garden Earth Day Eco Market
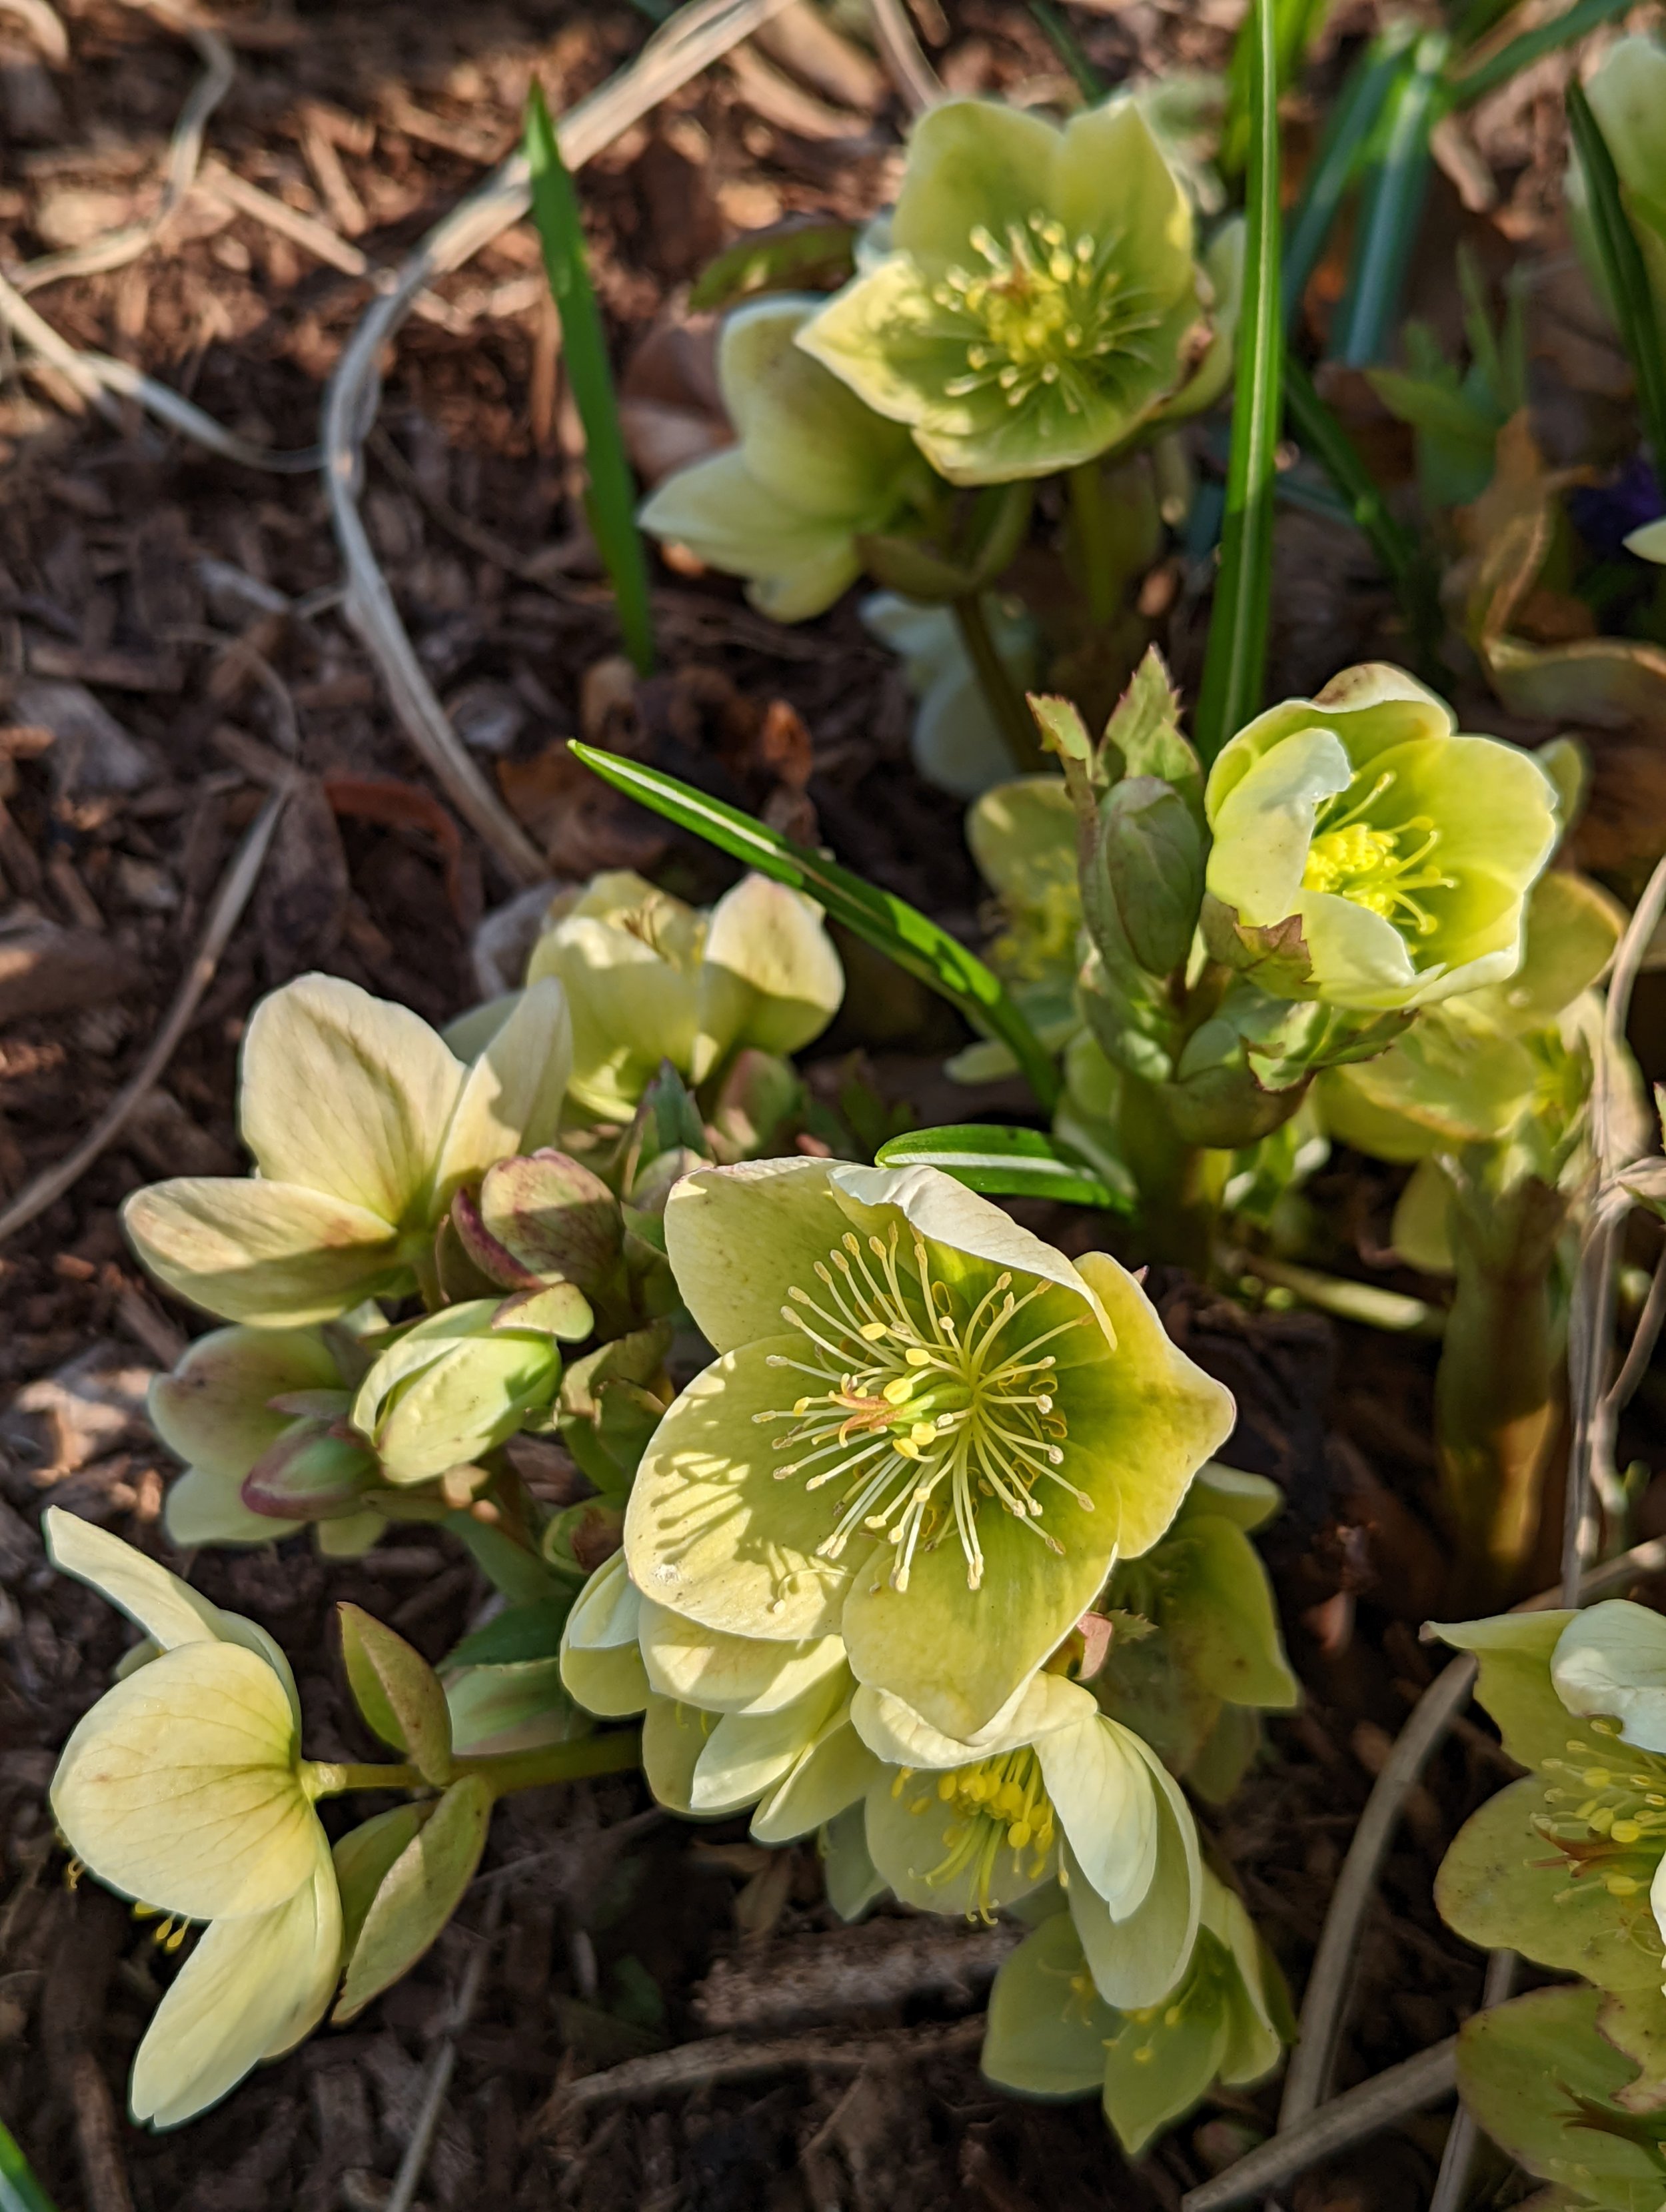
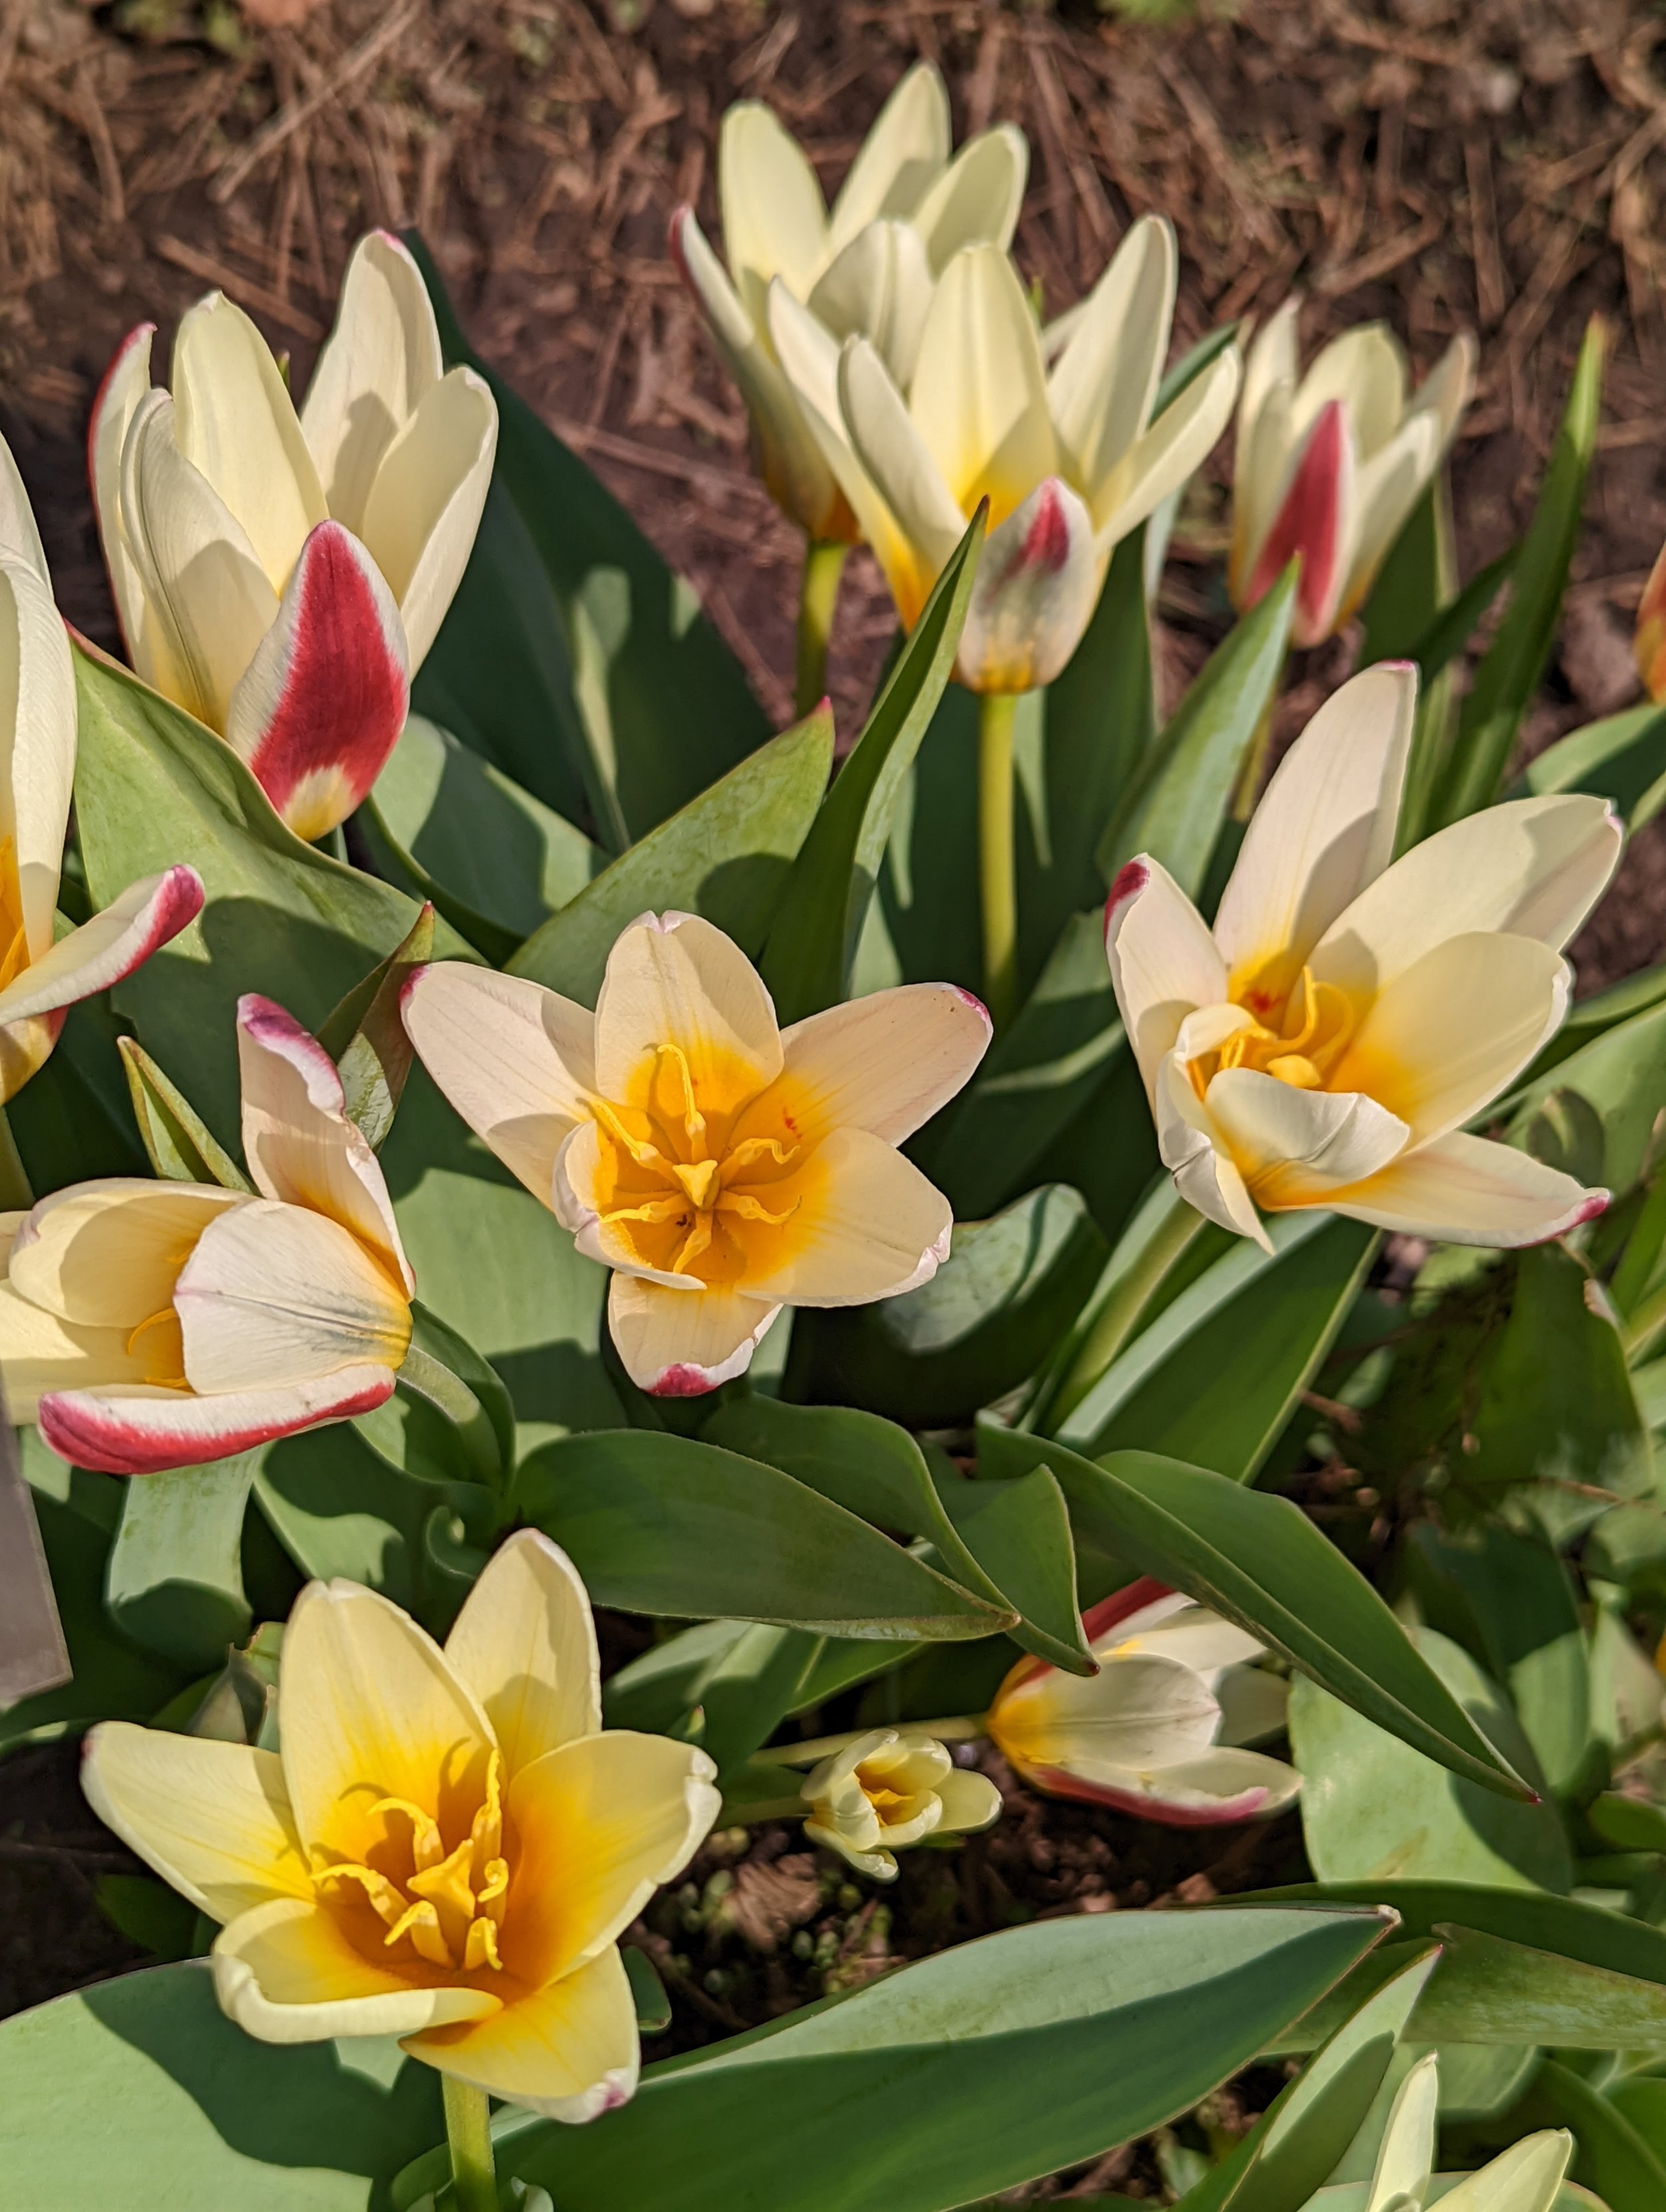
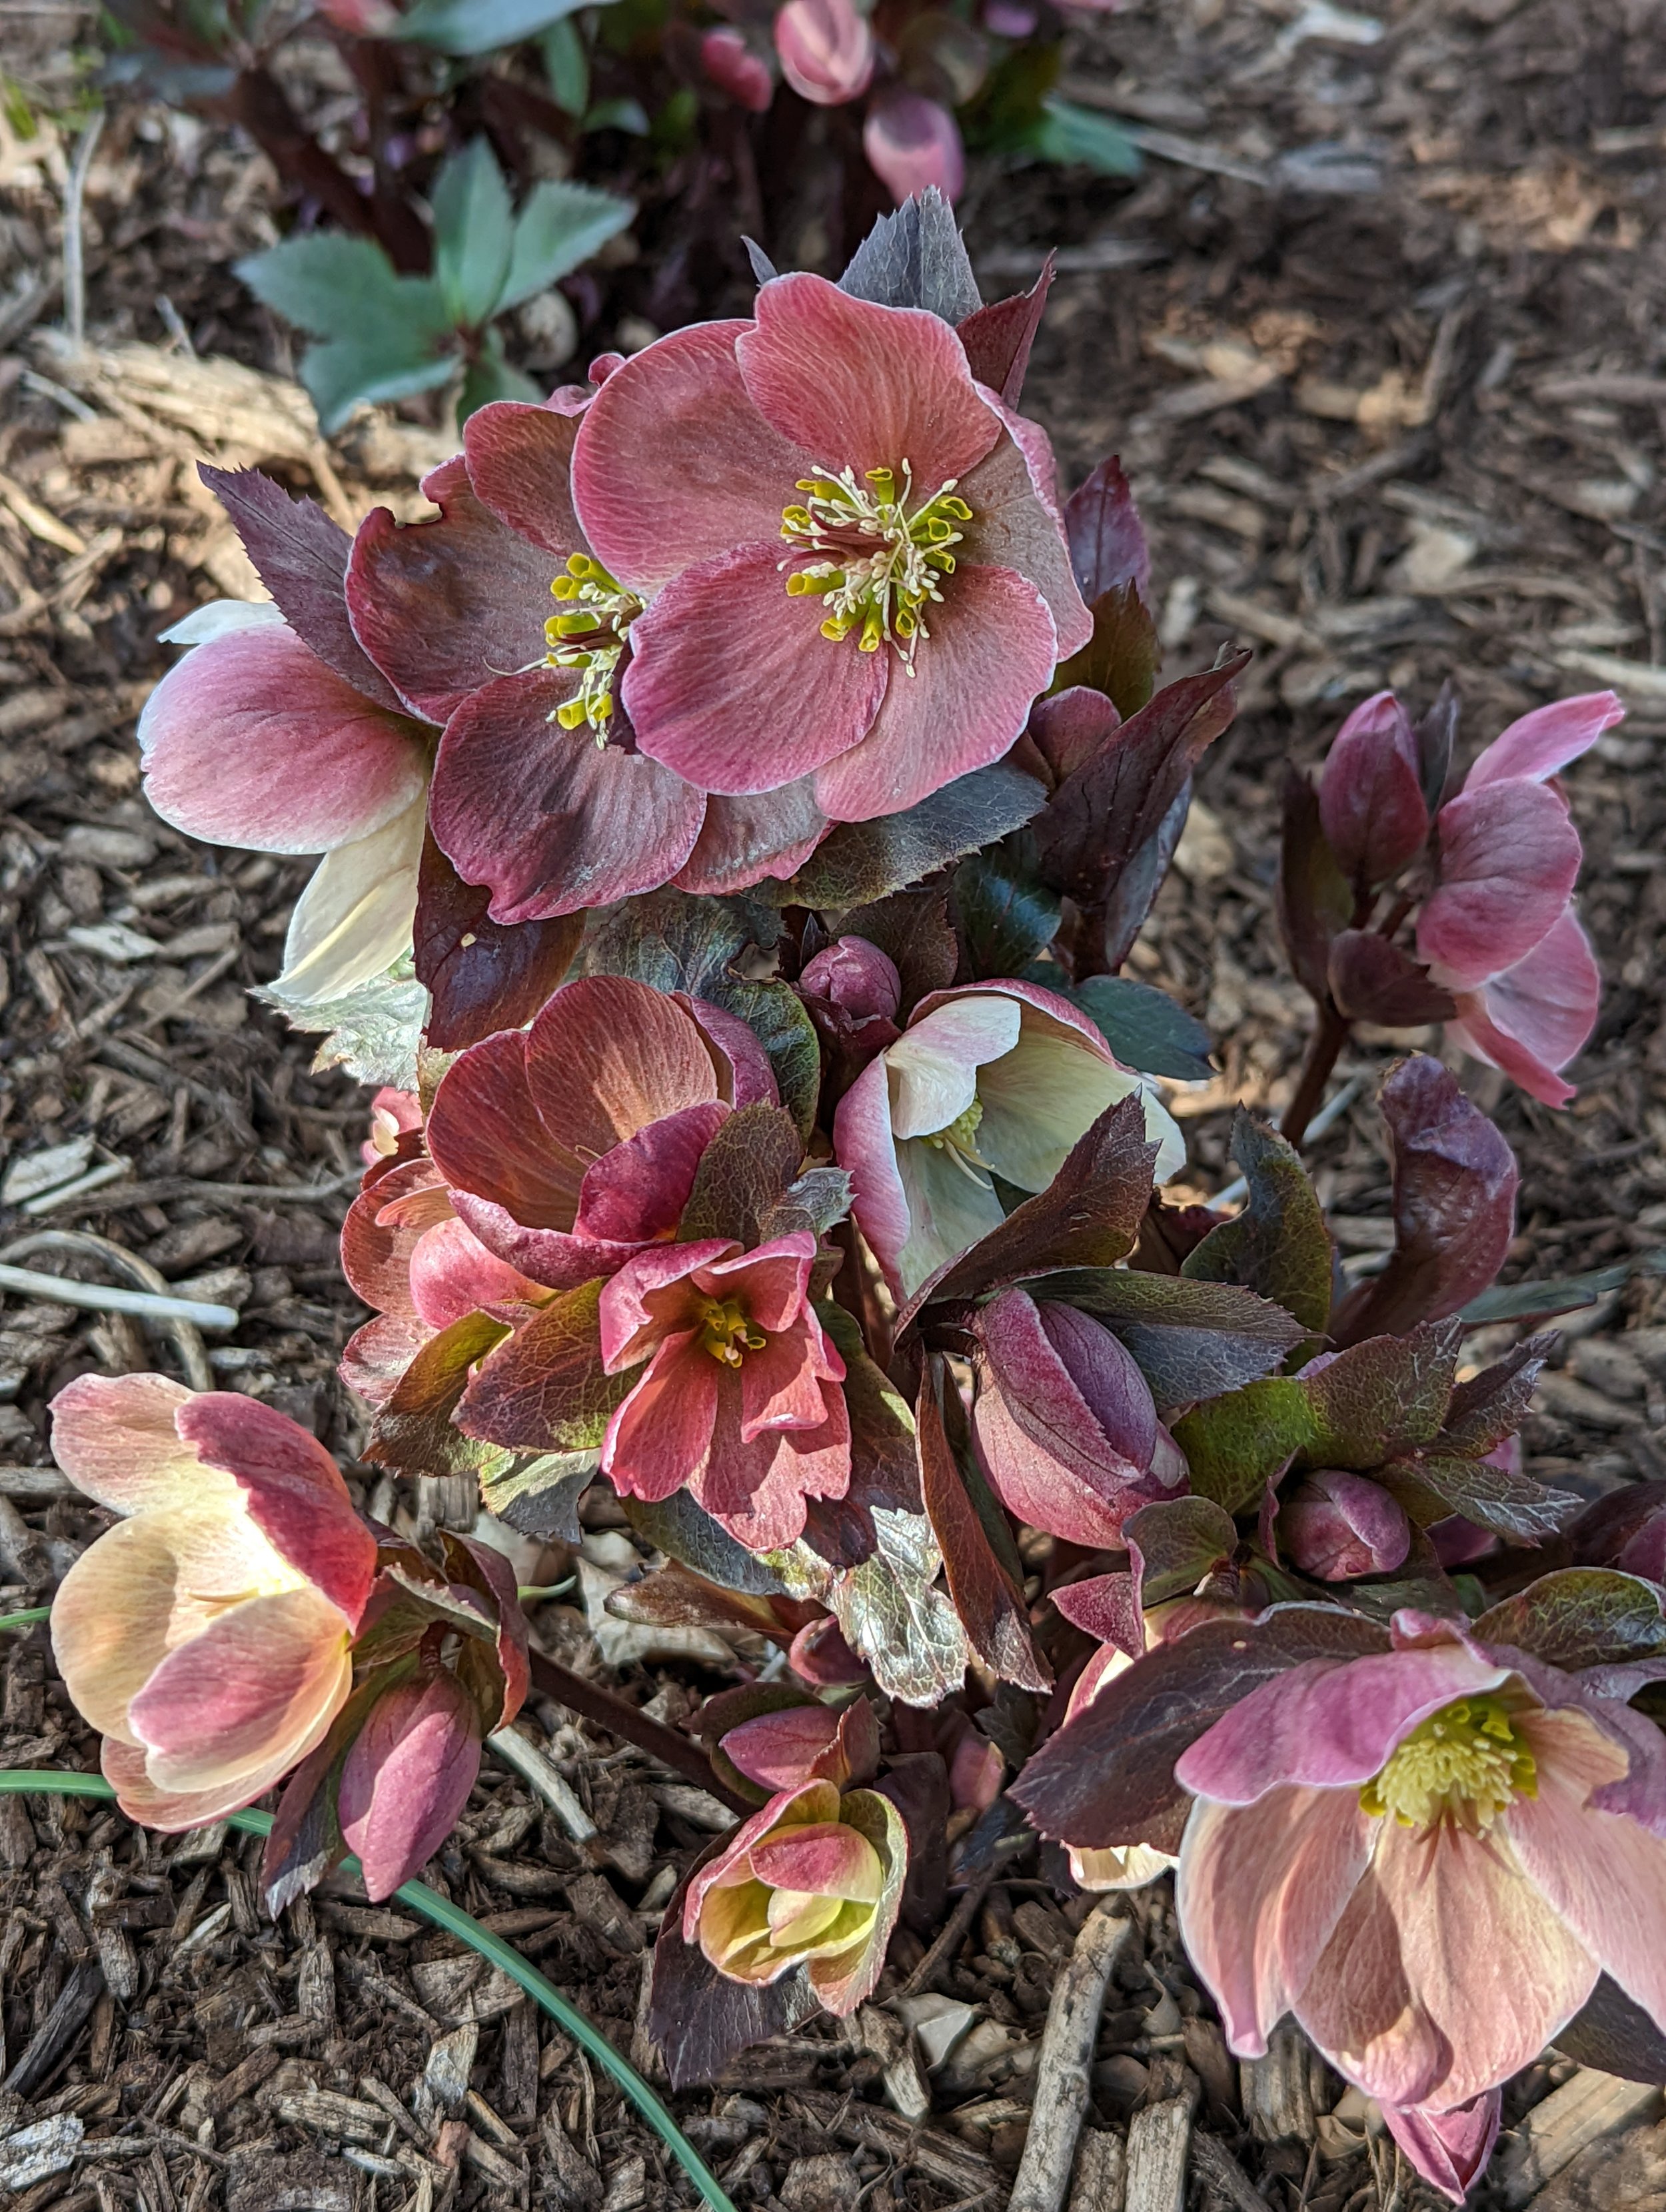
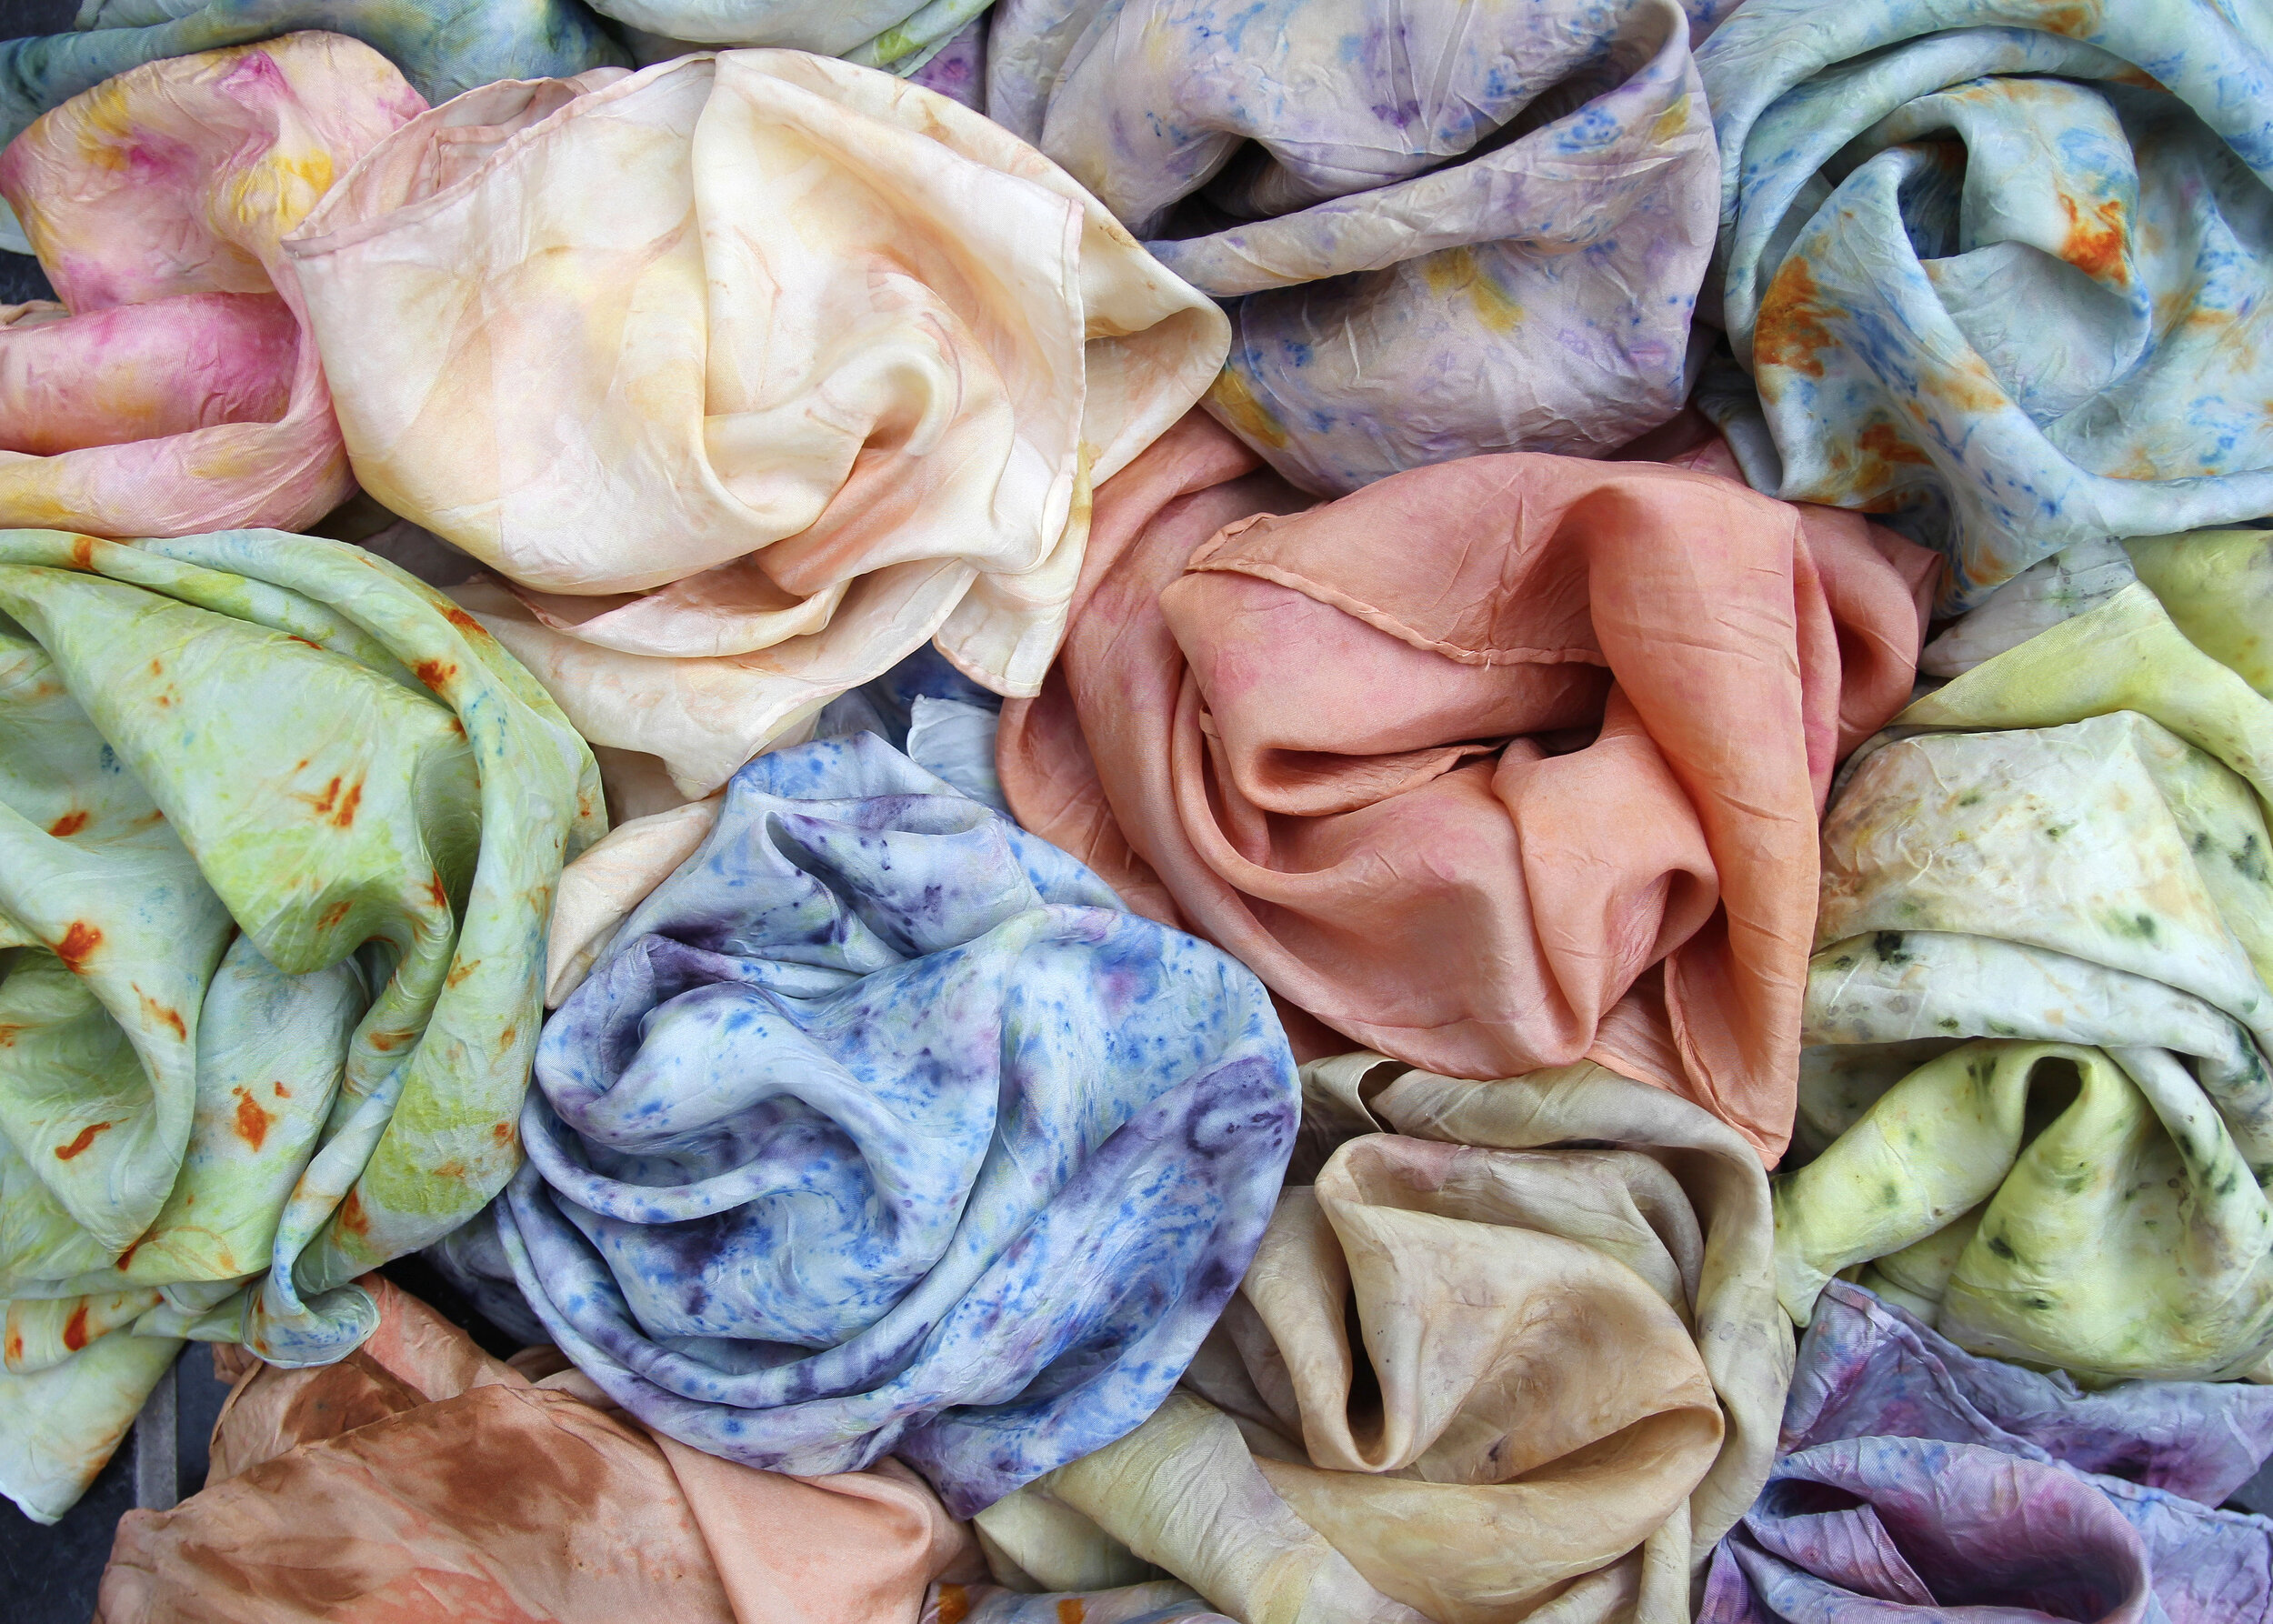
What a thrill it was to participate in our first market since way-back-when! And how appropriate that it was the first Earth Day Eco Market hosted by the Toronto Botanical Gardens. We displayed our colourful silk and organic cotton items and introduced our repurposed table linens to the mix. It was fun to chat with fellow vendors and check out their (excellent) wares. Although the weather was breezy, the sun came out in the afternoon and we enjoyed a stroll through the garden beds after packing up. And yep - photos of the blooms we captured are featured below. Thanks for making this market experience such a fun one TBG!


For the second year, we’ve experimented with naturally dyeing Easter eggs at home, and we’re just loving these beautiful results! We wanted to share our technique so that you can make your own eco-dyed eggs this season, too.
First of all, you’re going to need some eggs! White eggs will give you the most vibrant final colours; last year, however, we could only get brown eggs, and they still turned out pretty nice, just a bit more subdued. I gently washed my eggs with soapy water and rinsed them well to prepare them for dyeing.

If you want to create the same leaf and floral resist designs that we did, you’ll need to collect small leaves and flowers! Generally speaking, thinner items will more easily sit flush against the surface of your eggs, giving you a crisper image - I used an old oak leaf on one egg, and because it was dry and stiff it didn’t have ‘perfect’ contact with the egg, and as a result that imprint was softer and less precise. Cut up some old pantyhose into approximately 5” lengths, then press your flowers and leaves onto your egg - wetting the egg and/or plant material will help it stick to the egg. Gently stretch the piece of pantyhose over your egg, and twist it to tie it into a knot at the back. I got my favourite results from papery old hydrangea blossoms, but fresh flowers would work great as well!
You can use many household items/food scraps to make your egg dye. We used yellow onion skins (for orange), red cabbage (blue), nettle tea (green), and turmeric (yellow). You can also experiment with red onion skins, and beets for pink. Next year we may try using dried flowers like marigolds, coreopsis, and some other traditional dye sources, like cochineal. I expanded the palette I had to work with by shifting the pH of my red cabbage dye by adding vinegar to one jar, baking soda to another, and leaving a third jar of dye plain. The compound in red cabbage which provides its colour is called an anthocyanin, and it is sensitive to pH. This means that changing the pH of the dye solution will change the colour: an acidic solution will appear pink, while a basic solution will appear blue. Unmodified, the red cabbage dye appears purple. Strictly speaking, red cabbage is not considered a true dye, as this colour compound, anthocyanin, is not very stable, and is liable to fade and shift to grey over time! In the end all of my eggs in the cabbage dye came out different shades of blue, because eggshells are made almost entirely of calcium carbonate, which is itself strongly basic. This means all my cabbage dyes were shifted to blue/basic by the eggs themselves! Still, the range of blues are quite pretty, and notably the dye with the vinegar came out strongest/darkest. I also expanded my palette by mixing the dyes together, notably the onion skin dye and cabbage dye, which made an earthy olive brown colour.


Here’s how I made the various dyes…
Red cabbage: Roughly chop 1/2 small red cabbage, and just submerge it in water in a saucepan - you want to use as little water as possible here, to make the dye super concentrated. Gently simmer for about an hour or longer, till the water is deeply coloured and the cabbage pieces look like the colour has been leached out. For all dyes, avoid boiling, as the brightest colours tend to come from dye that hasn’t been excessively heated. Once you’re happy with the dye, strain the mixture and decant into three jars. To shift the colour, add 1 tsp vinegar to one jar, and 1 tsp baking soda to another. Leave one jar plain.
Onion skin: Collect the loose skin from a bag of onions, and peel off as much of the outer onion skin as you can, without leaving your onions completely ‘naked.’ Tear the onion skin into smallish pieces, and just submerge in water in a small saucepan. I tried to measure the amount of water for each dye by filling the jar I intended to use to hold the dye… this way I didn’t end up with extra dye, and I ensured my dye was as concentrated as possible! Simmer for about an hour, but don’t allow it to boil aggressively, then strain.
Nettle tea: I boiled my kettle, then after it was off the boil for a couple minutes, I poured the hot water over one nettle tea bag in a small mason jar. I find that nettle becomes darker and more concentrated when it is left to oxidize, so I left this jar open on my counter for several hours. I left the tea bag in when I finally put it in the fridge with the egg in it!
Turmeric: Like the nettle dye, I used recently boiled water poured over about 1/2-1 tsp of ground turmeric in a glass jar. I let this sit on my counter, and stirred frequently to agitate the sediment.

When it comes to dyeing the eggs, you can opt to either do a hot dye bath which will hard boil your eggs, or a cold dye bath which will keep them raw. I opted to do the cold bath, but to boil them, simply add your prepared eggs to the dye saucepans and simmer for 10-20 minutes or until your preferred colour is achieved. Store in the fridge when not displaying, and feel free to make an egg salad when Easter comes to an end!
I chose to do a cold dye bath for a few reasons: It requires fewer saucepans and smaller quantities of dye (you need less dye to submerge an egg in a small mason jar than you do in a saucepan), and because I plan to blow out my eggs to keep them for next year! So why hollow my eggs after dyeing, and not before? Fresh eggs will easily stay submerged in dye, but hollow eggs will either float or fill with dye, which can be annoying to empty, and again, requires more dye than simply covering a fresh egg.
If you’re going to use a cold dye bath, fill your jars 3/4 full with your prepared dyes (the dye can be warm), then pop in your eggs! Store in the fridge, and check after 12-24 hours. I was happy with the colour of the cabbage and onion dyes after this amount of time, but I left the turmeric and nettle tea dyed eggs in their dye for about 48 hours. When your eggs are done, gently untie the pantyhose, and lightly rinse under cool water. Gently pat dry with a paper towel or soft cloth, and place them in an egg carton or on another stable surface to dry. Store in the fridge, or blow them out to keep forever!


Sources & Inspiration: Our initial inspiration for dyeing eggs with natural homemade dyes came from Louise Upshall of Gumnut Magic; see her ISO Dye Club for details. The tradition of decorating and celebrating eggs in spring is thousands of years old, and can be found across multiple religious traditions. Specifically, dyeing eggs with onion skins and other vegetable dyes for Easter, and using flowers and leaves to create patterns on the eggs is associated with various Eastern European Christian traditions; this process is particularly attributed to Greek, Hungarian, Polish, and Ukranian Easter eggs (among others!). Ukrainian Pysanky batik eggs also enjoy a rich history and are widely celebrated. I found this Wikipedia article on the history of Easter eggs and their meaning quite interesting!

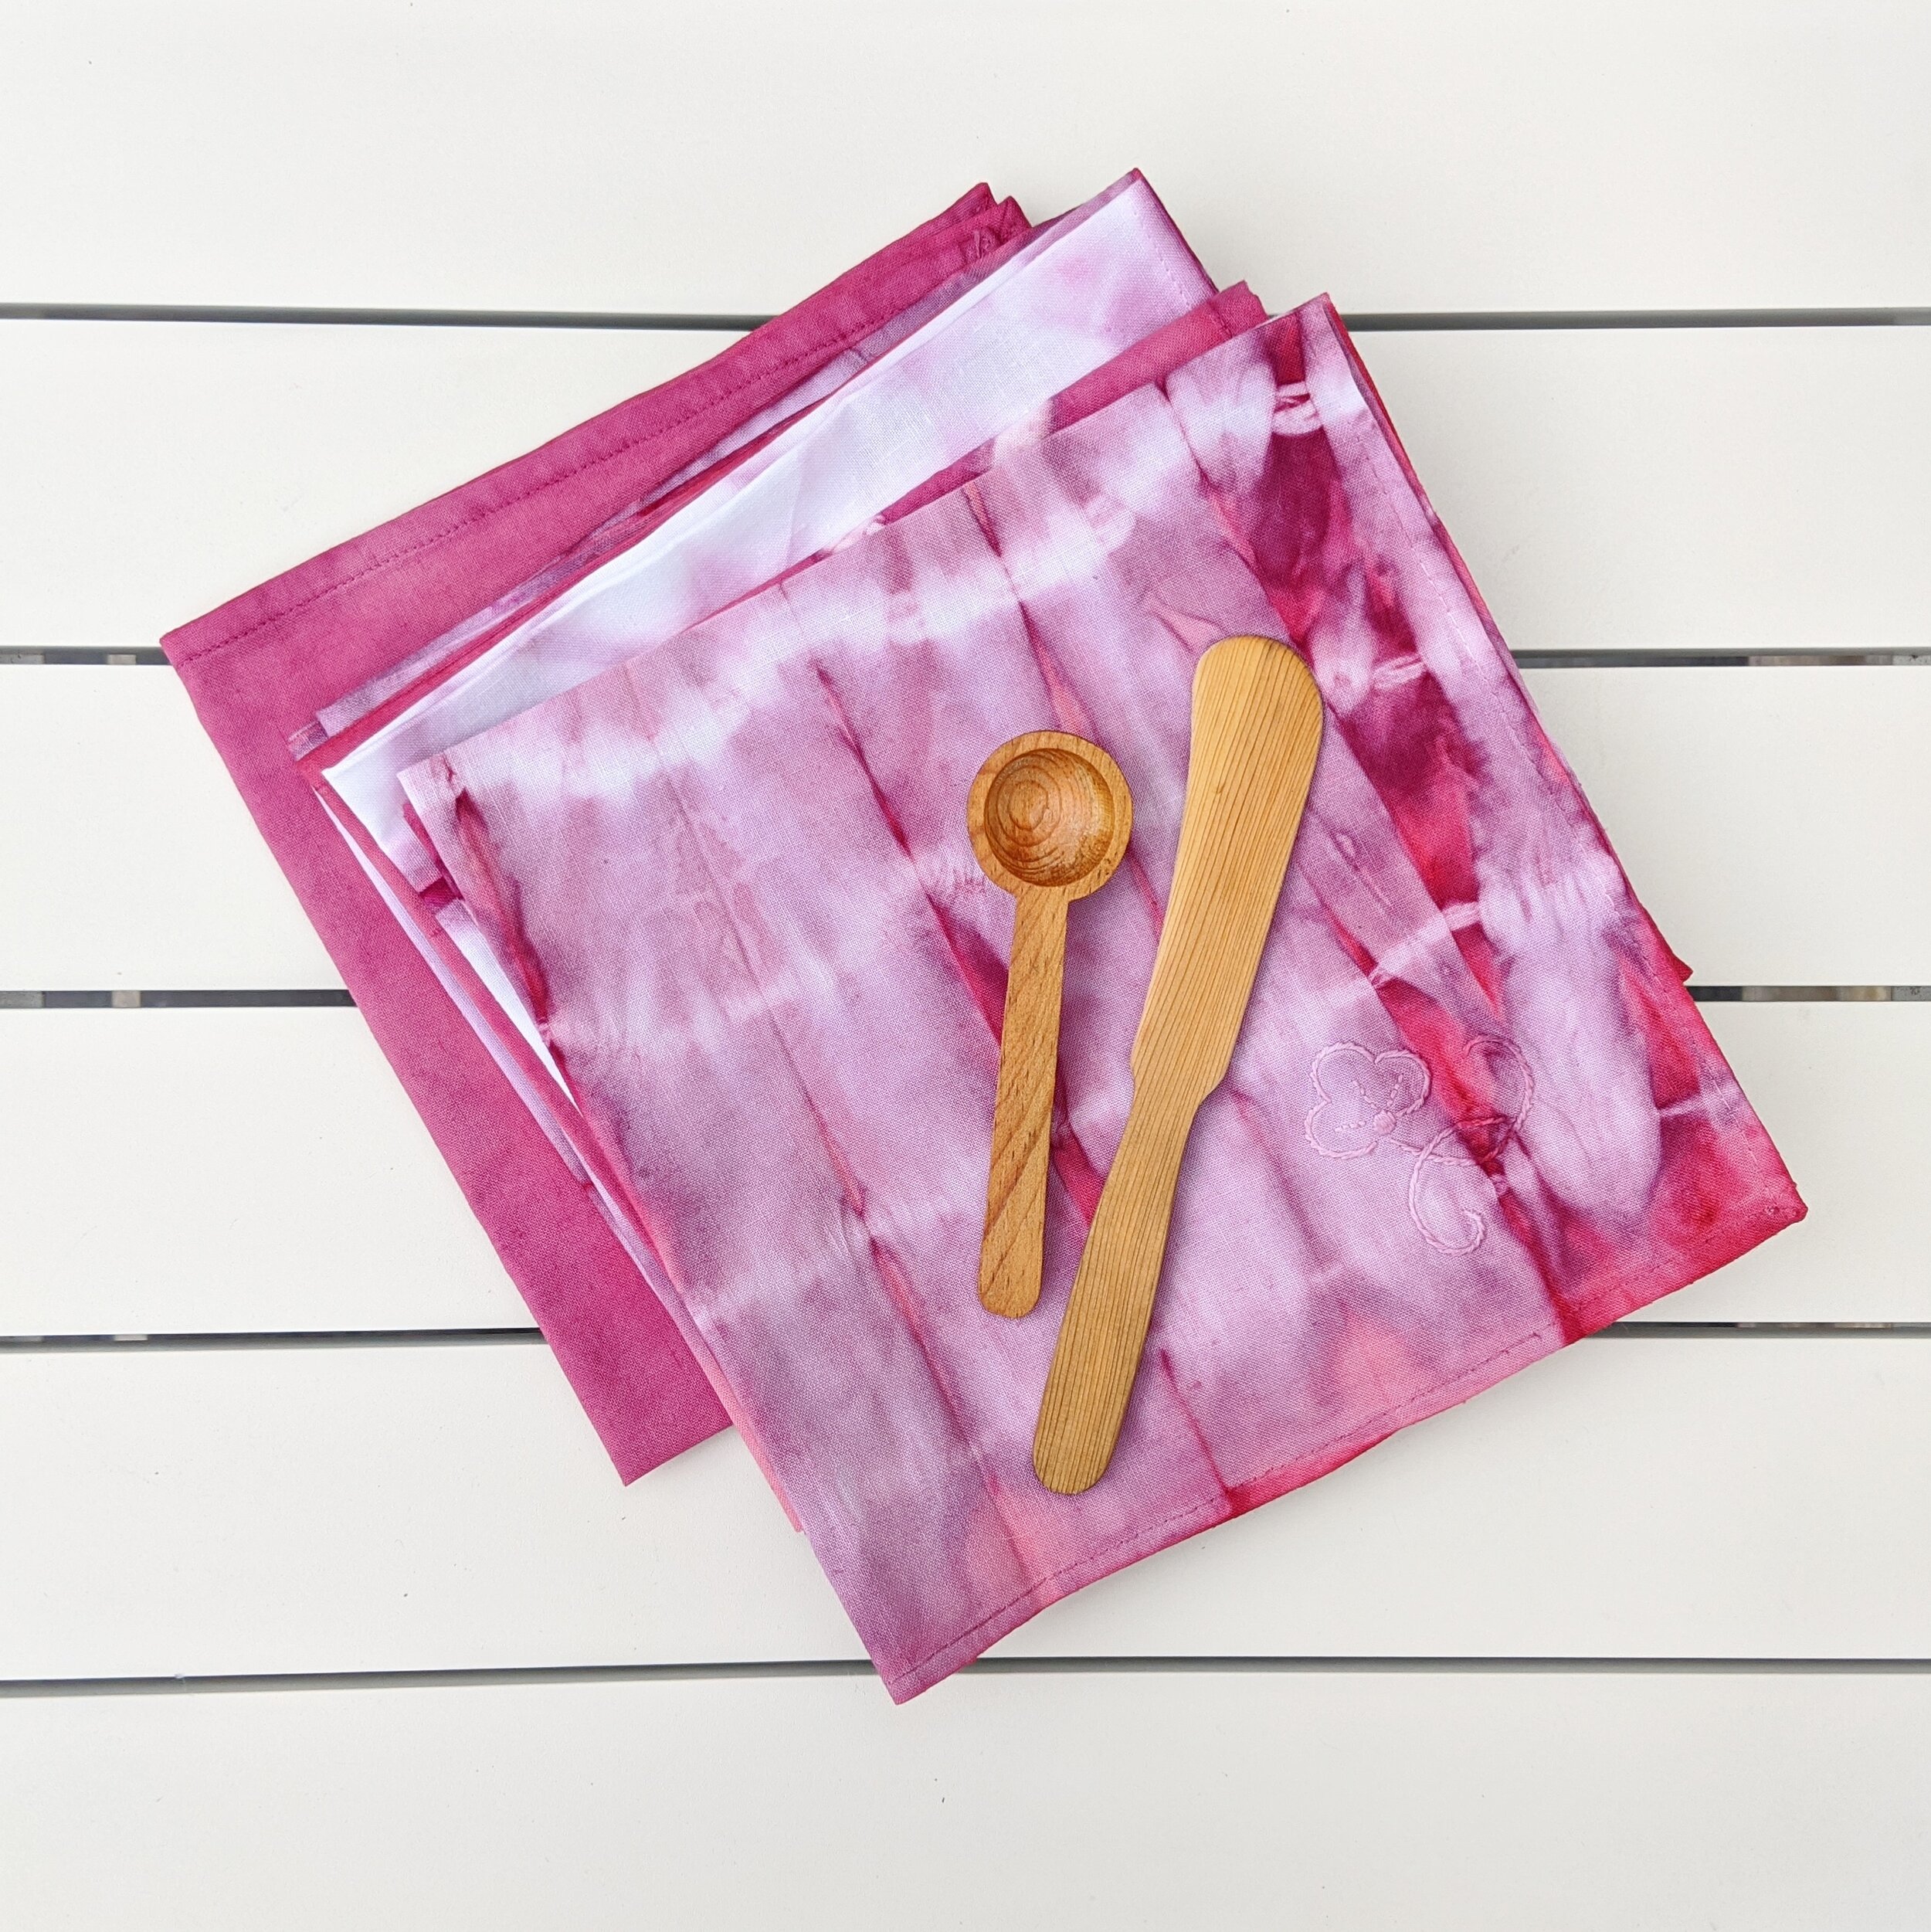
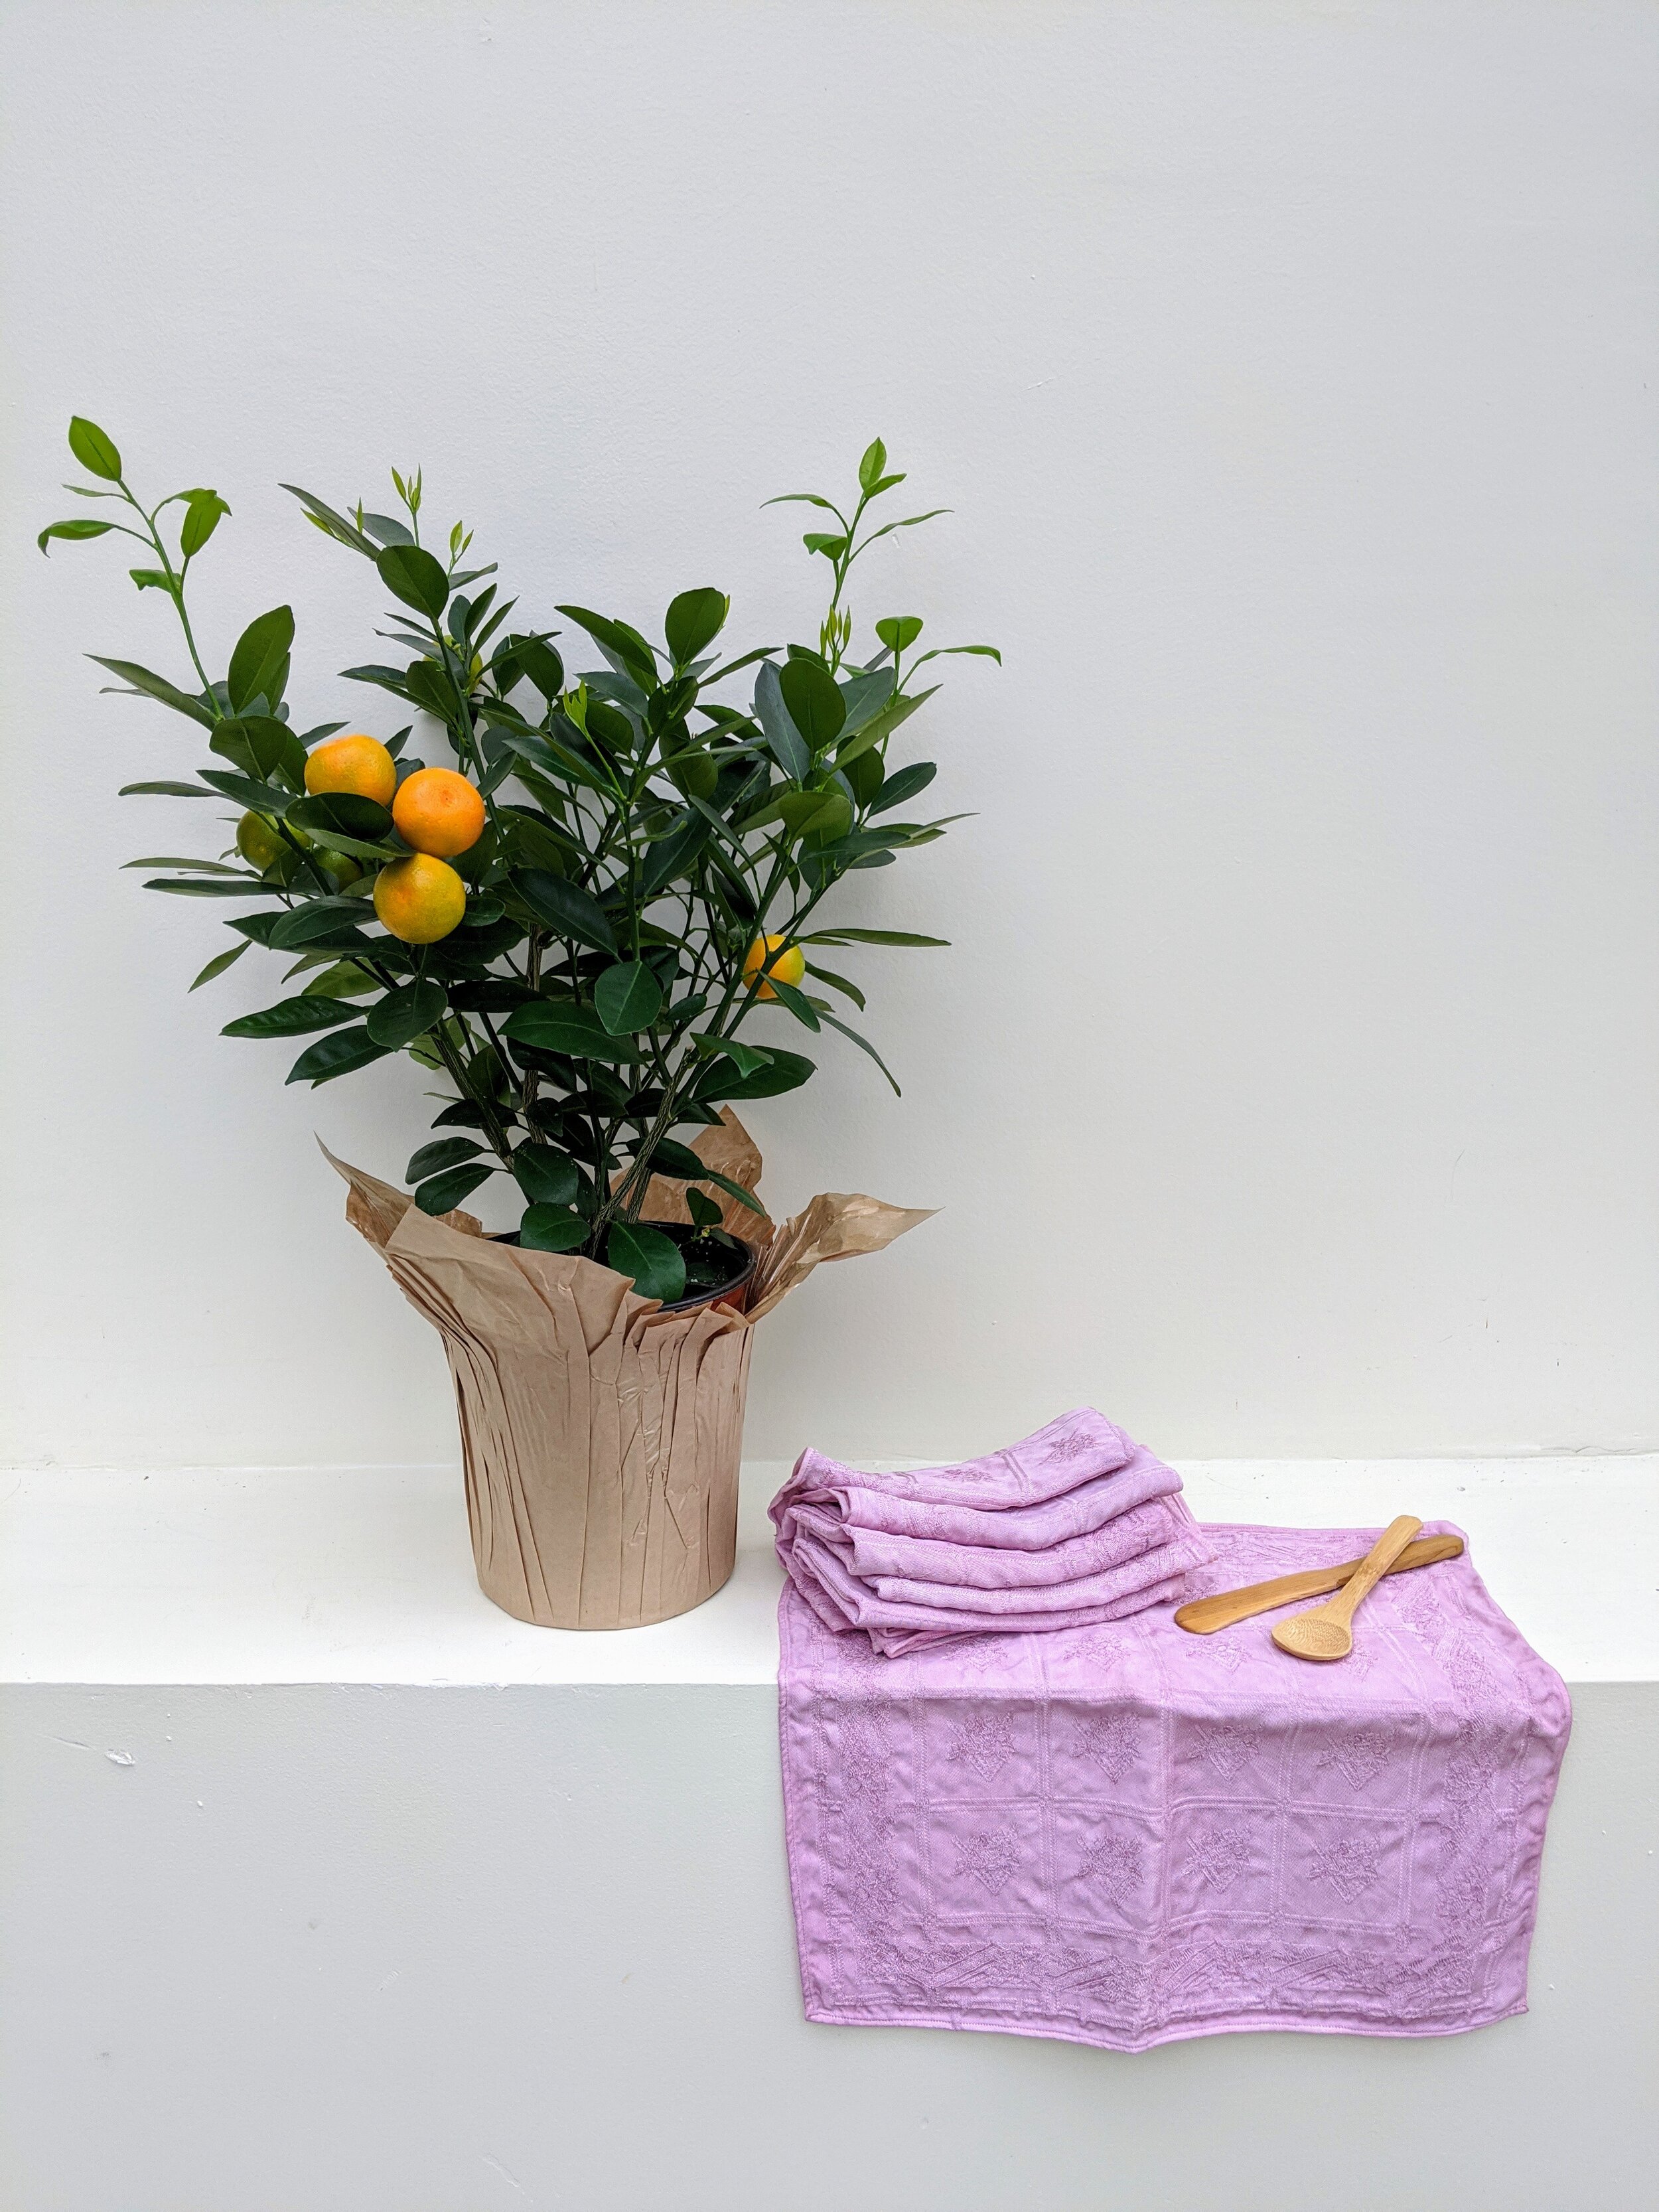
Naturally-dyed vintage linen napkins
Back in February, we were thrilled to be invited to participate as exhibitors in the first, Natural Dyes in Northeast America symposium hosted by Ryerson University. Originally scheduled for April 2020, it was to feature scholars from York University, the Ontario College of Art and Design, and the Royal Ontario Museum. The symposium was postponed due to covid-19 but after much work on behalf of the organizers, it is now running online over the course of the next few months.
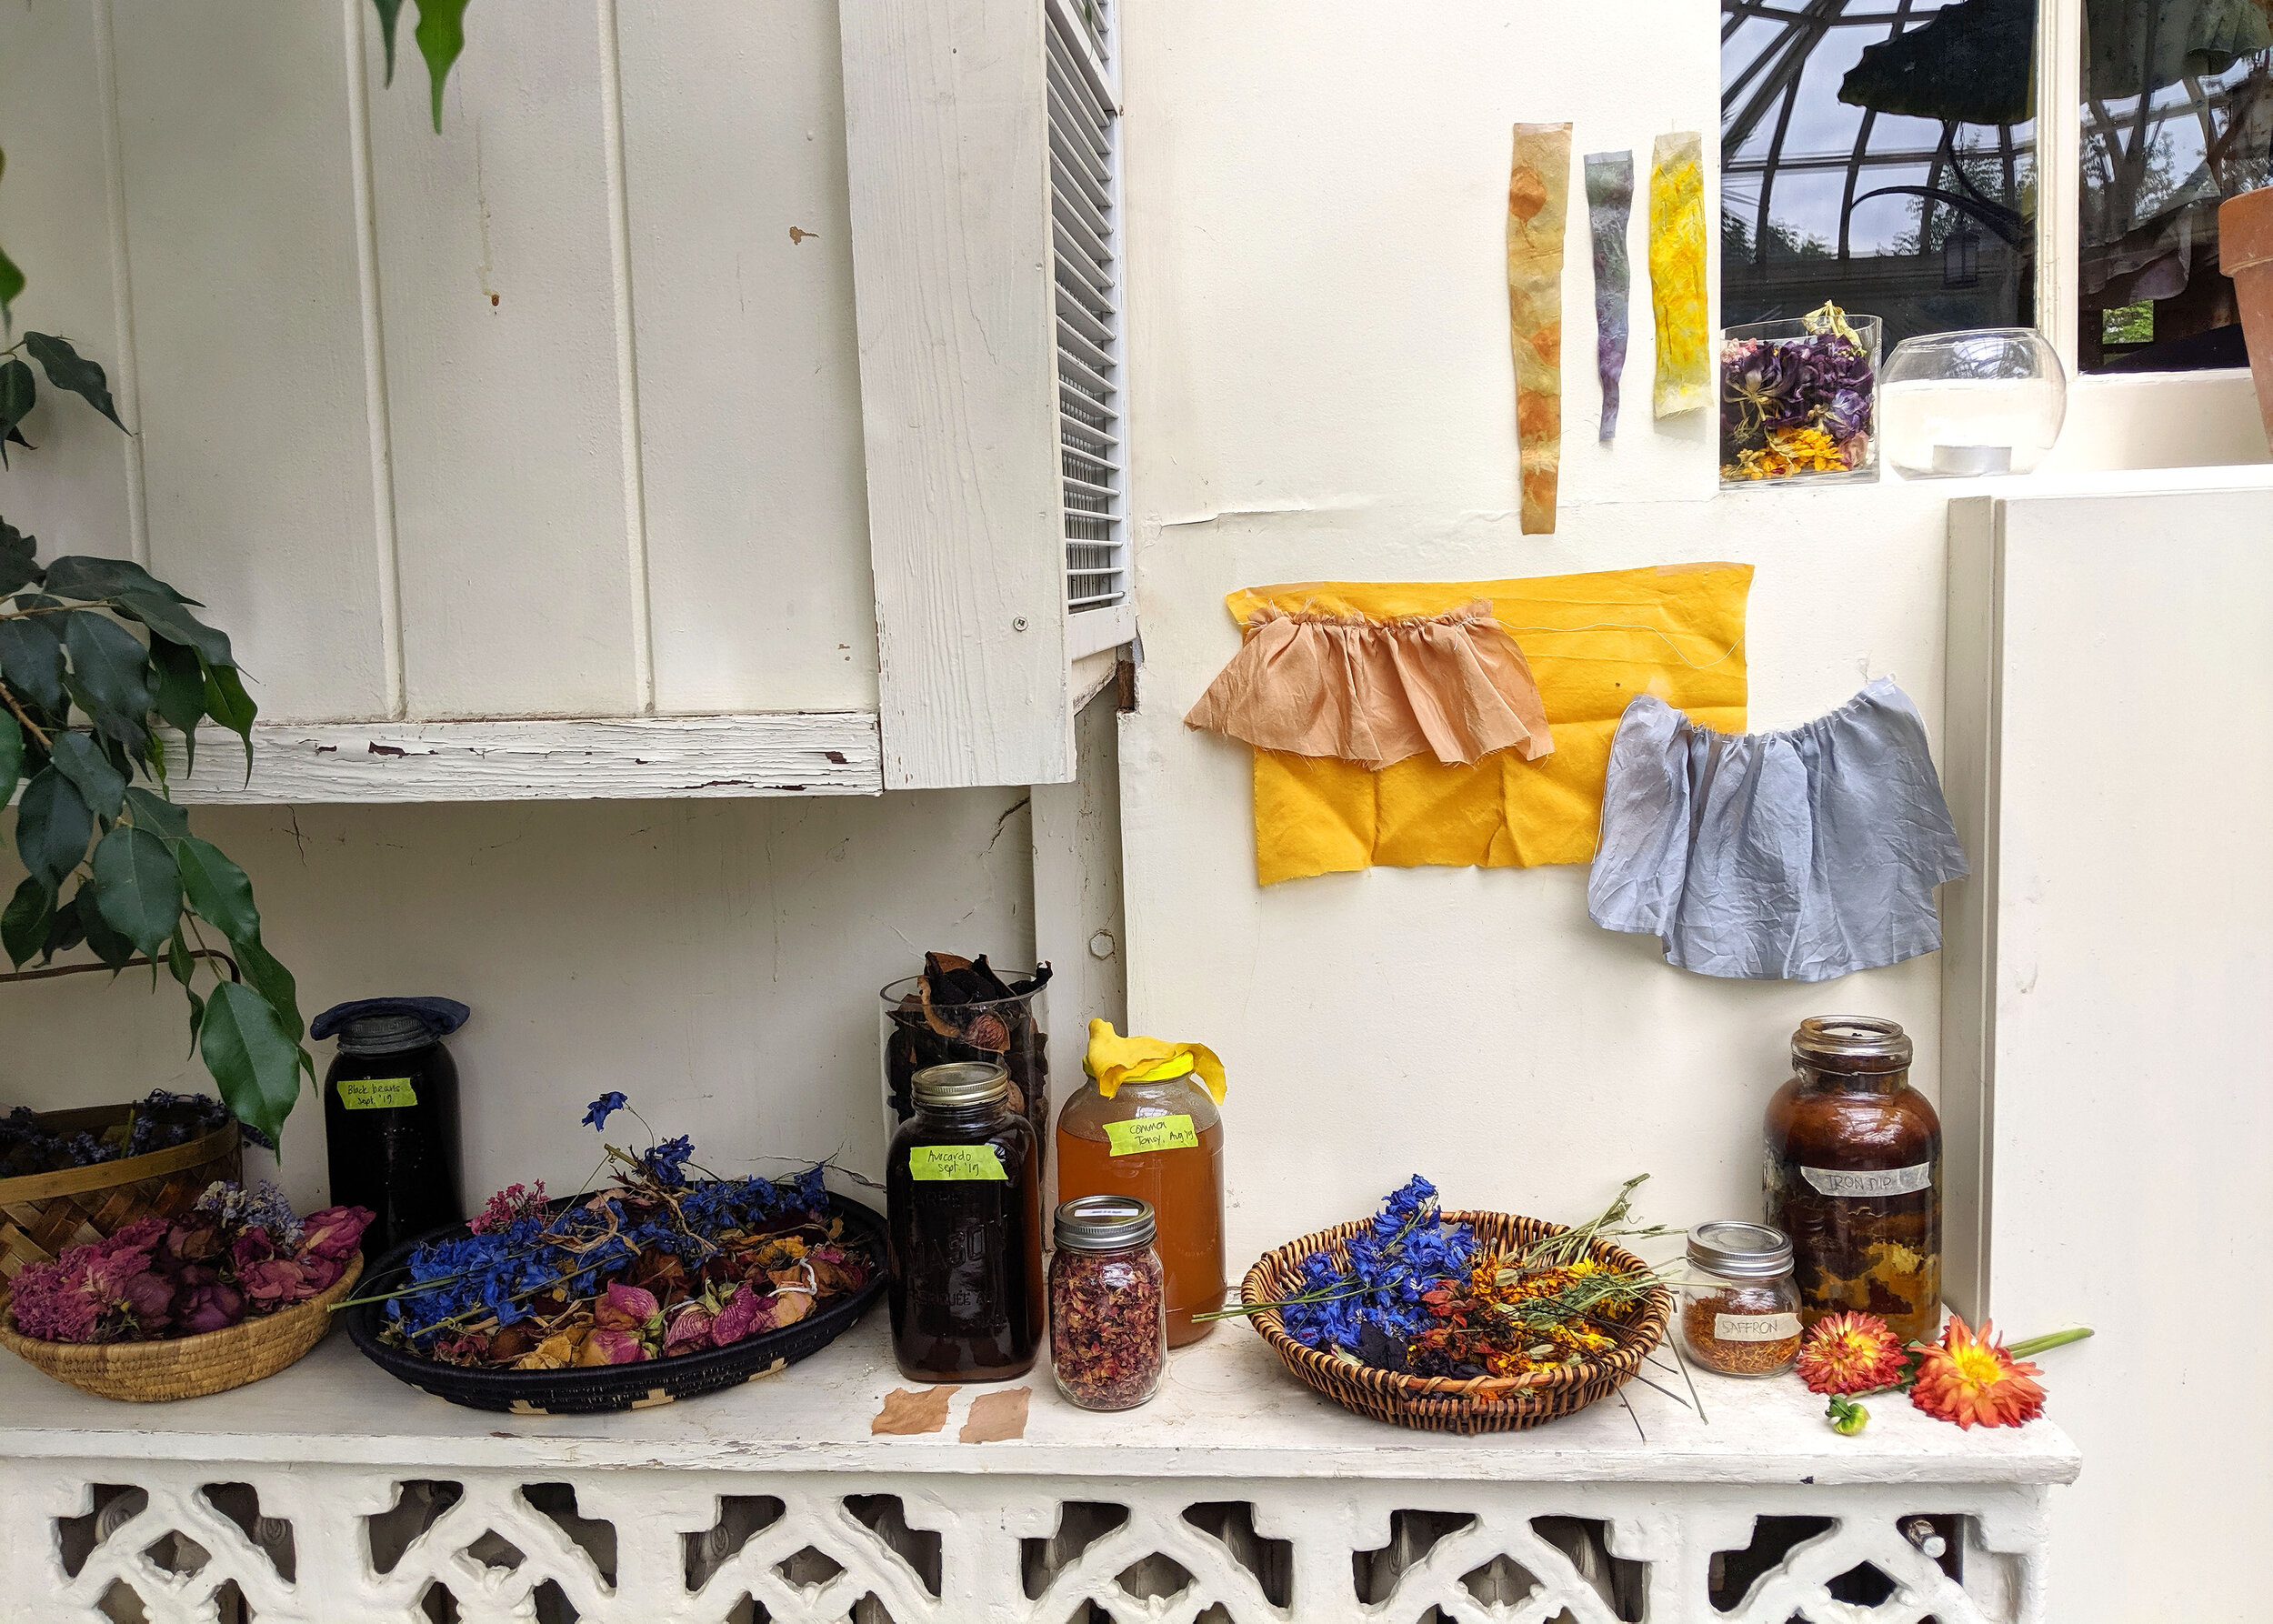
Divided into three distinct modules, Learning & Knowing, Land & People, and Pasts & Futures, our materials are currently on exhibit in the Learning & Knowing module. For this occasion, we are showcasing some work on a set of vintage table linens, including both linen and cotton fibres. Isabel was gifted several of these pieces from her mother-in-law, which (as vintage linens tend to do), had developed stains, or yellowed. We felt that they were perfect candidates for natural dyeing and thus began the basis of our exhibition ReSet: A newly dyed vintage table setting. Also on display are a few pages from our Swatch Book, where we keep a record of our samples and experiments. We hope you’ll take a look at our work, and check out the extremely talented artists we are flattered to be featured alongside.
Kathy Hattori, an internationally recognized authority on natural dyes and pigments, and founder of Botanical Colours has provided the keynote address for the first module, which you can watch here. Each module has its own keynote speaker, so there's reason to return to the site every so often as new content will be added until the symposium ends in March, 2021.
While we're sorry not to have a chance to meet colleagues in person at the symposium, we're excited to attend it virtually over the next few months and look forward to engaging with fellow dyers and artists personally, in due course.
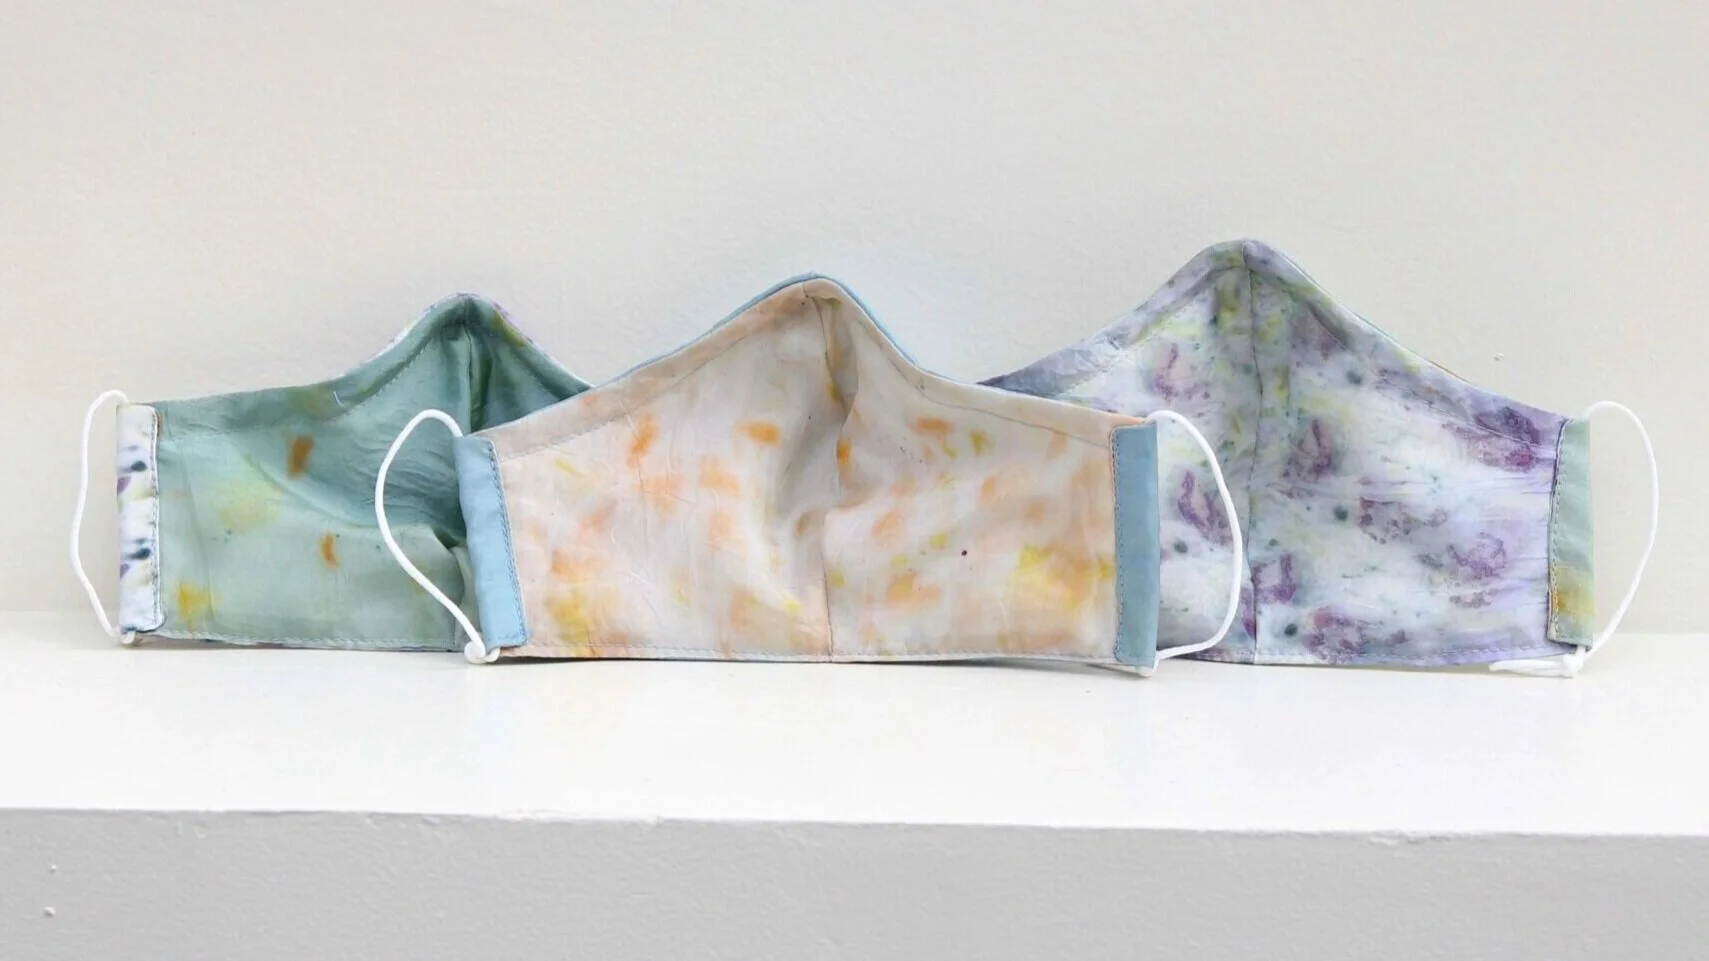
A selection of our beautiful silk face masks, with contrasting lining.
That time is upon us, friends! Our offering for Small Business Saturday this year is a free shipping promo, running from Friday, November 27 to Sunday December 6! When you spend $50 on a domestic (Canadian) order, or $75 on an international order, you will quality for free regular shipping! Depending on your location, please use the following discount codes…
Canada: SHIPCAN
US: SHIPUS
International: SHIPINTERNATIONAL
Since so many of us are doing our holiday shopping online this year, shipping dates are more important than ever. Here are some important guidelines to keep in mind when placing your Windeyer Studio order…
Canada
Deadline for guaranteed Christmas delivery for out-of-province Canadian orders (regular shipping): Monday, December 9, and for Ontario/local orders with regular shipping: Thursday, December 17
Deadline for out-of-province expedited shipping: Friday, December 18
Deadline for Ontario/local expedited shipping: Monday, December 21
US
Deadline for guaranteed Christmas delivery for US order (regular shipping): Monday, December 9
Deadline for US expedited shipping: Friday, December 11
International
For most international destinations, the guaranteed ship date for Christmas delivery with regular shipping has already passed, so in order to guarantee Christmas delivery, we suggest using expedited shipping before December 6! We are using the Canada Post Holiday Sending guide, so please consult their site for specific dates for your country.
We are sharing this statement from our Instagram, in support of Black Lives Matter and ending racism in Canada:

While this account has been quiet for the past week or so, please know that we've been actively listening, reading and learning. We are immensely grateful to those who are sharing, teaching and guiding. There's much to be done, both at home and abroad, and we must get on with it; we commit to joining the movement for justice and peace. We're currently developing strategies and actions for Windeyer Studio to combat racism and lift up Black and Indigenous Canadians.
Black lives matter. Indigenous lives matter.
We were invited to participate in the Starving Artist Pop-Up Valentine’s Market on February 9 and thought it would be the perfect time and place, to launch our new line of upcycled table linens. Having both dyed and bundled-dyed napkins and placemats over the Fall using flowers from our garden, with the pop-up market’s theme aligned to Valentine’s Day, we wanted to be on-brand colour-wise. Dyeing some of the vintage linens with cochineal (dried insects) and madder (root powder) provides an amazing range: from pink to purple and reds through to orange. We’re truly excited to share these pieces at the market and look forward to continuing to use these vibrant dyes on our silks, too.

We're pleased to begin the new year by adding vibrant colour to the store-front window of G&S Dye and Accessories - one of Windeyer's suppliers.
The display will remain until the end of February and all items can be purchased in the store, Monday - Friday, 10am - 5pm.
Find G&S Dye and Accessories at 250 Dundas Street West, near McCaul and Dundas.

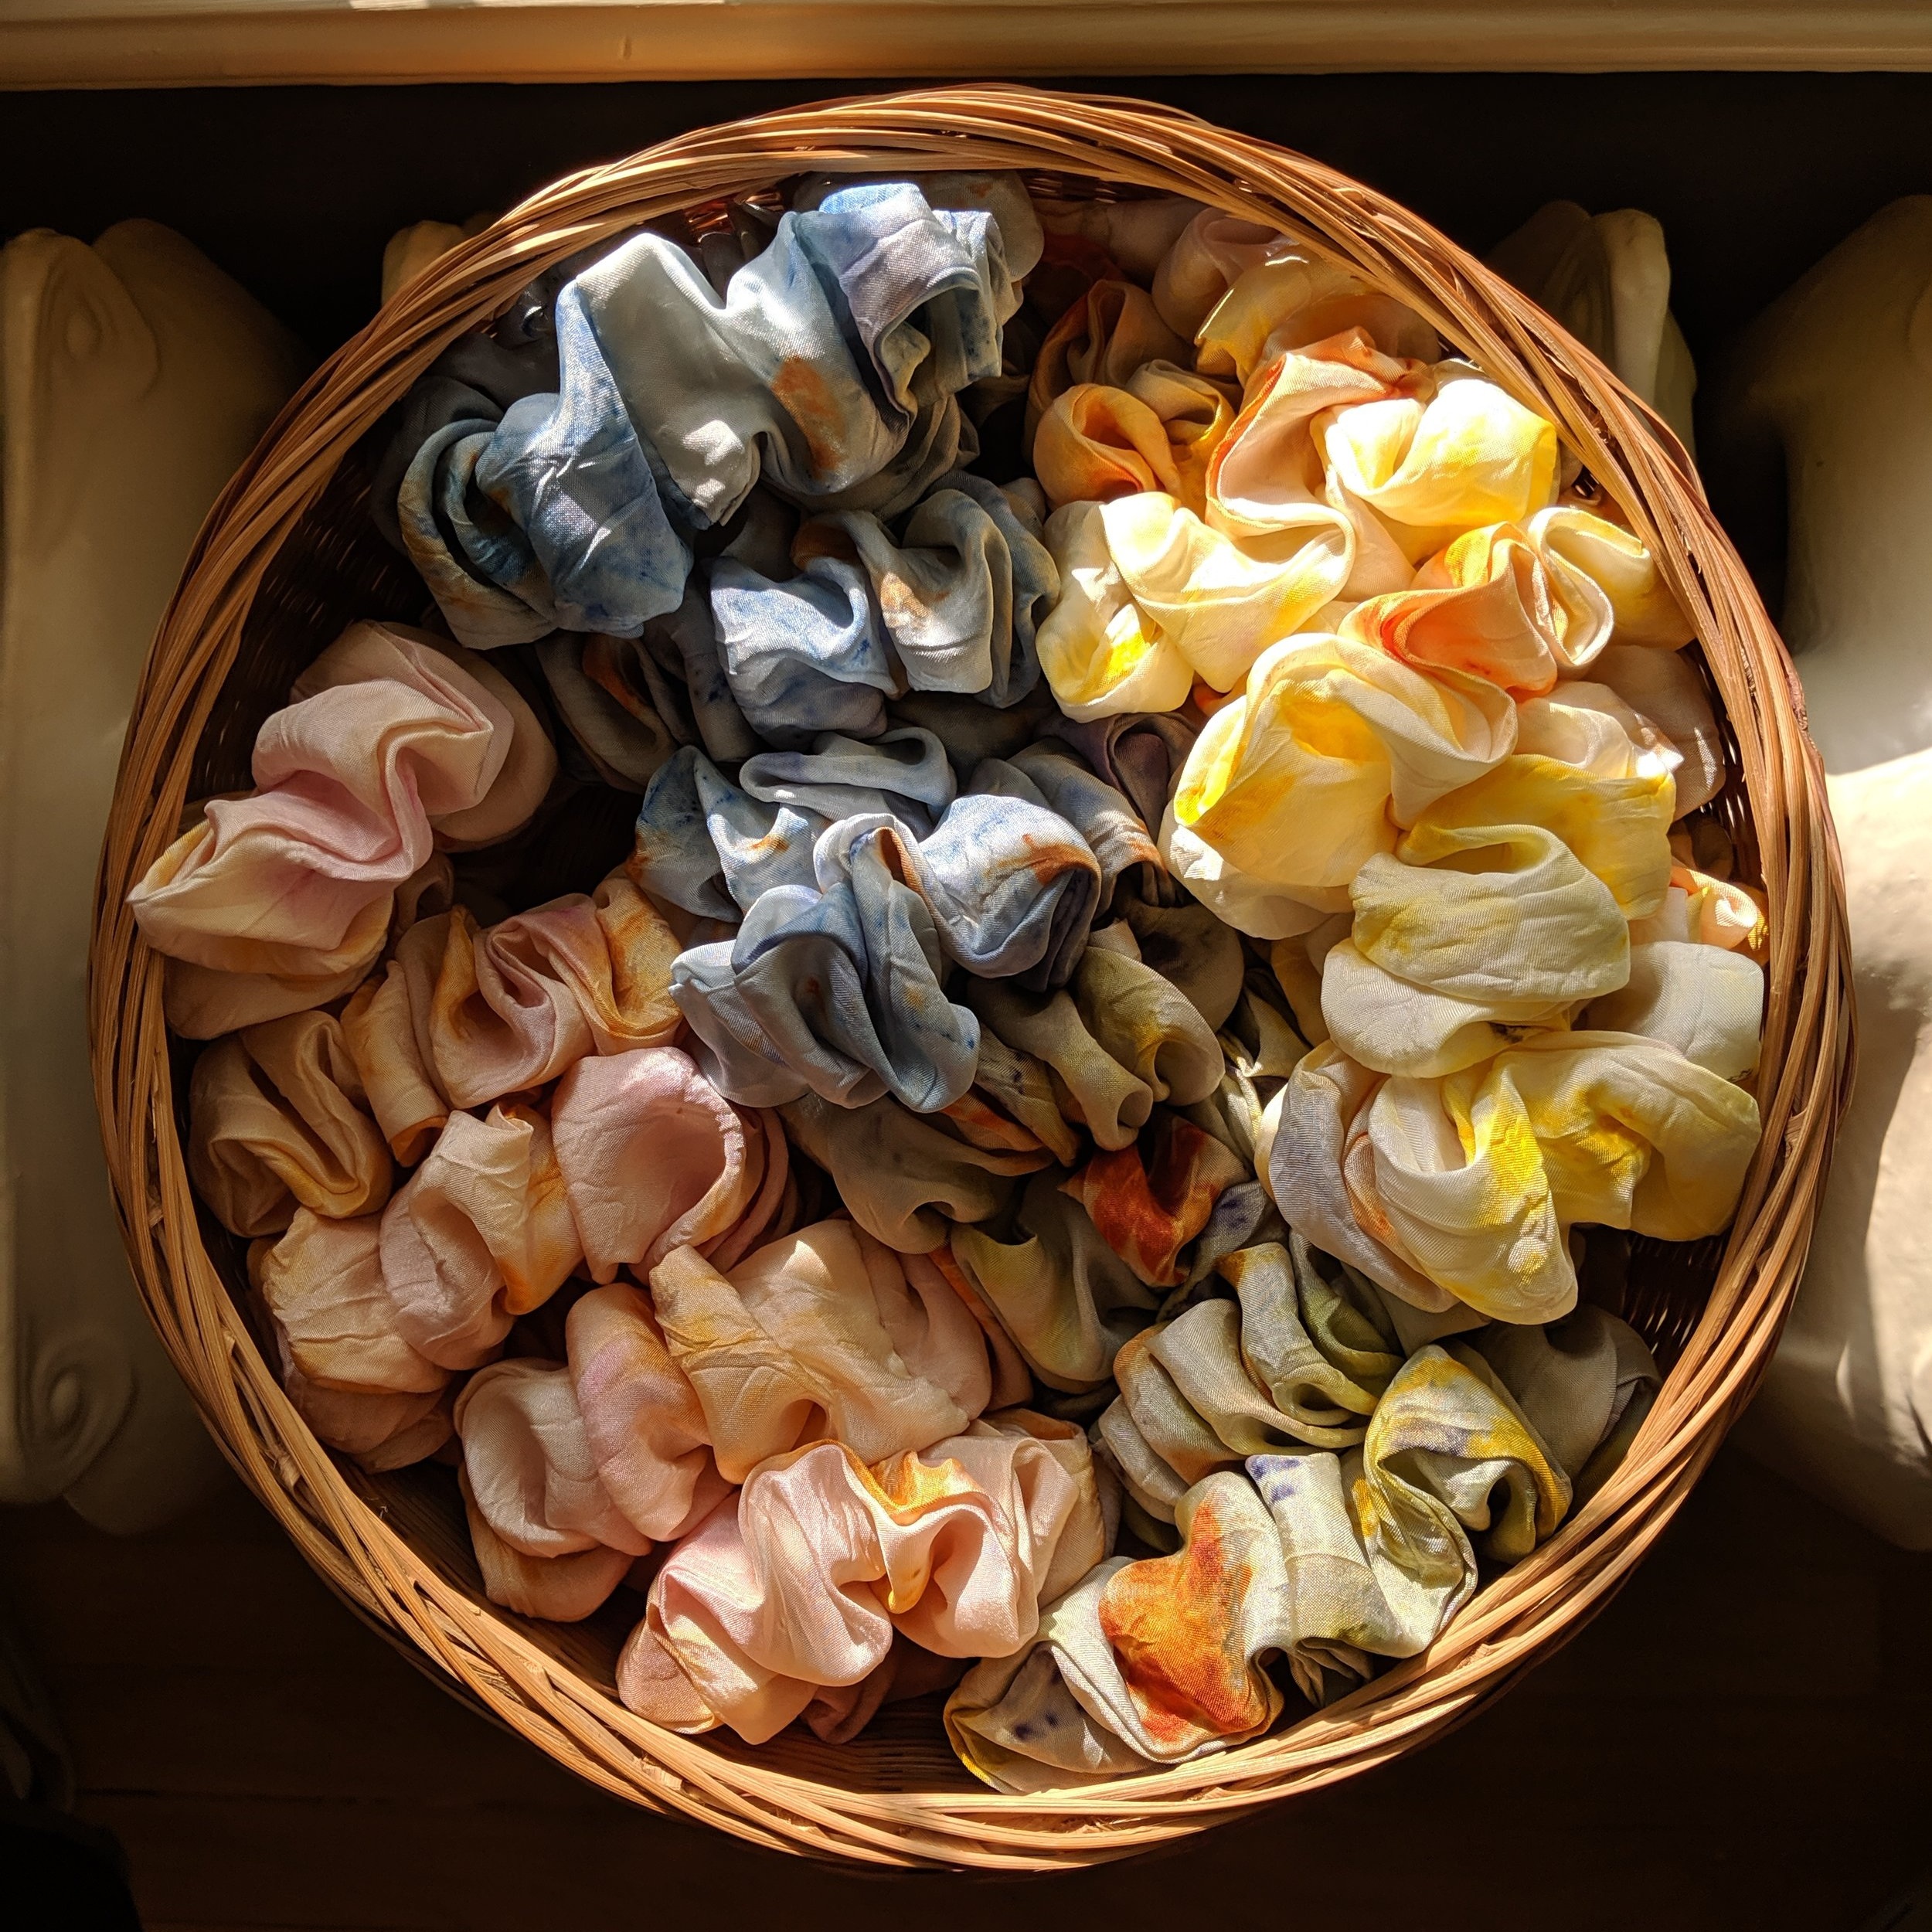
Our first-ever Small Business Saturday sale commences today, Friday November 29th, and will run until midnight on Monday December 2nd! Save $15 when you buy three or more of our hand-dyed, hand-sewn silk scrunchies, using code SCRUNCHIES4ALL from our online Scrunchie Shop. Happy shopping!


Get a head start on your holiday shopping with us this coming Monday, November 18th at the annual Royal St George’s Mistletoe Market. The event is open to the public from 10am to 5pm. We hope to see you there!

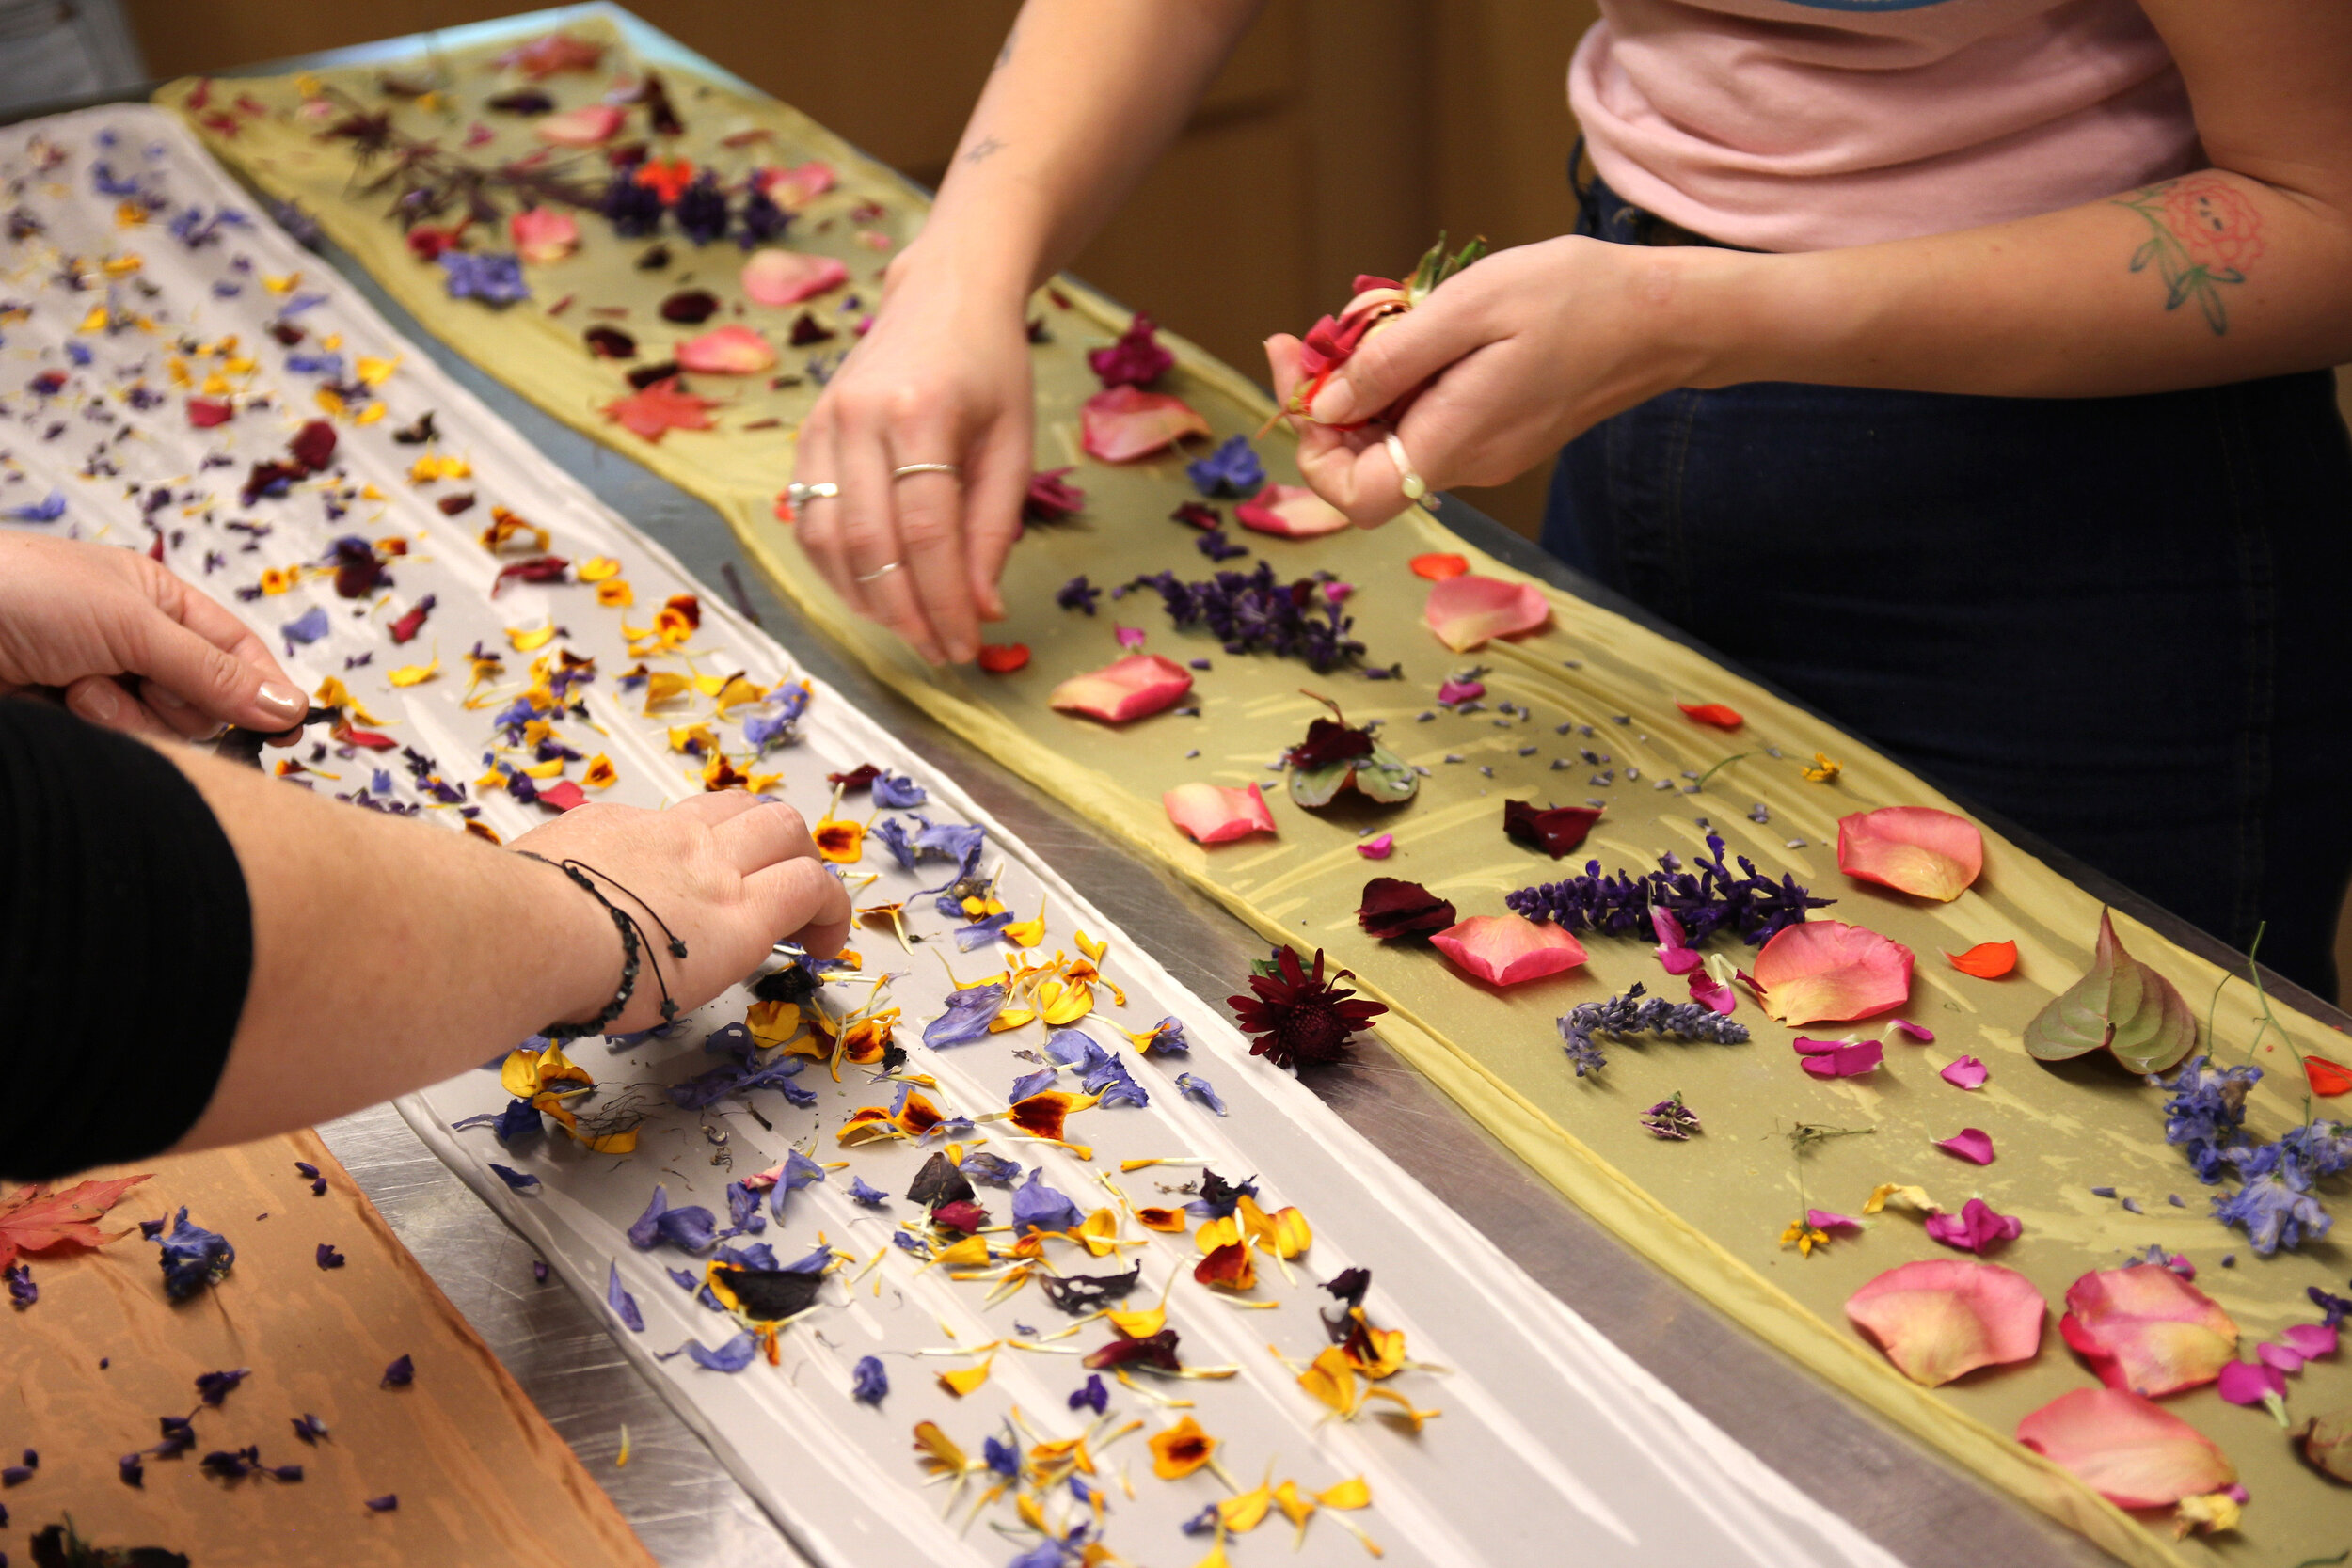
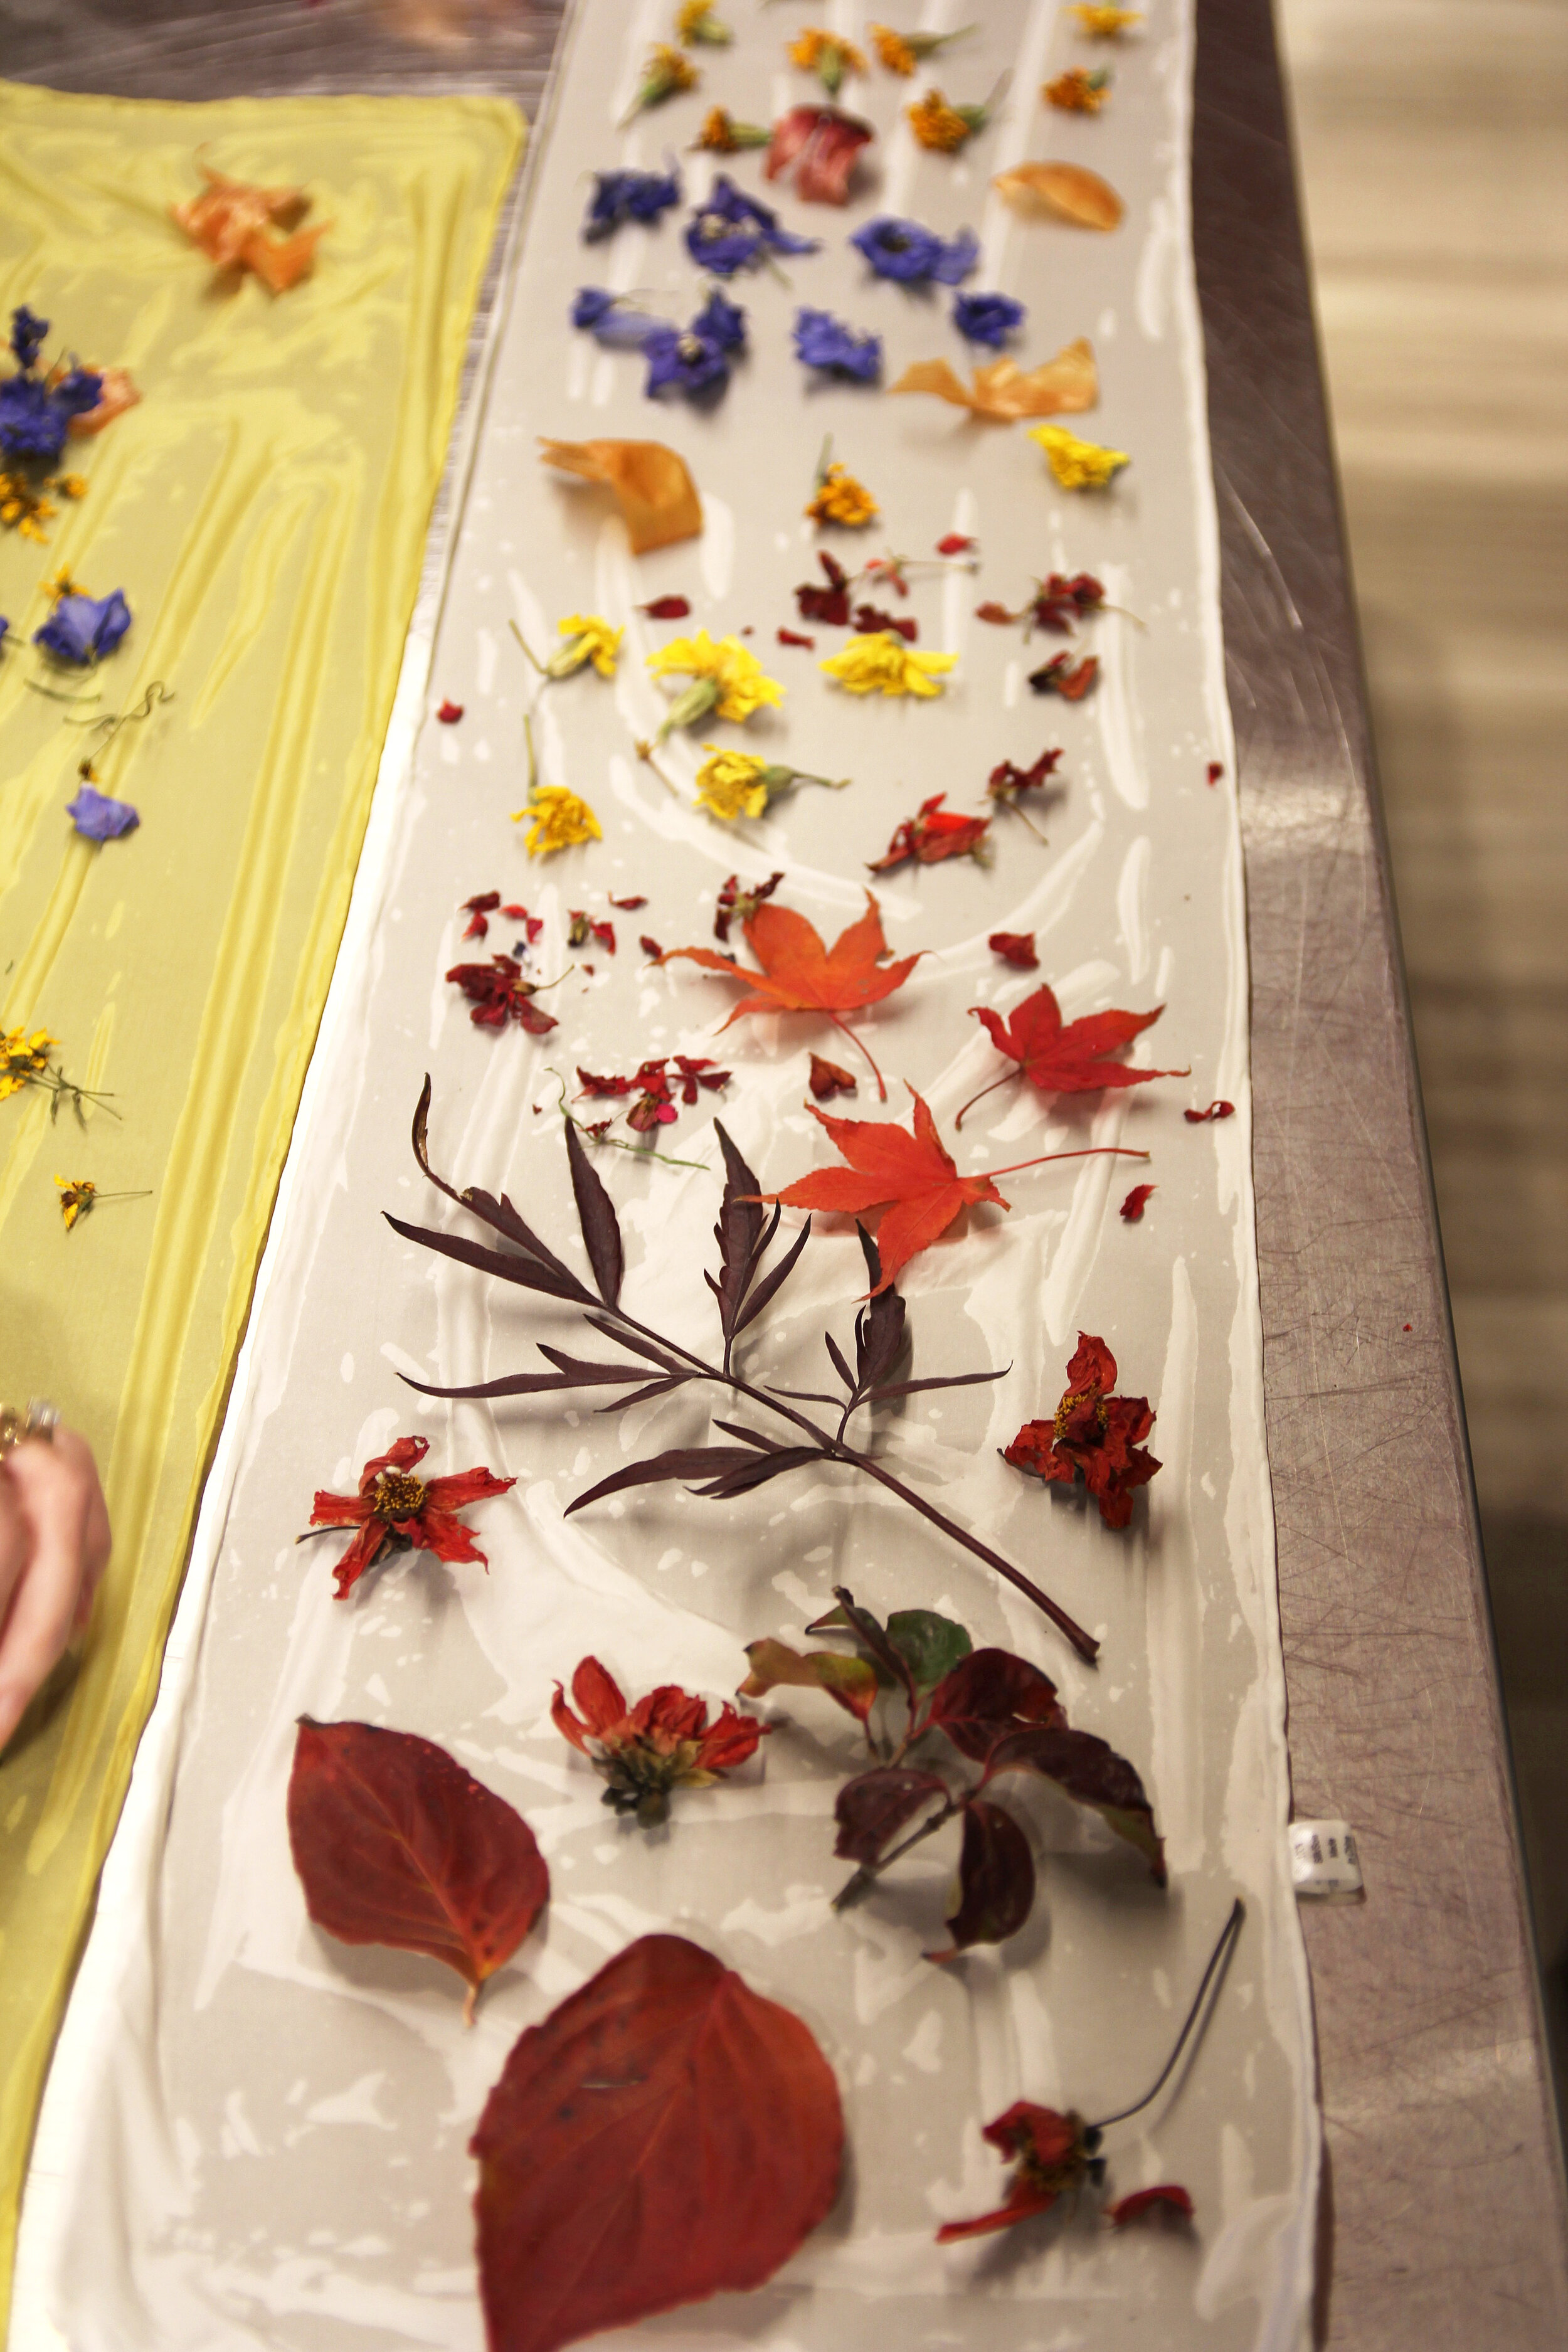
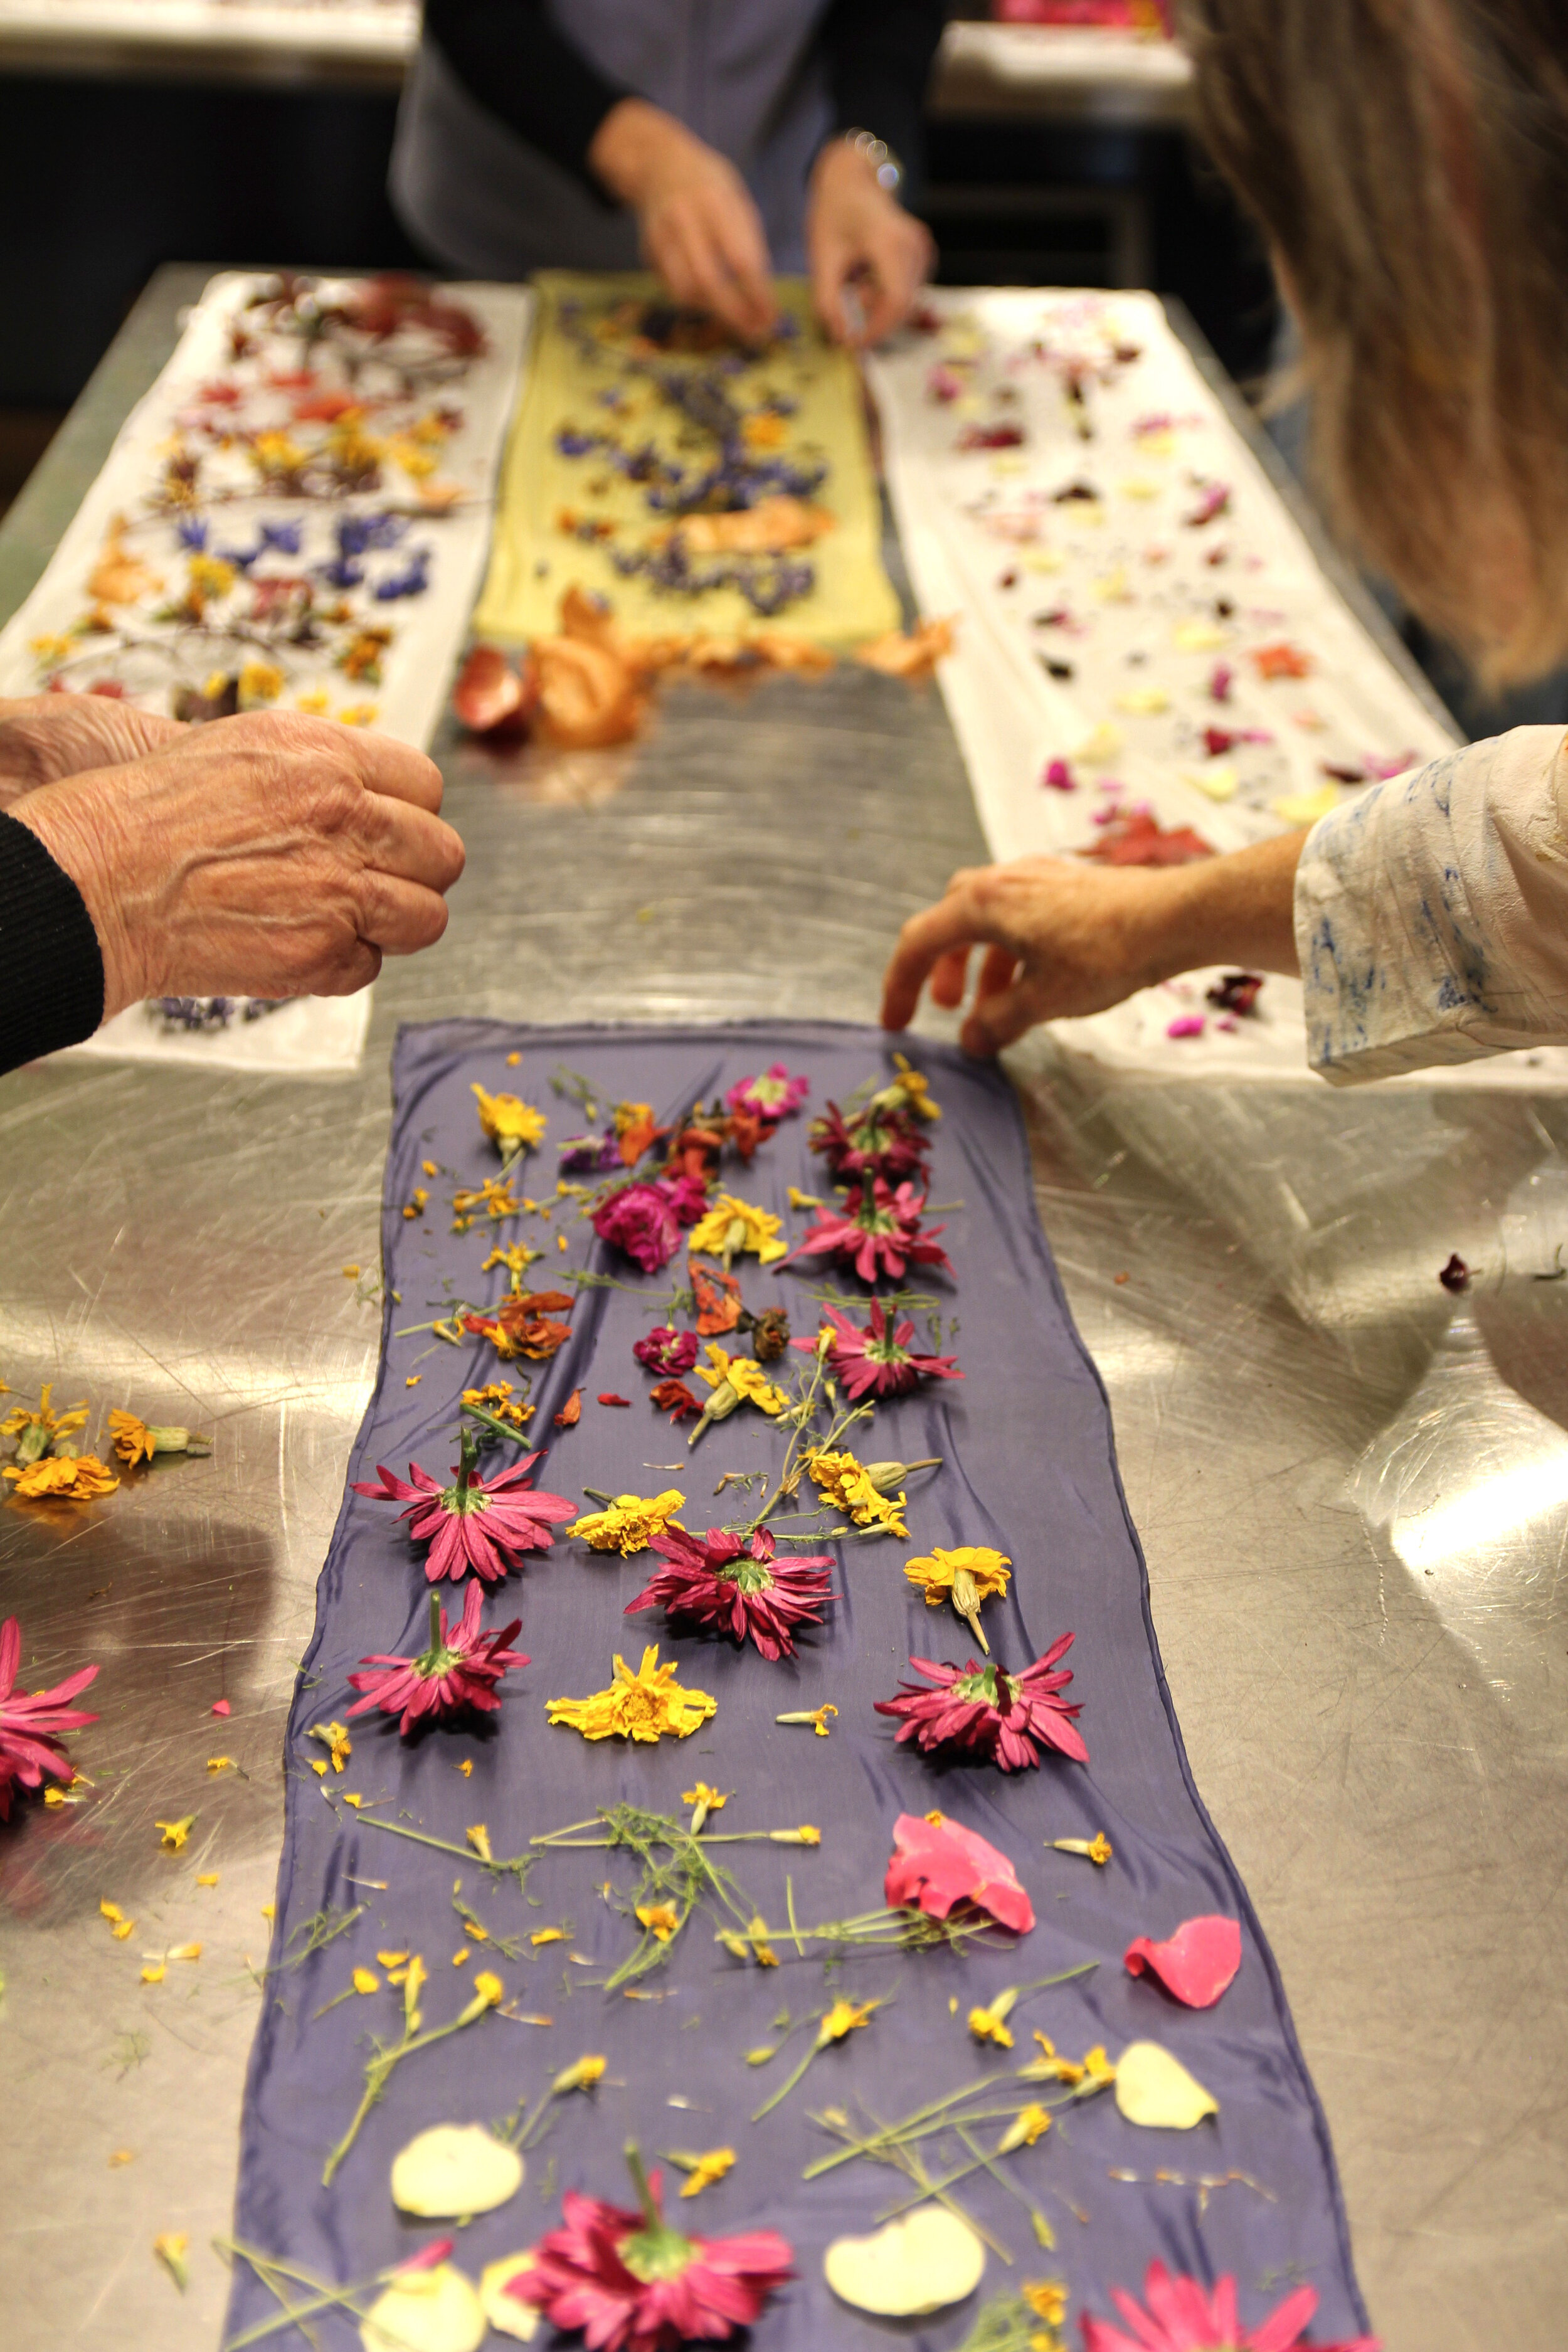
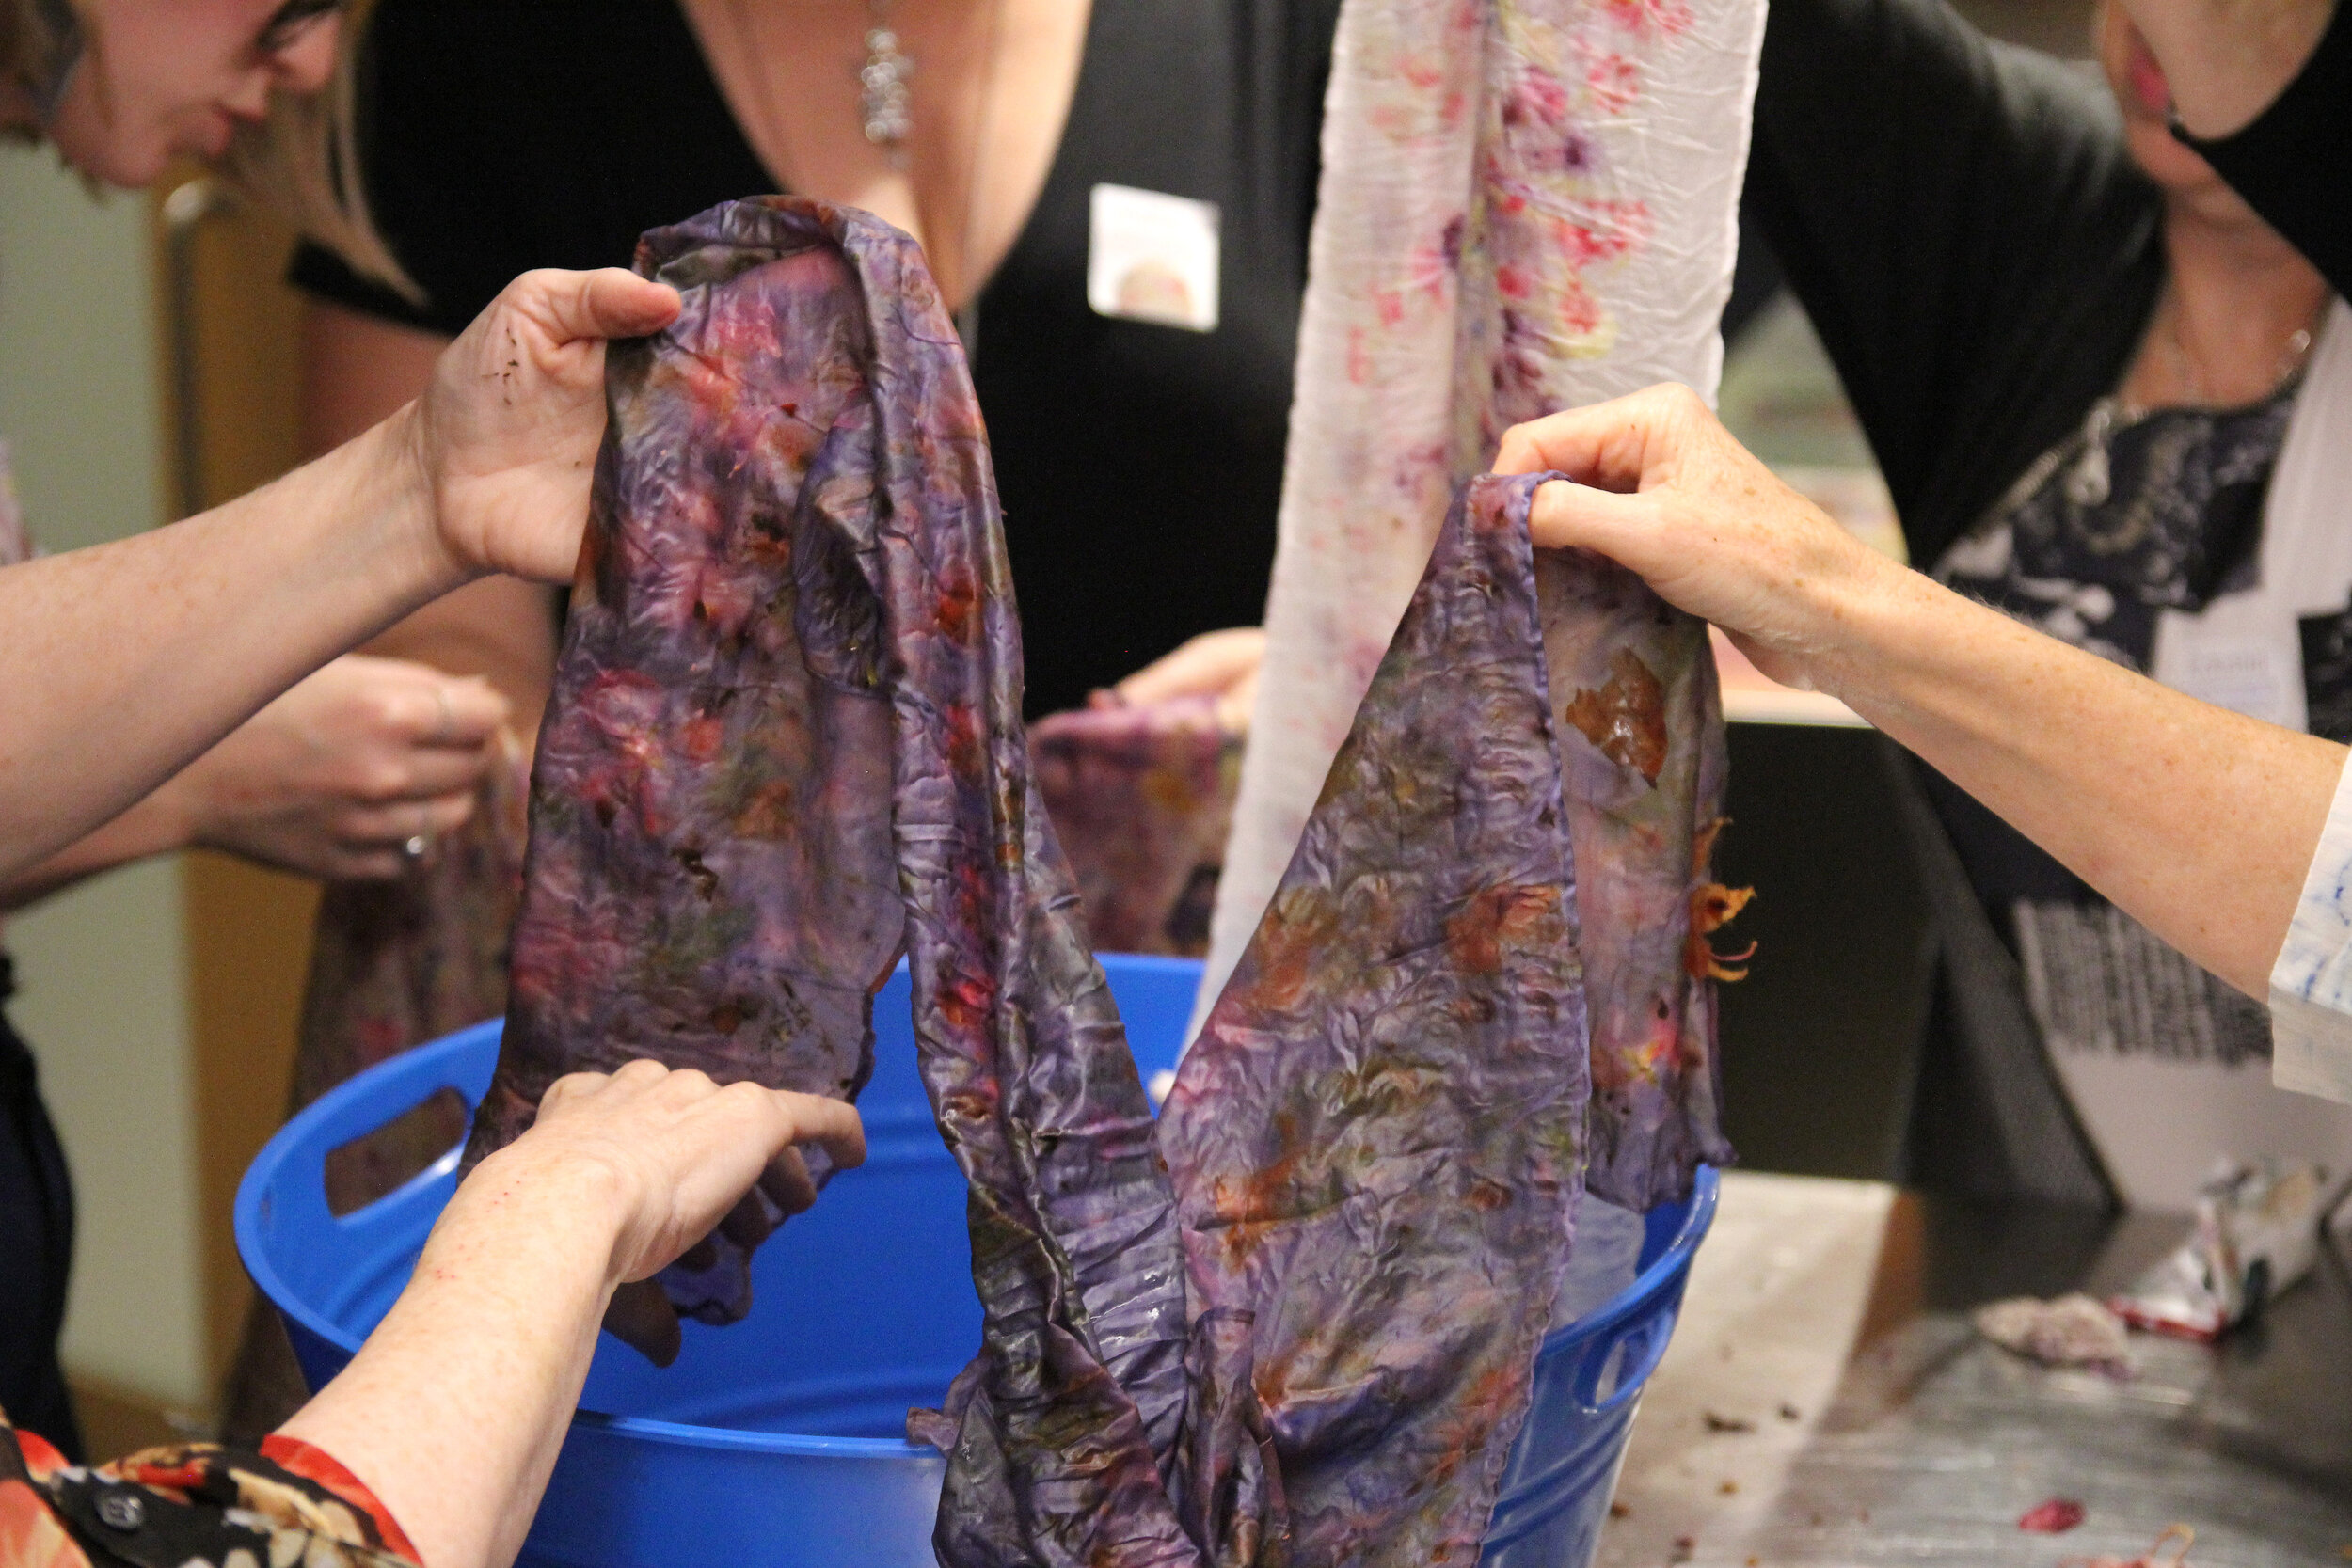
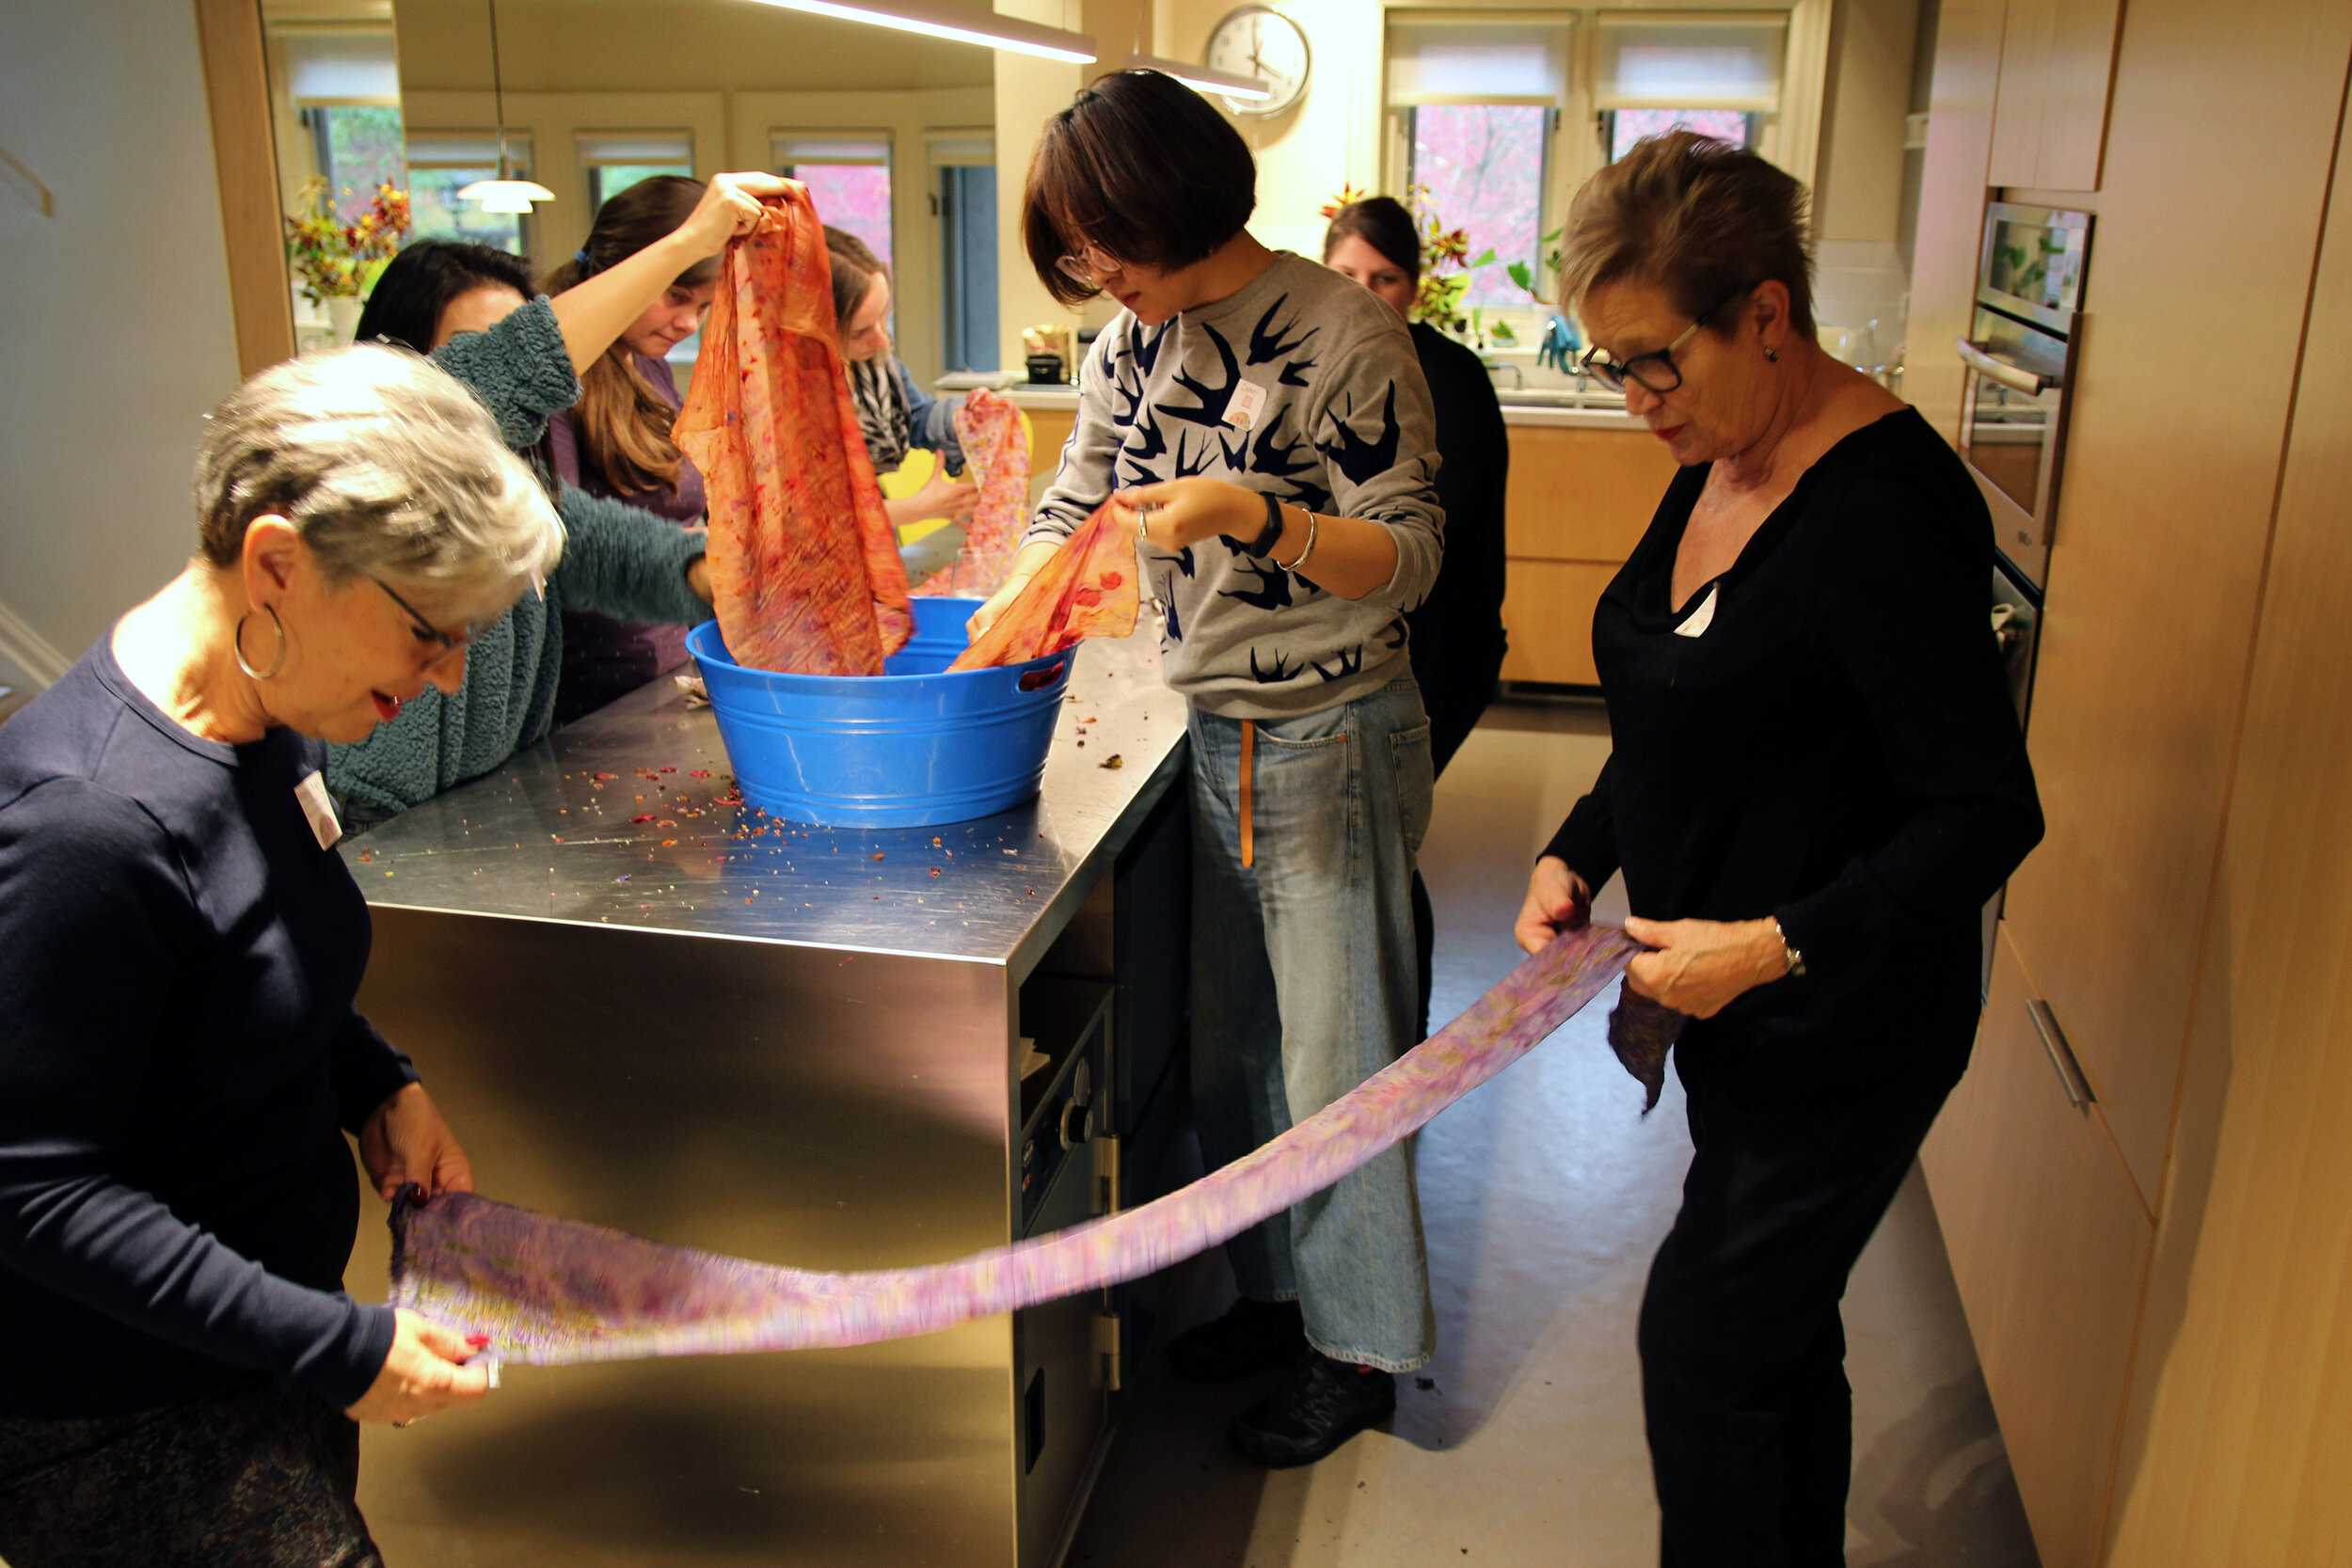
We had such a blast leading our second scarf-dyeing workshop this past October 27th. A wonderful group of participants joined us in our Toronto studio for an afternoon of flowers, silk, and all-things natural dyeing. After reviewing Windeyer’s guiding philosophy and our step-by-step process for transforming silk with flowers and leaves, we lead a demonstration of how colours can be modified post-dyeing. Then participants got to select their own mix of botanicals to dye their scarves. The precious scarves were bundled, steamed, and then unfurled! Some chose to modify their scarves after dyeing, and all proudly sported them for our end-of-workshop photo!
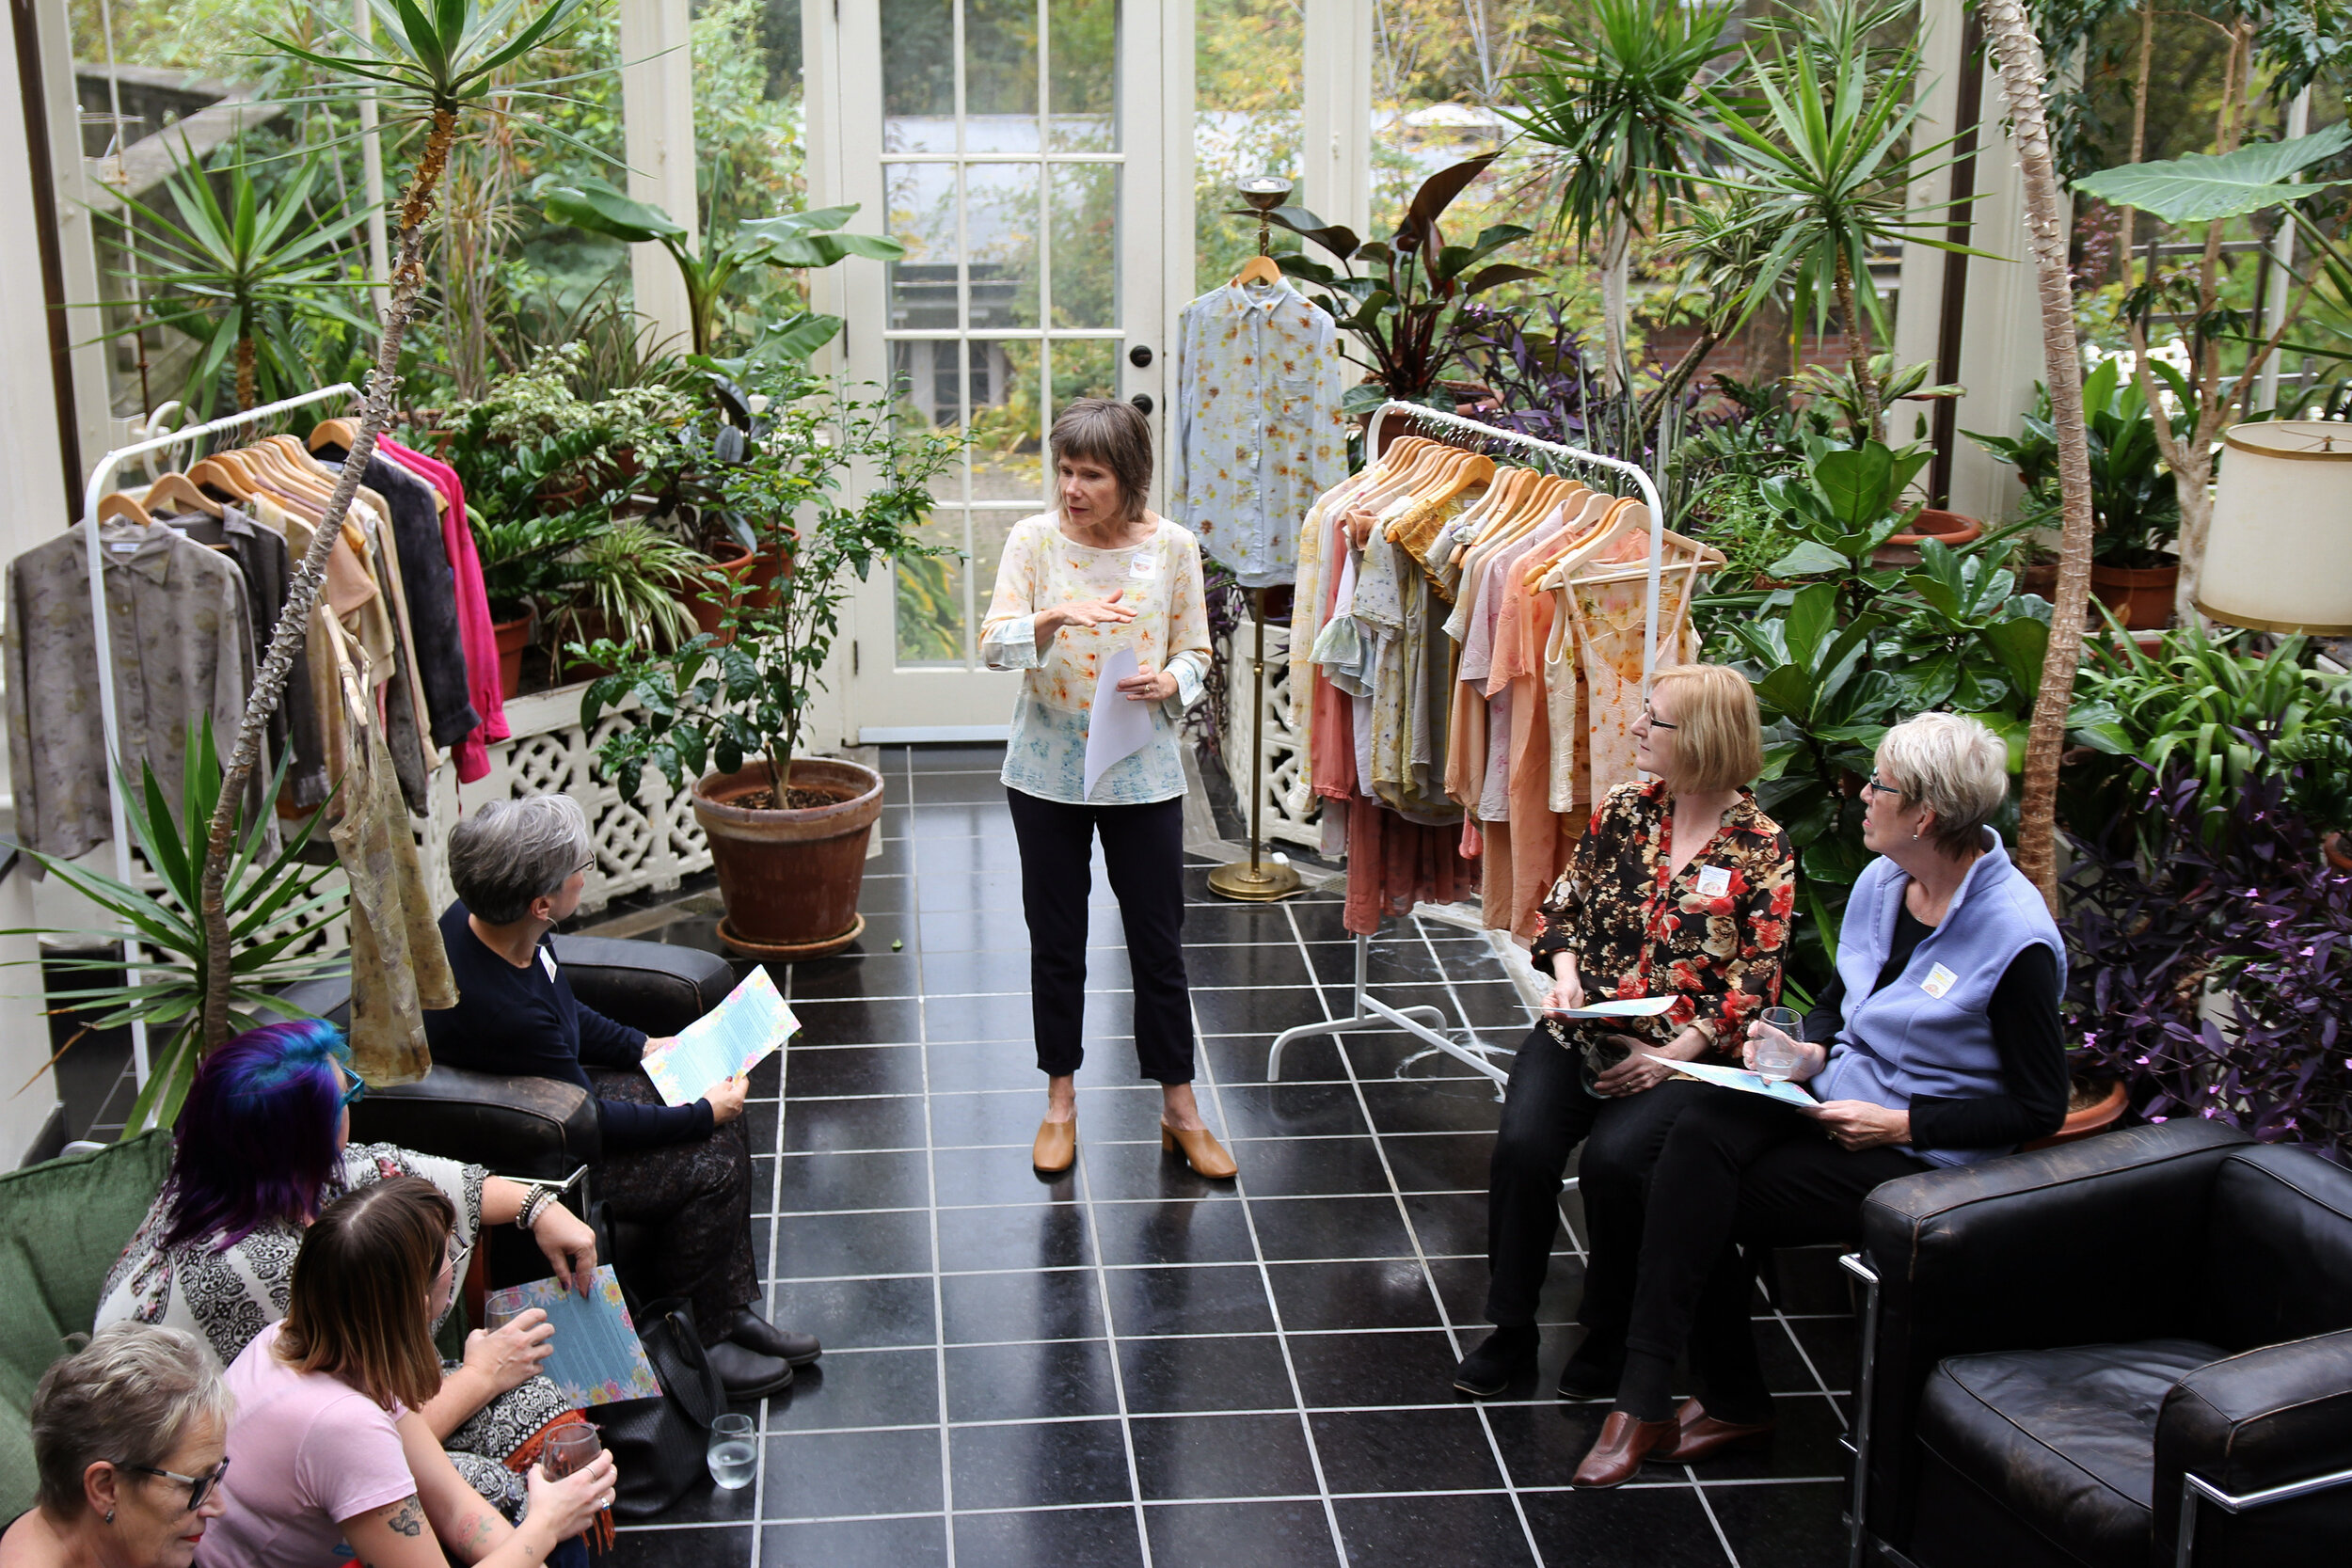
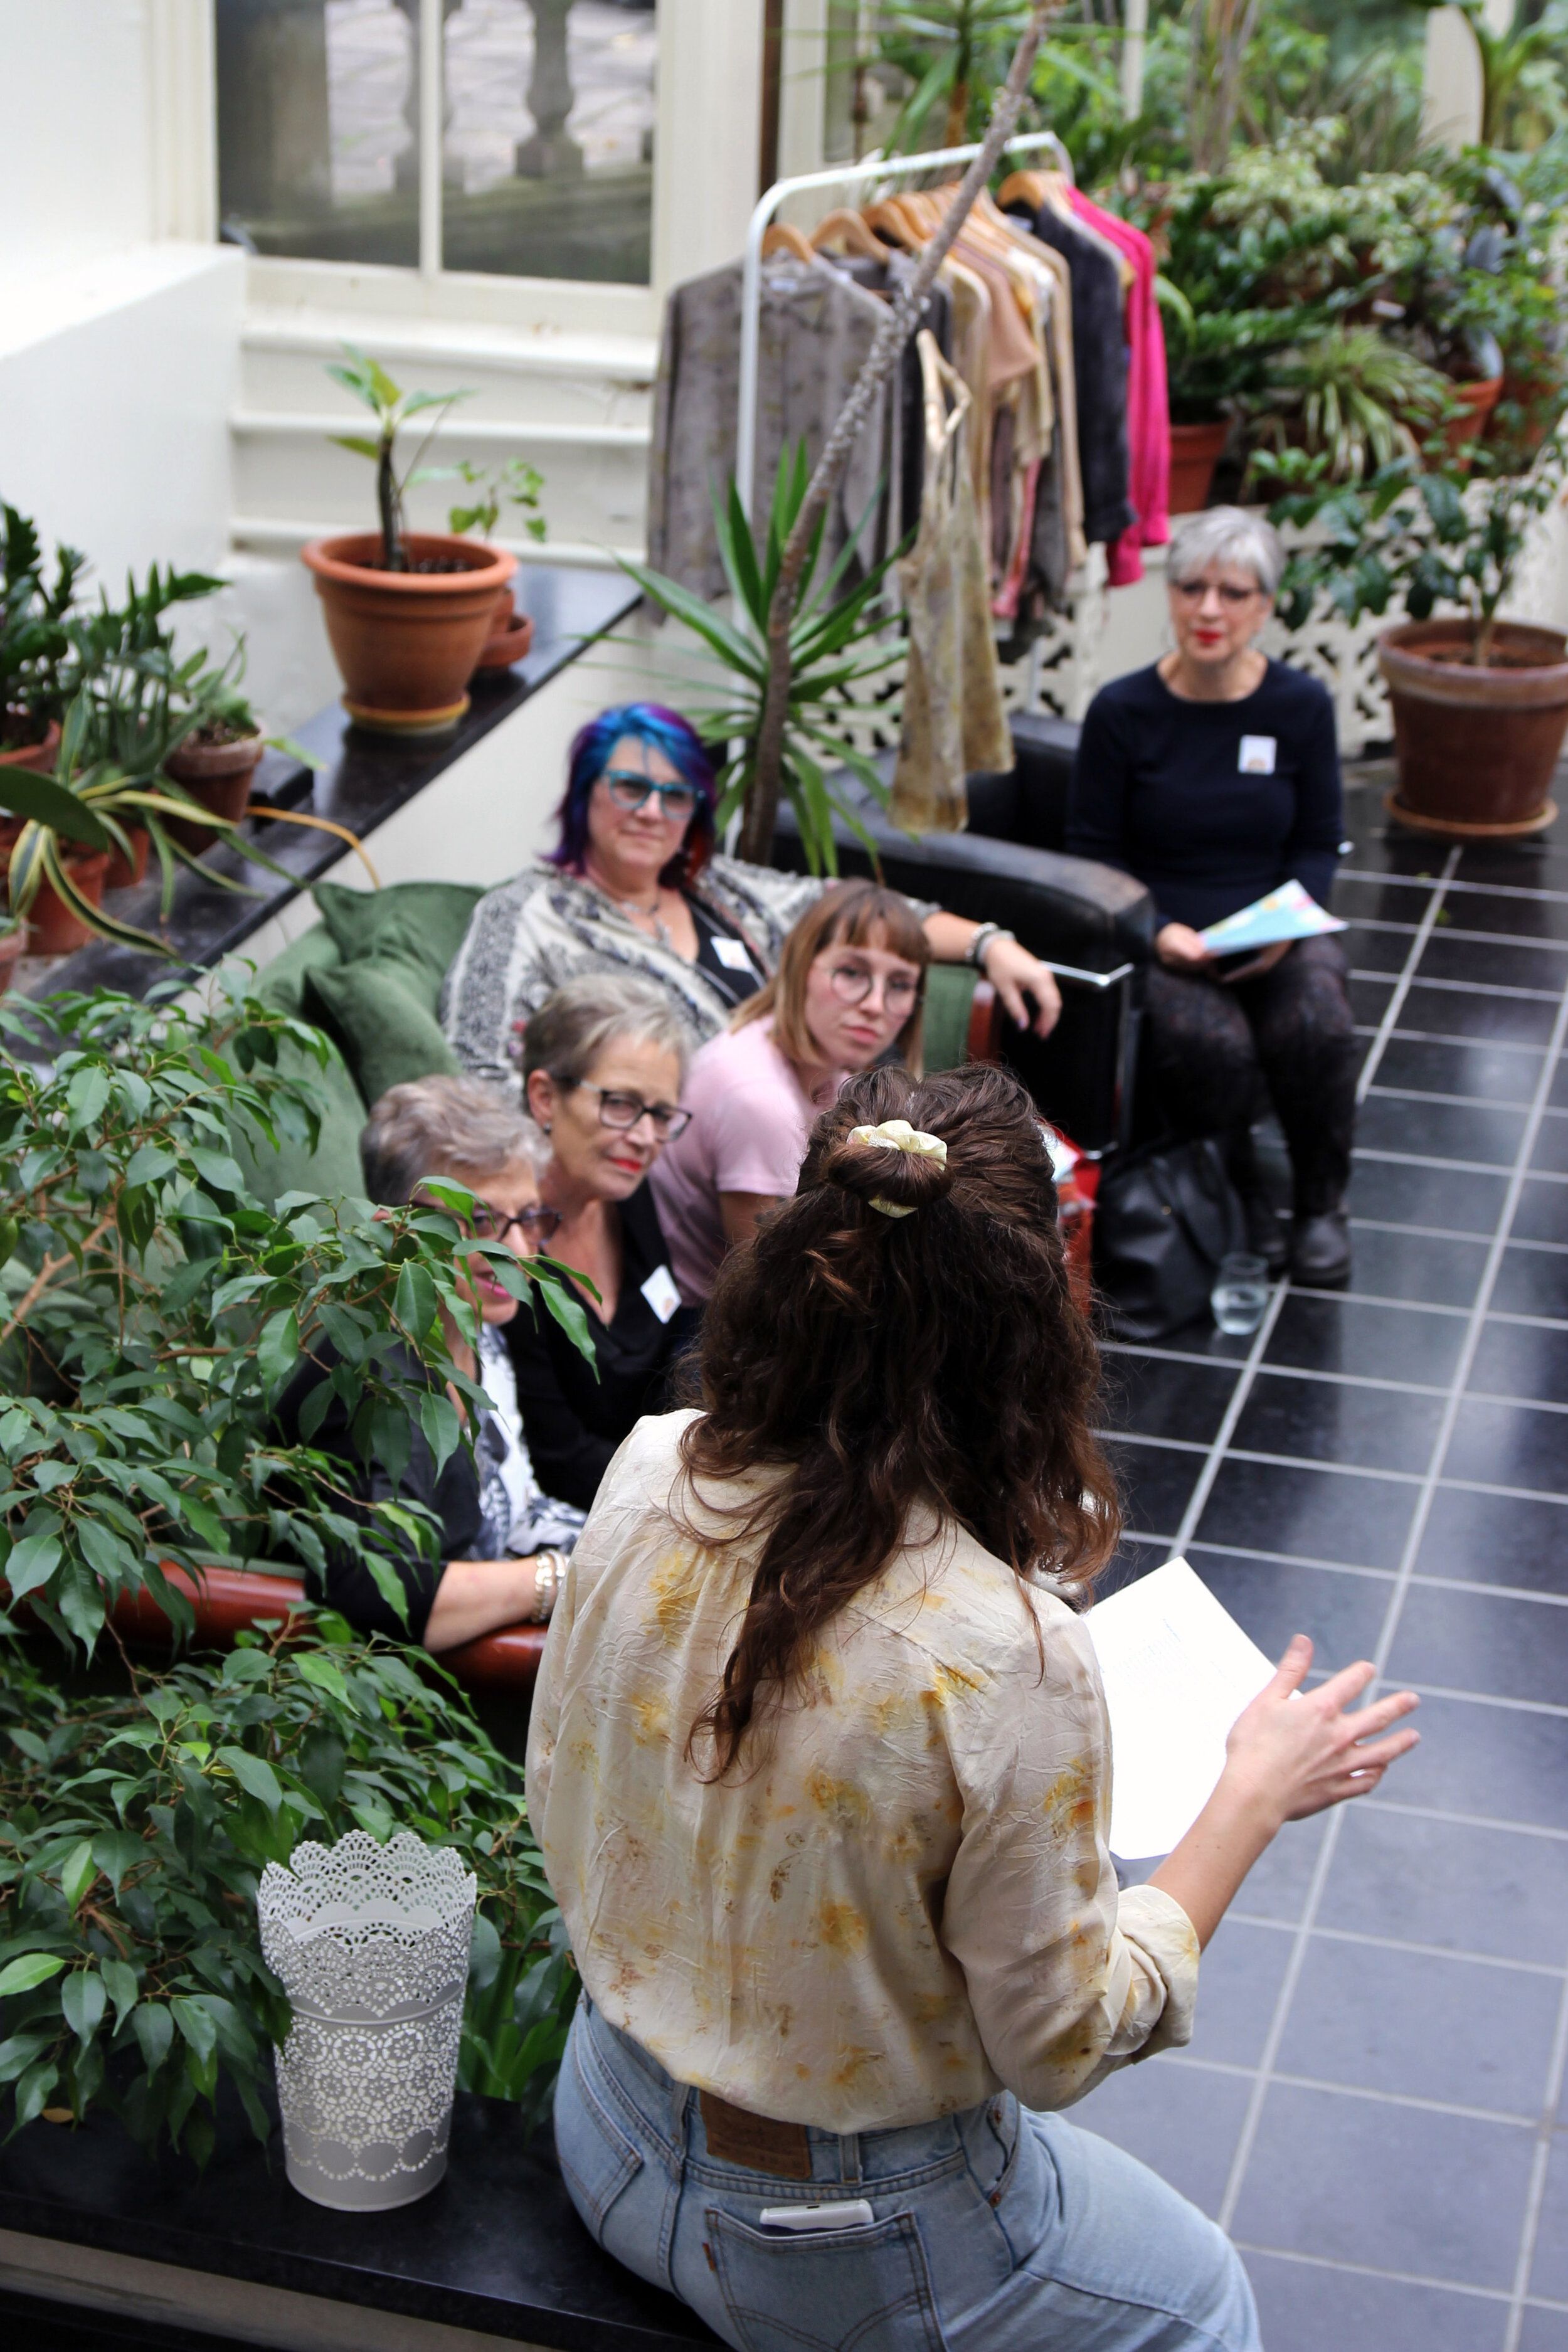

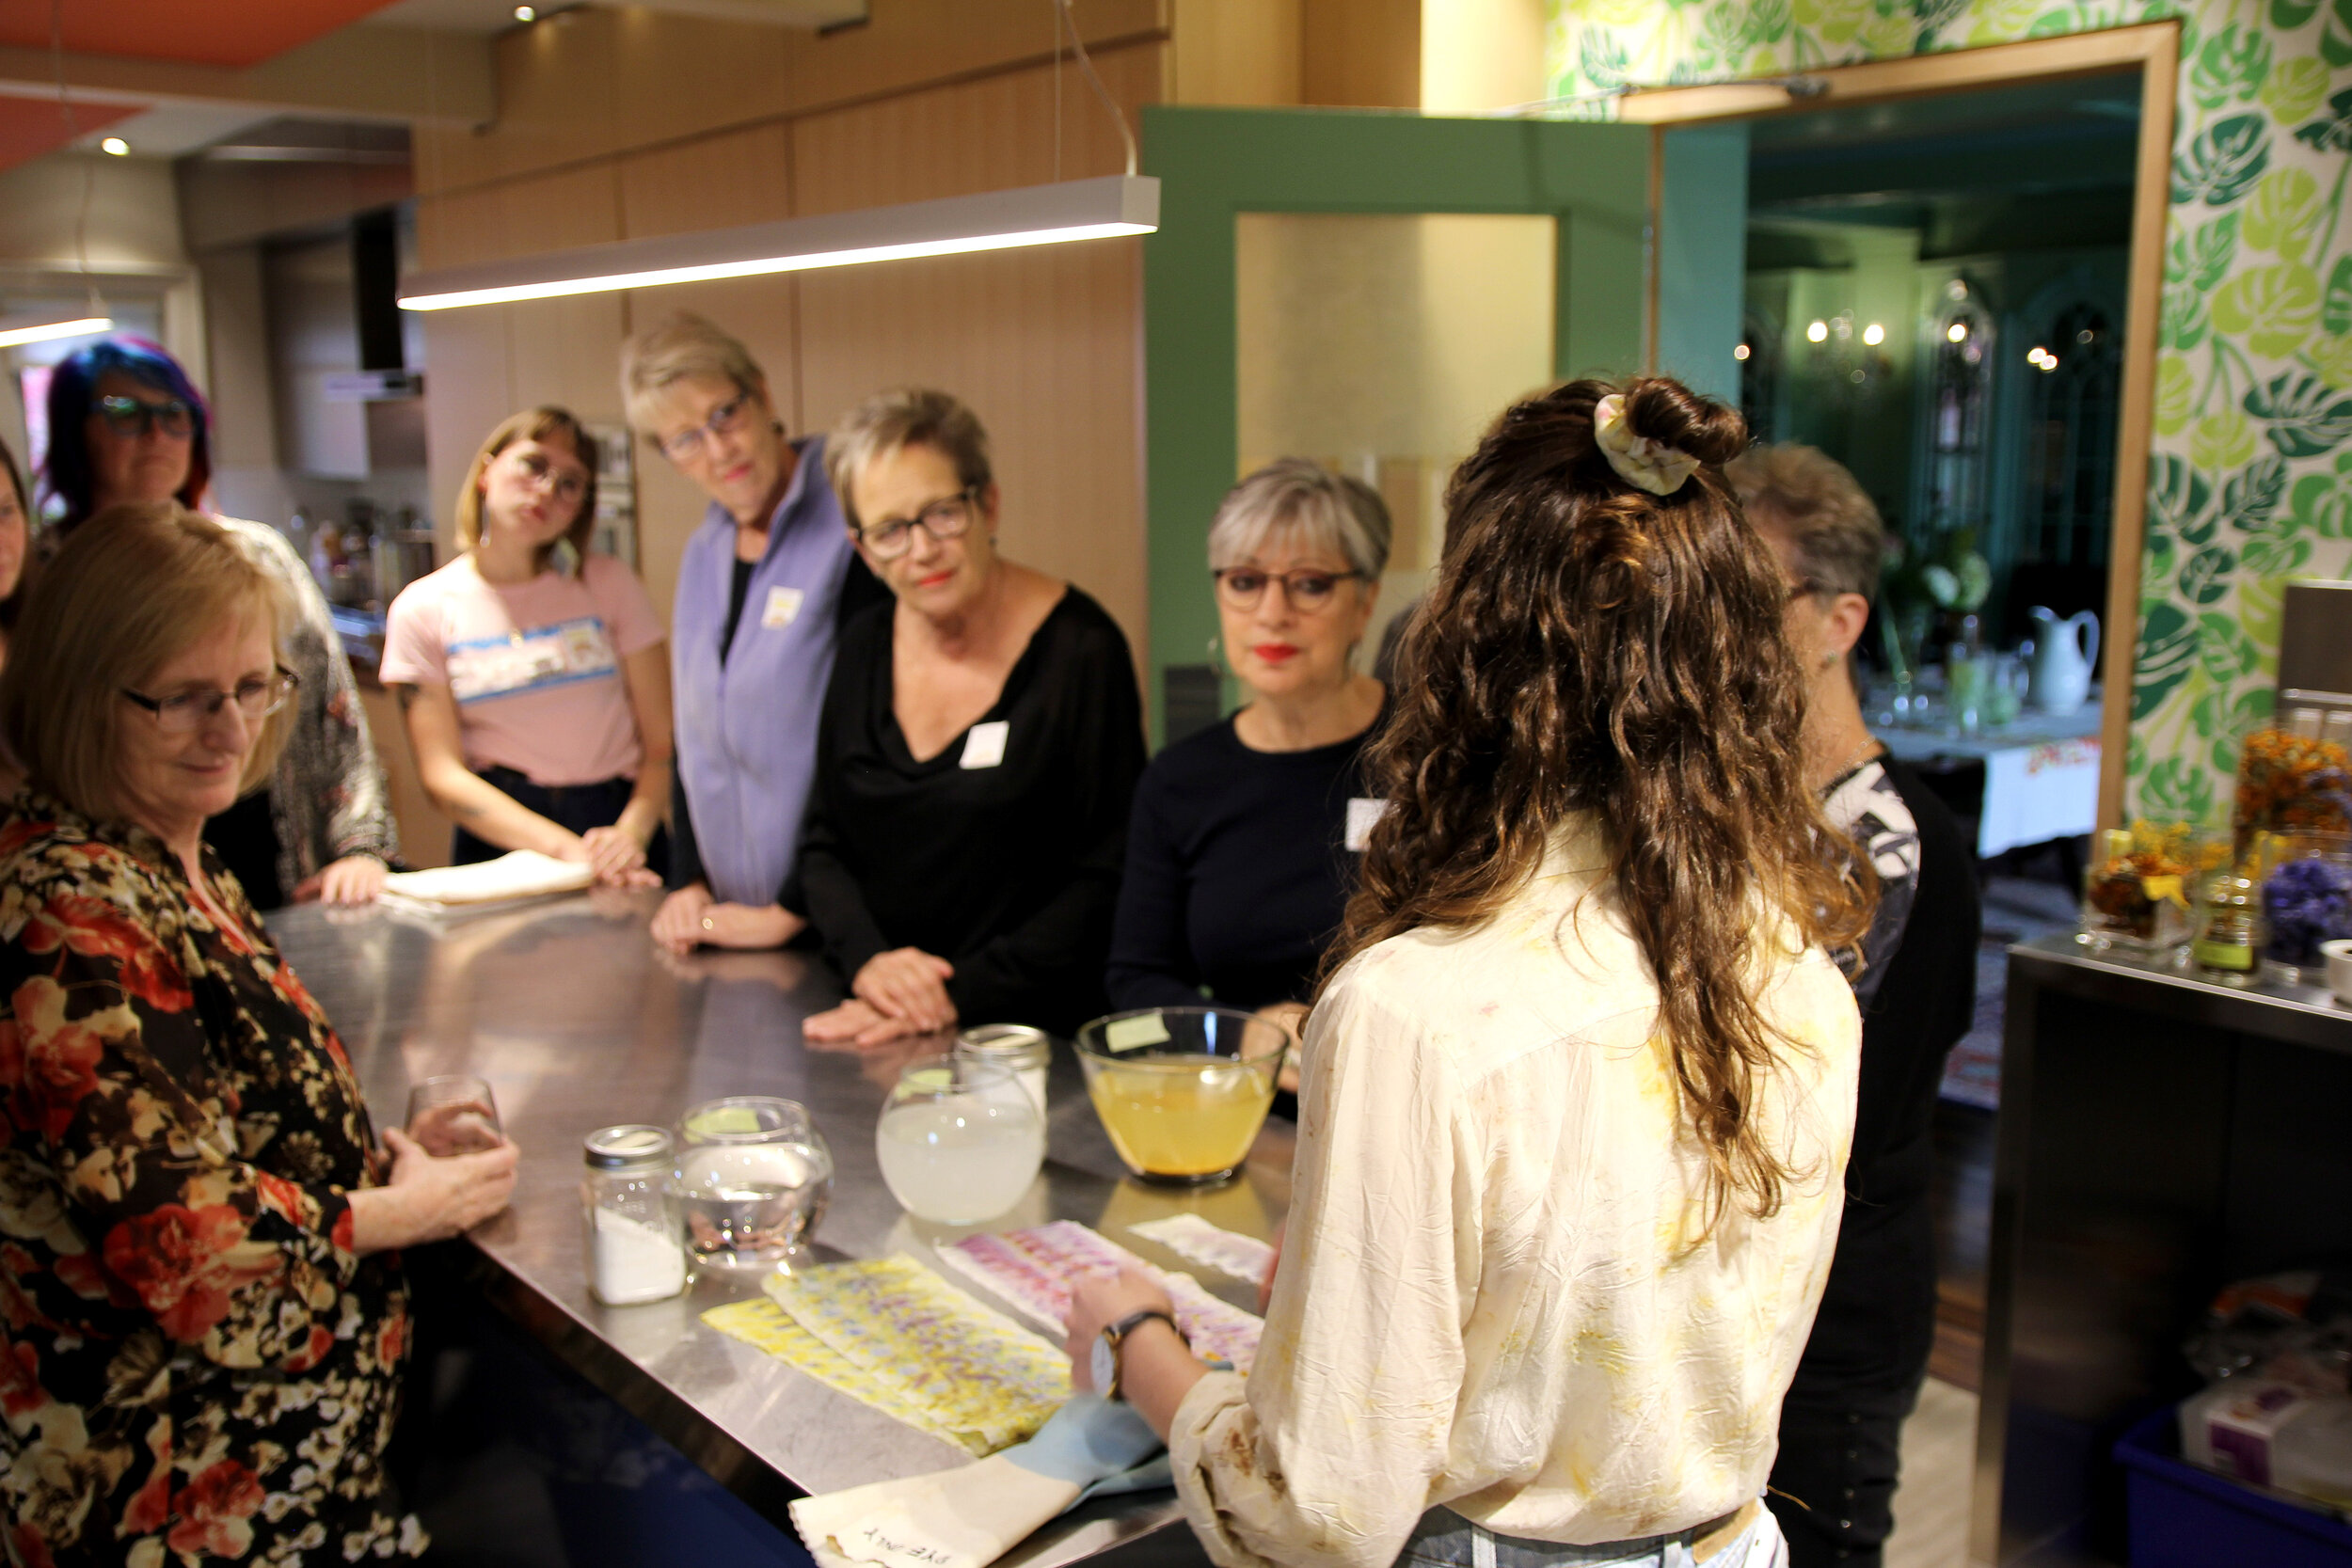

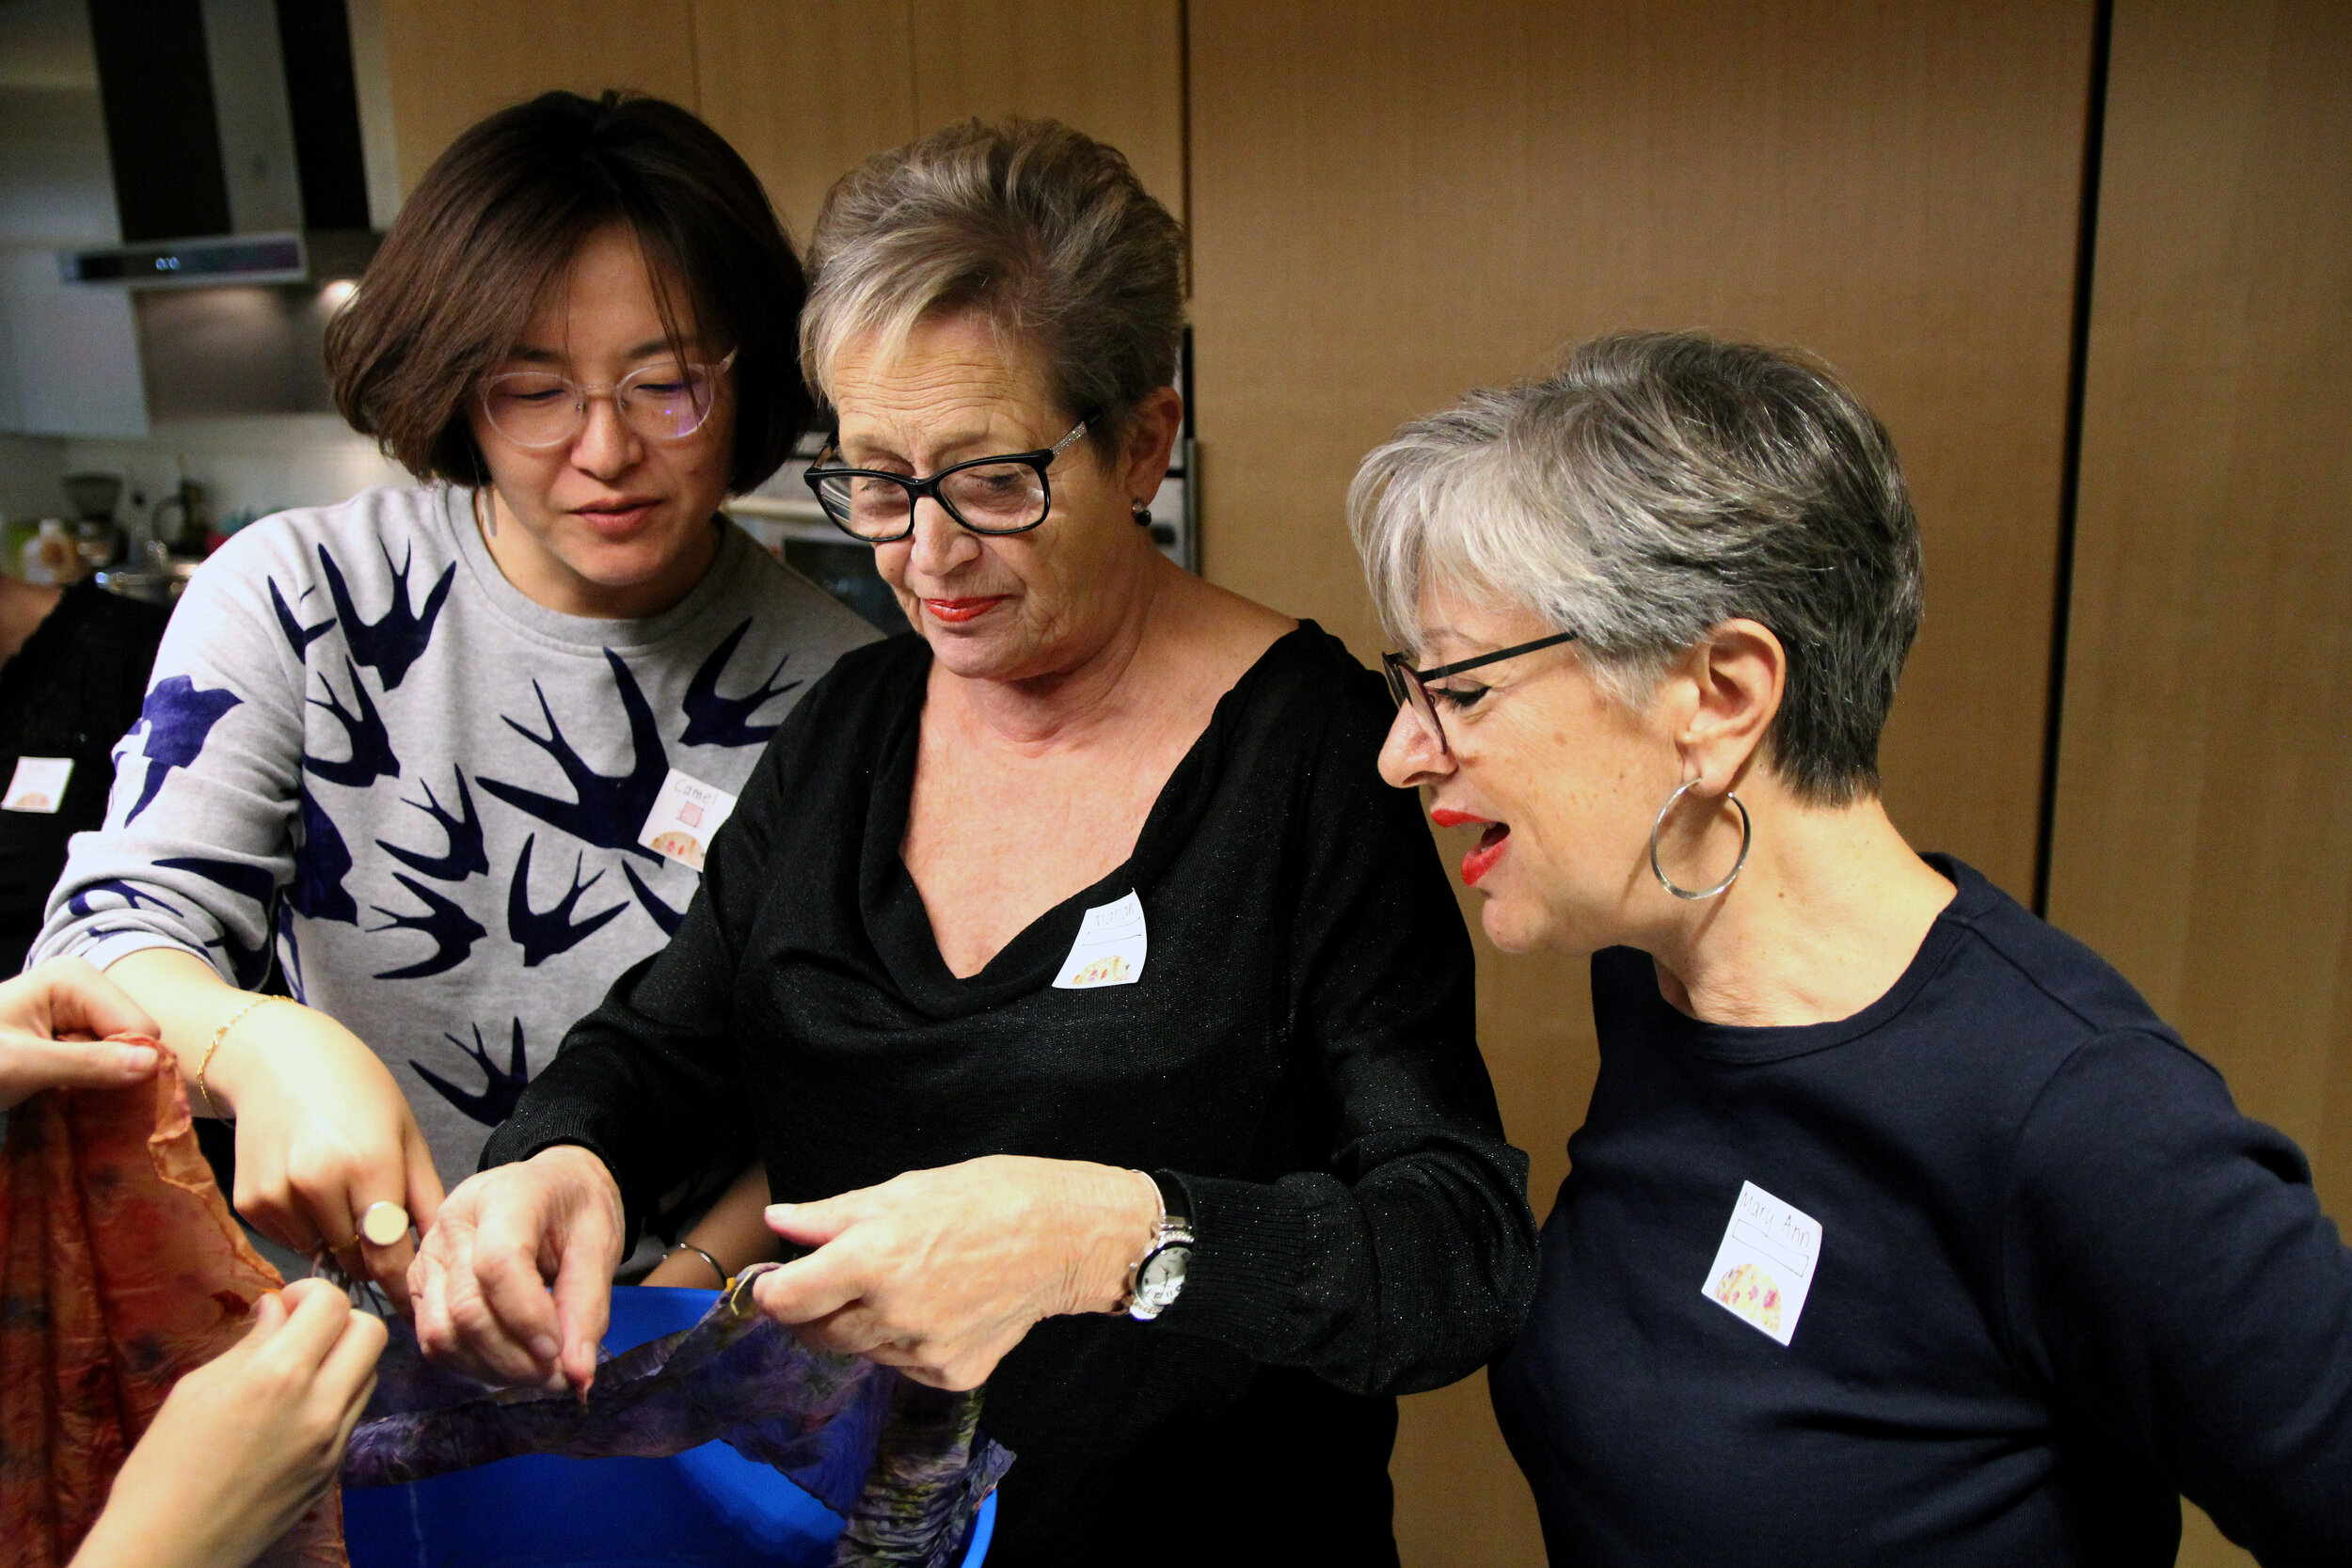

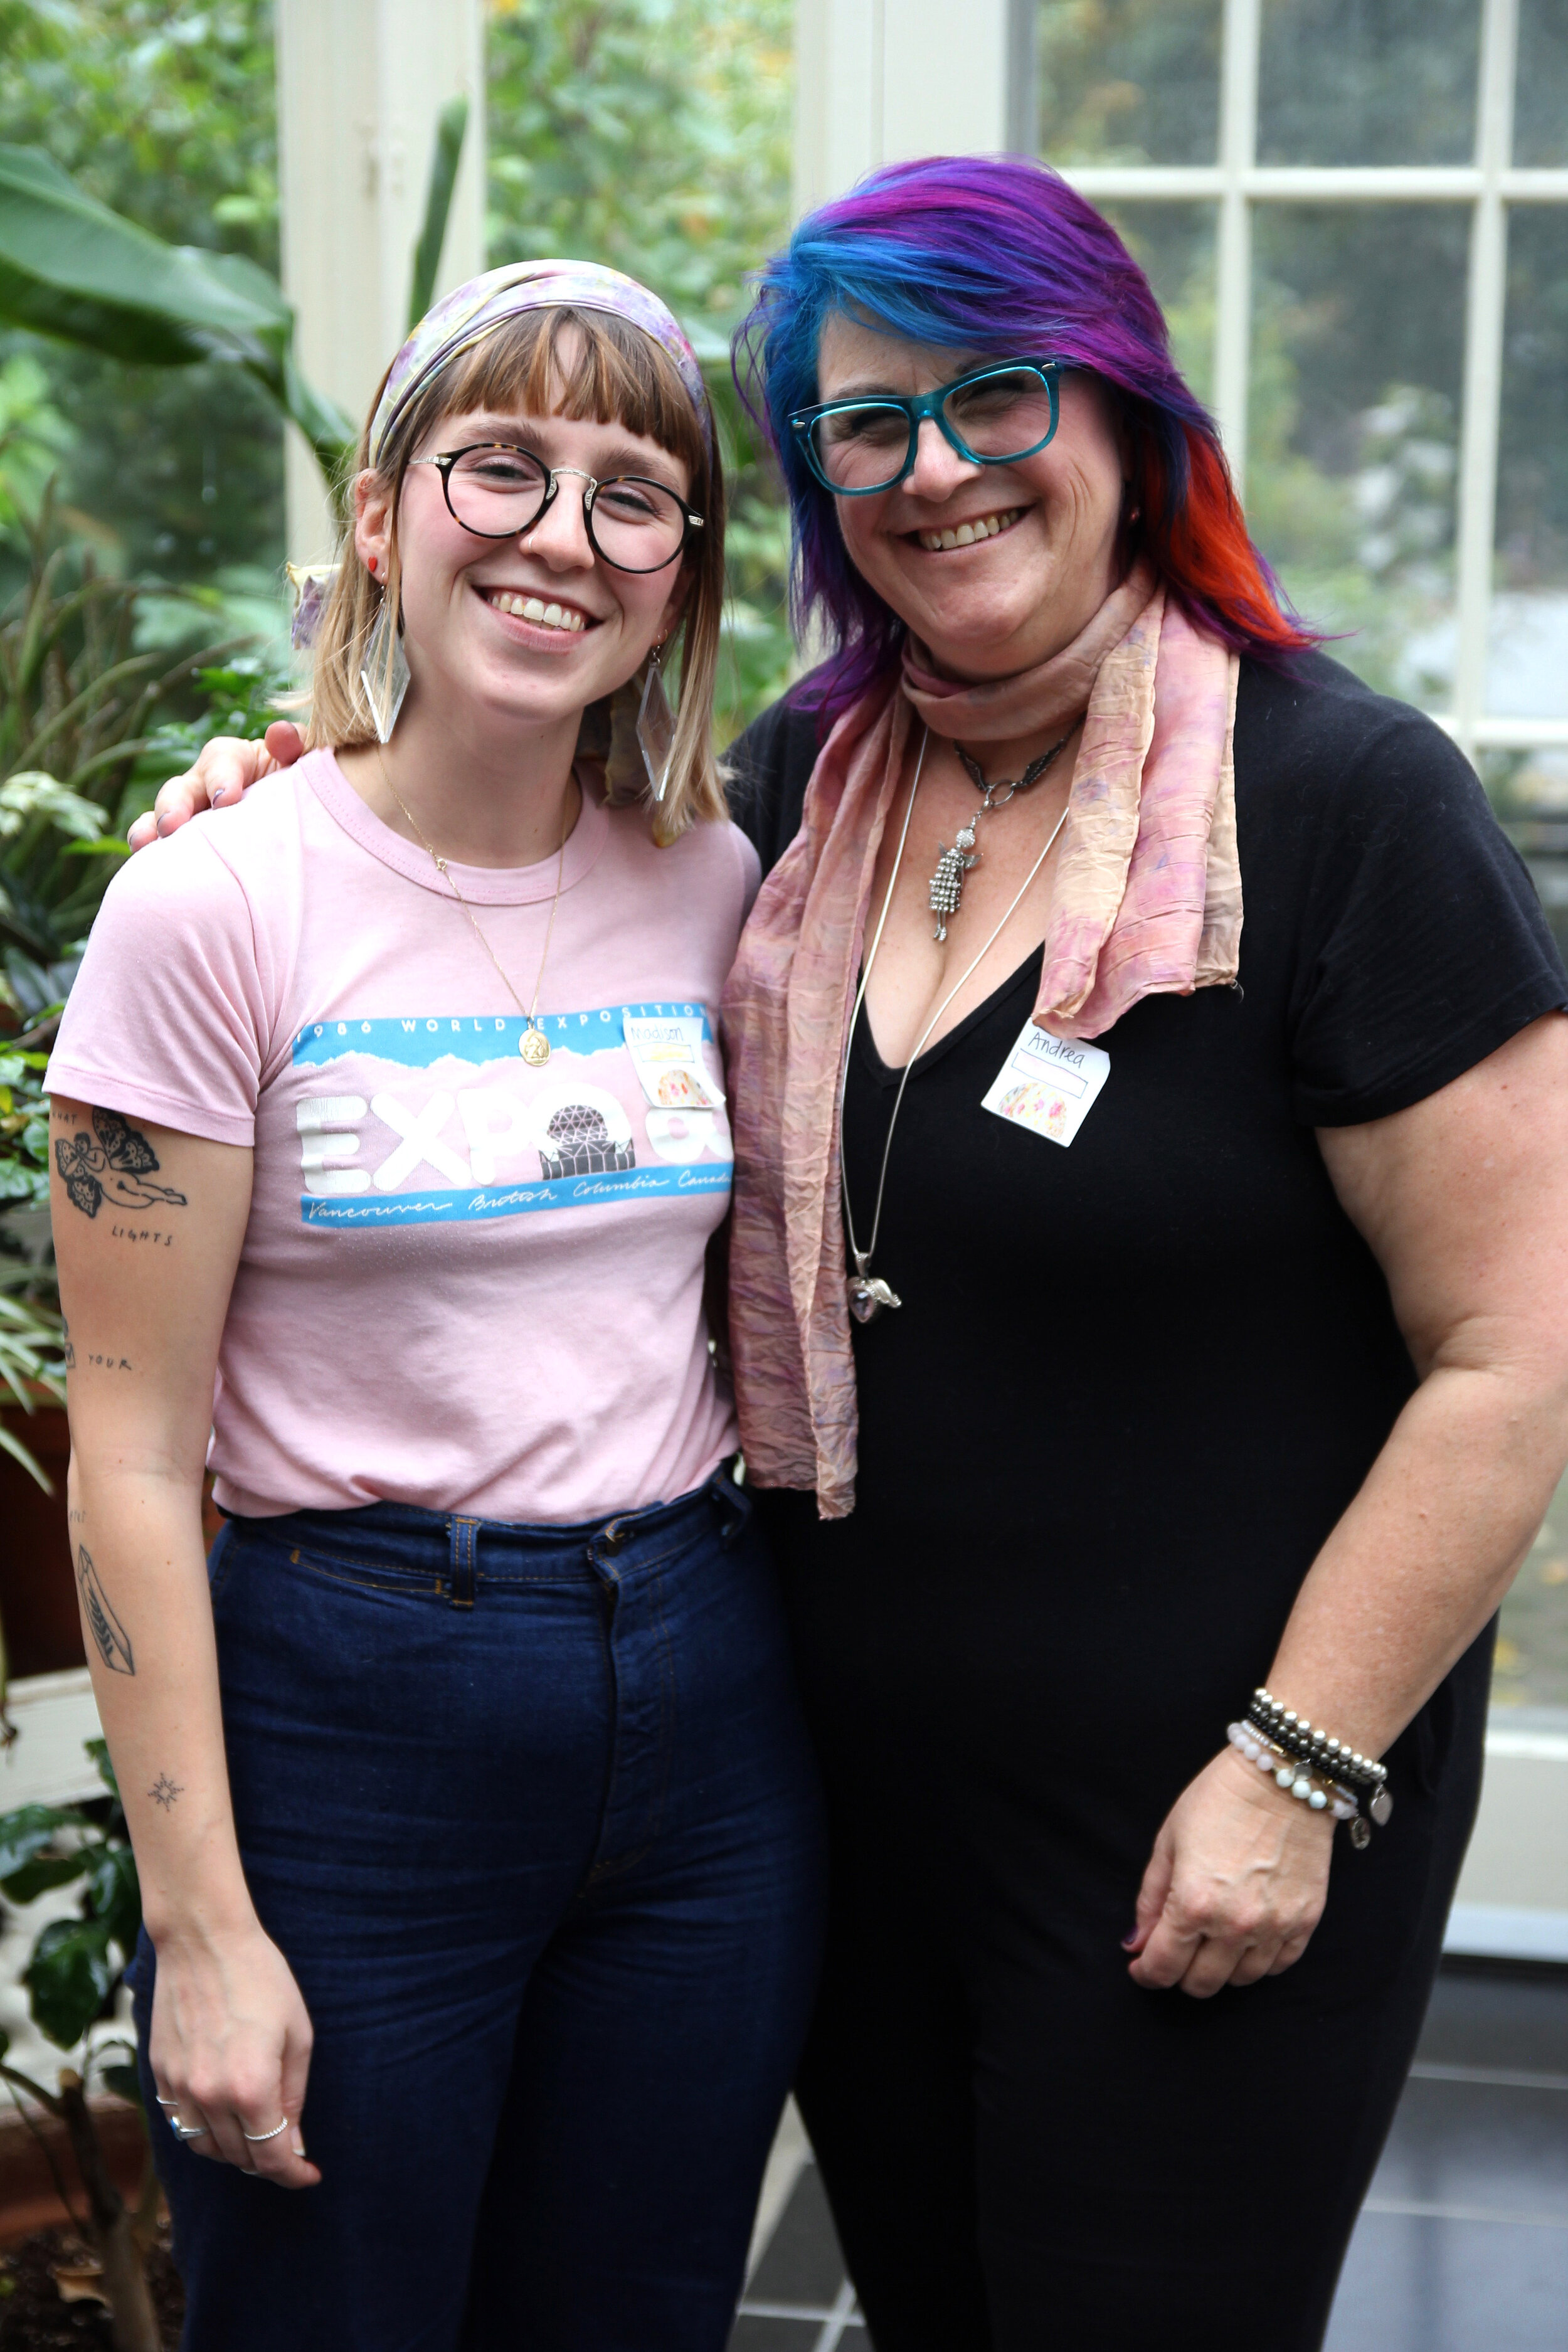
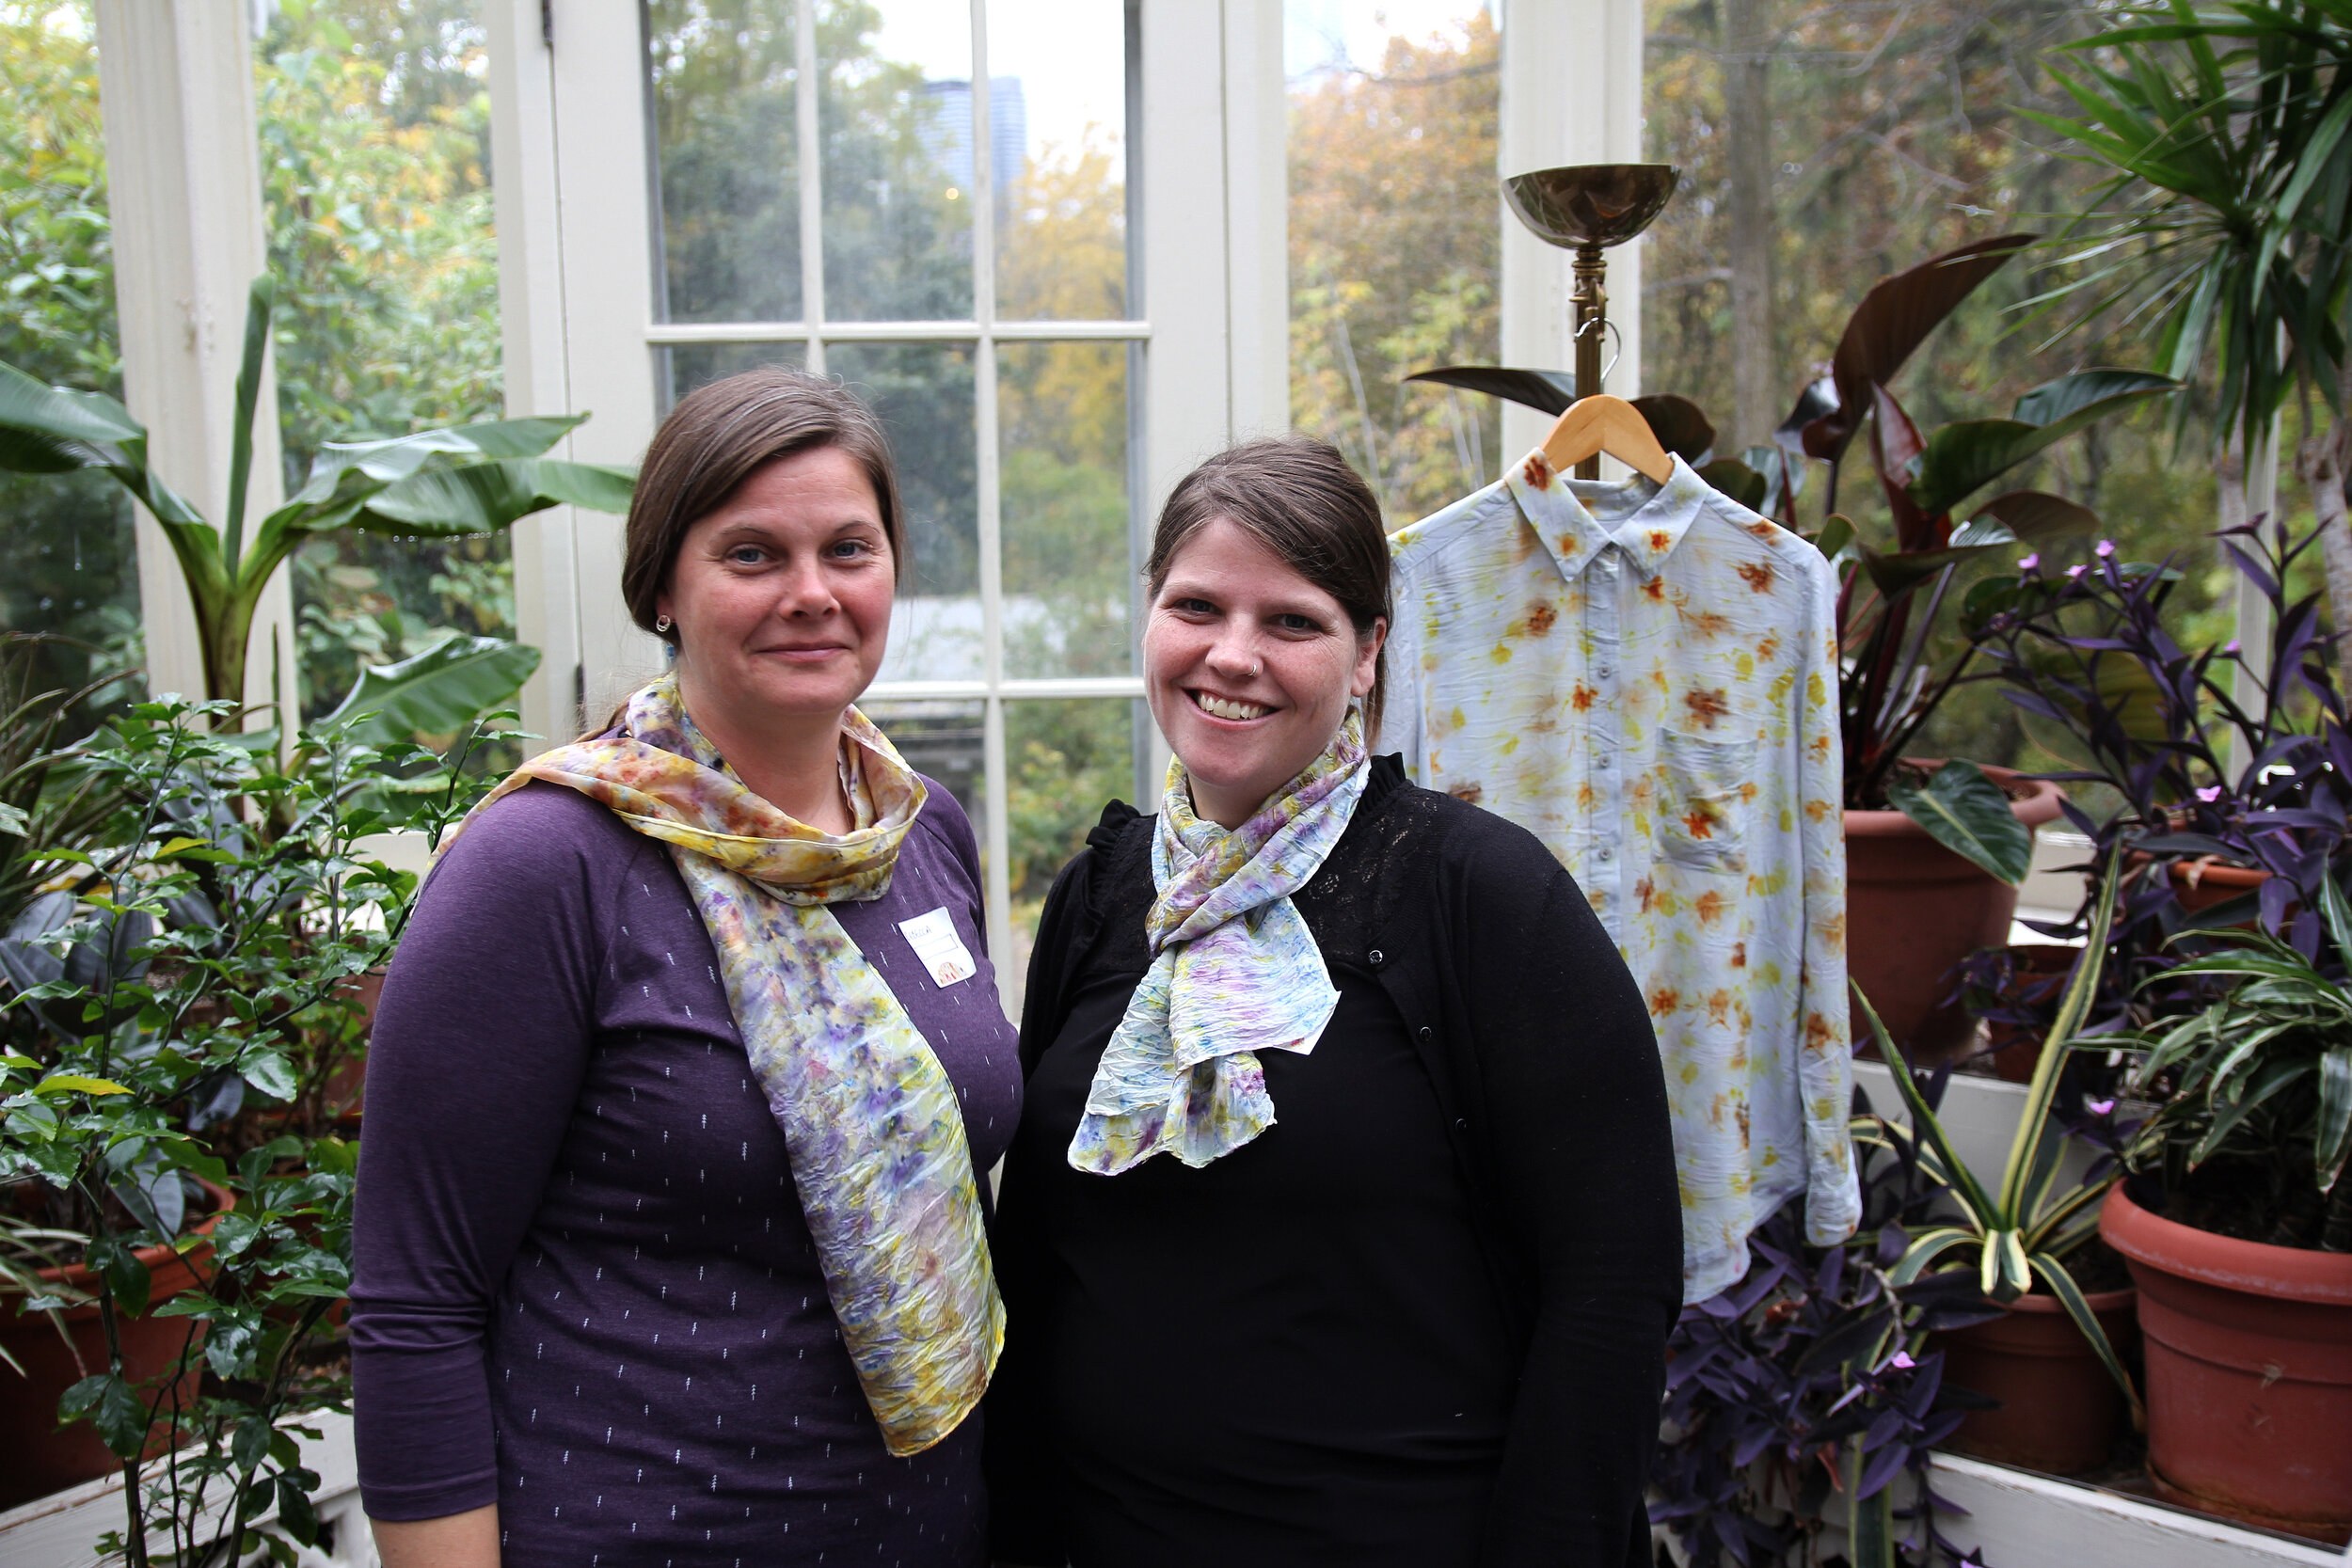
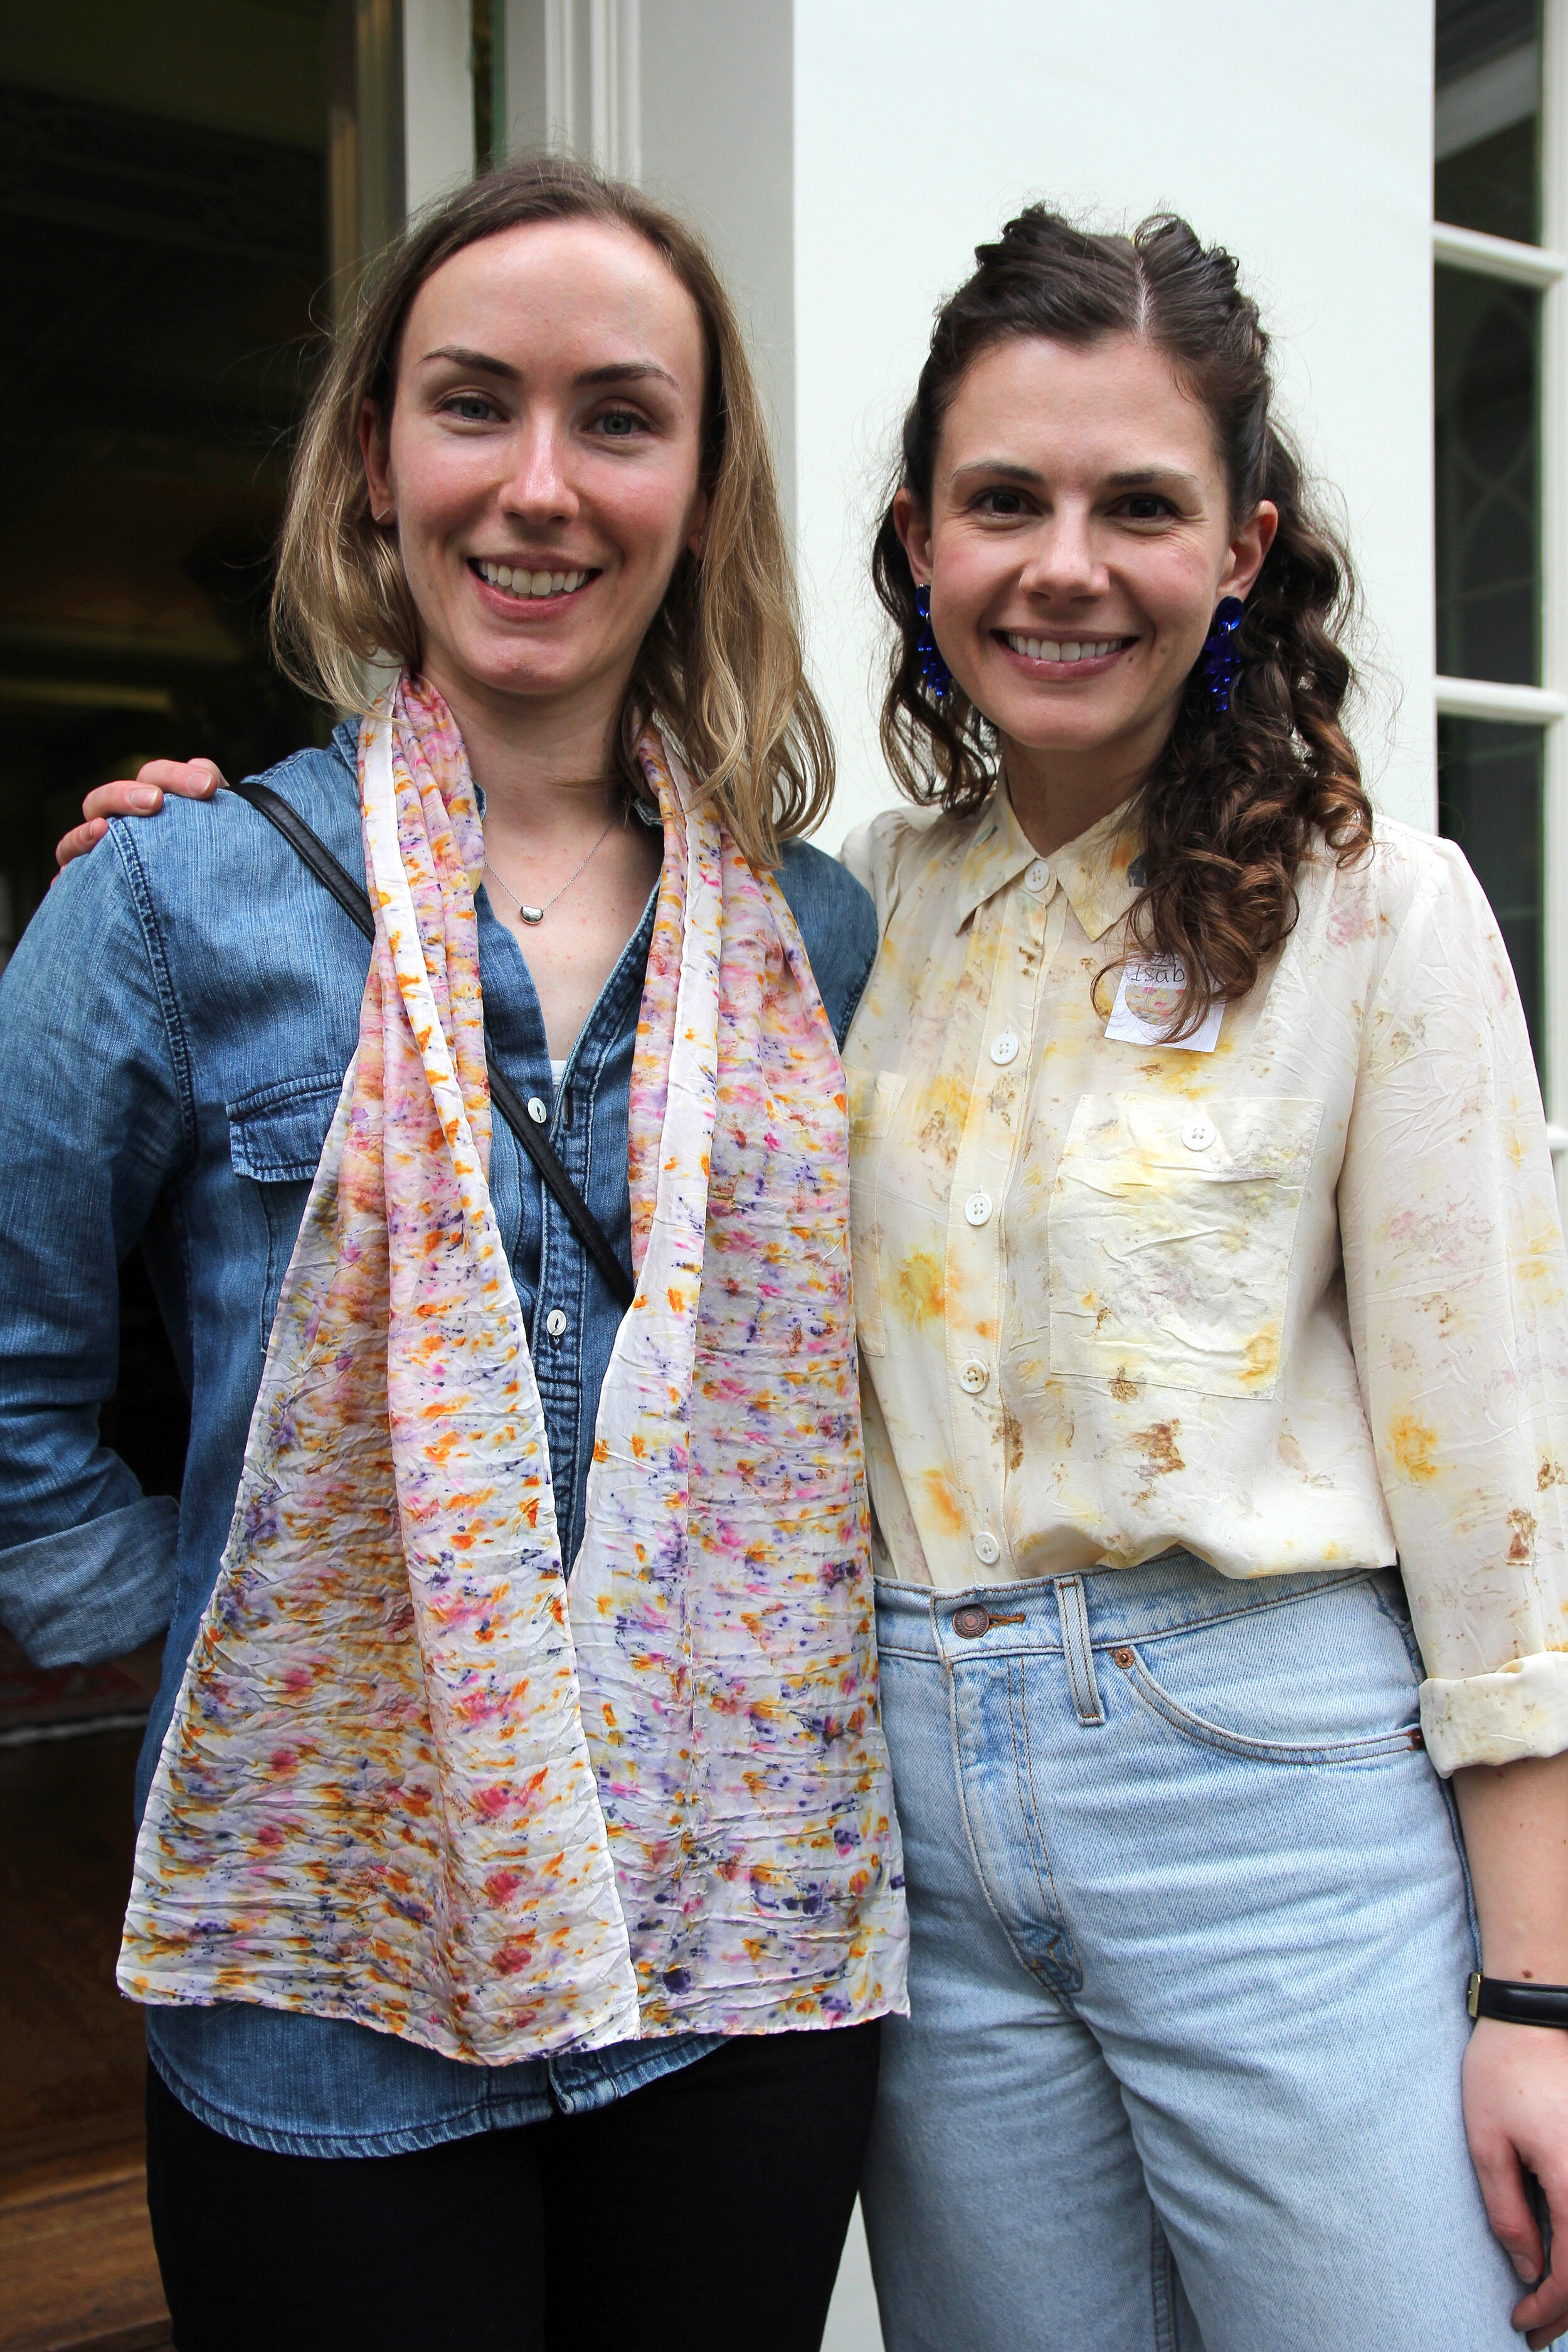

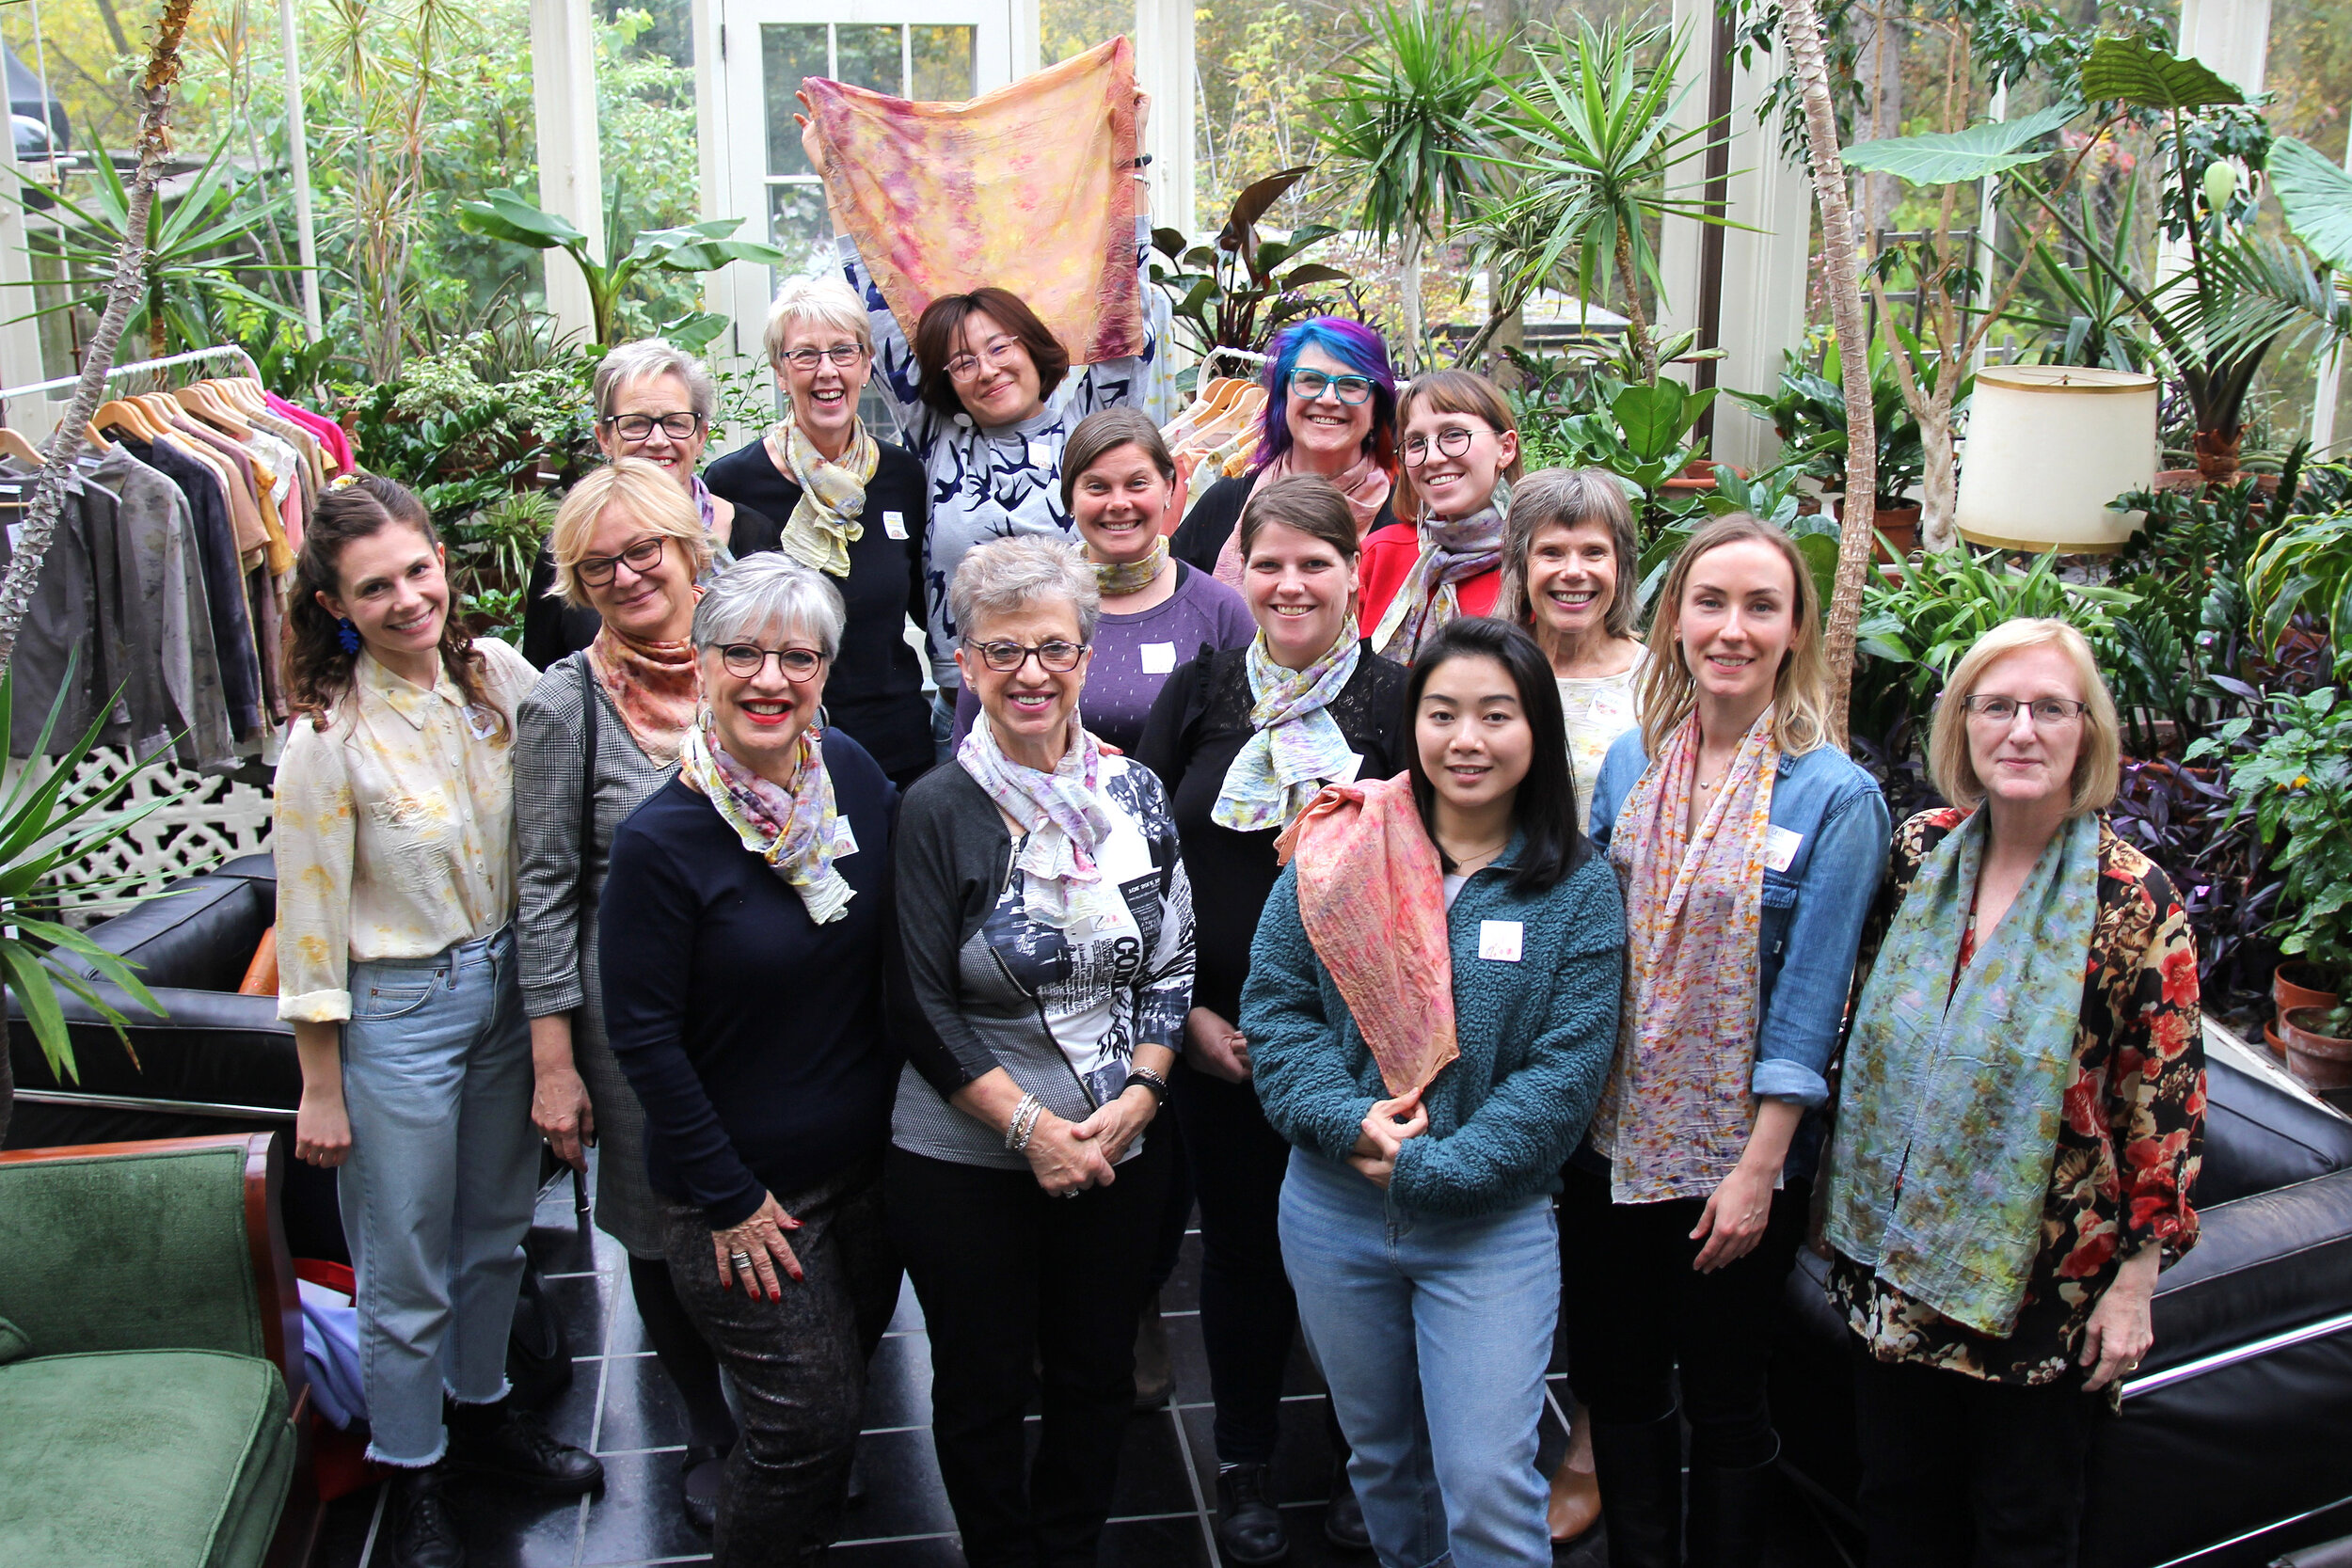
Thank you to our wonderful participants, and to Cecile Ferandier for her support and photography skills!
We are thrilled to announce the details for our second silk-dyeing workshop, to take place later this fall! Participants will join us at our Rosedale studio, to learn the basics of dyeing with flowers and botanicals. We will demonstrate our preferred techniques for preparing, dyeing, modifying, and caring for hand-dyed silk. Participants will dye their own silk scarf to take home, choosing from either a square or long rectangular scarf. Light refreshments will be provided.
Where: Sunday, October 27th from 2-4 pm
Location: 93 Highland Ave, Toronto
Cost: $75 per person
How to register: email us at windeyerstudio@gmail.com
The workshop is limited to 10 spots, so register quickly to avoid disappointment as our last workshop sold out!
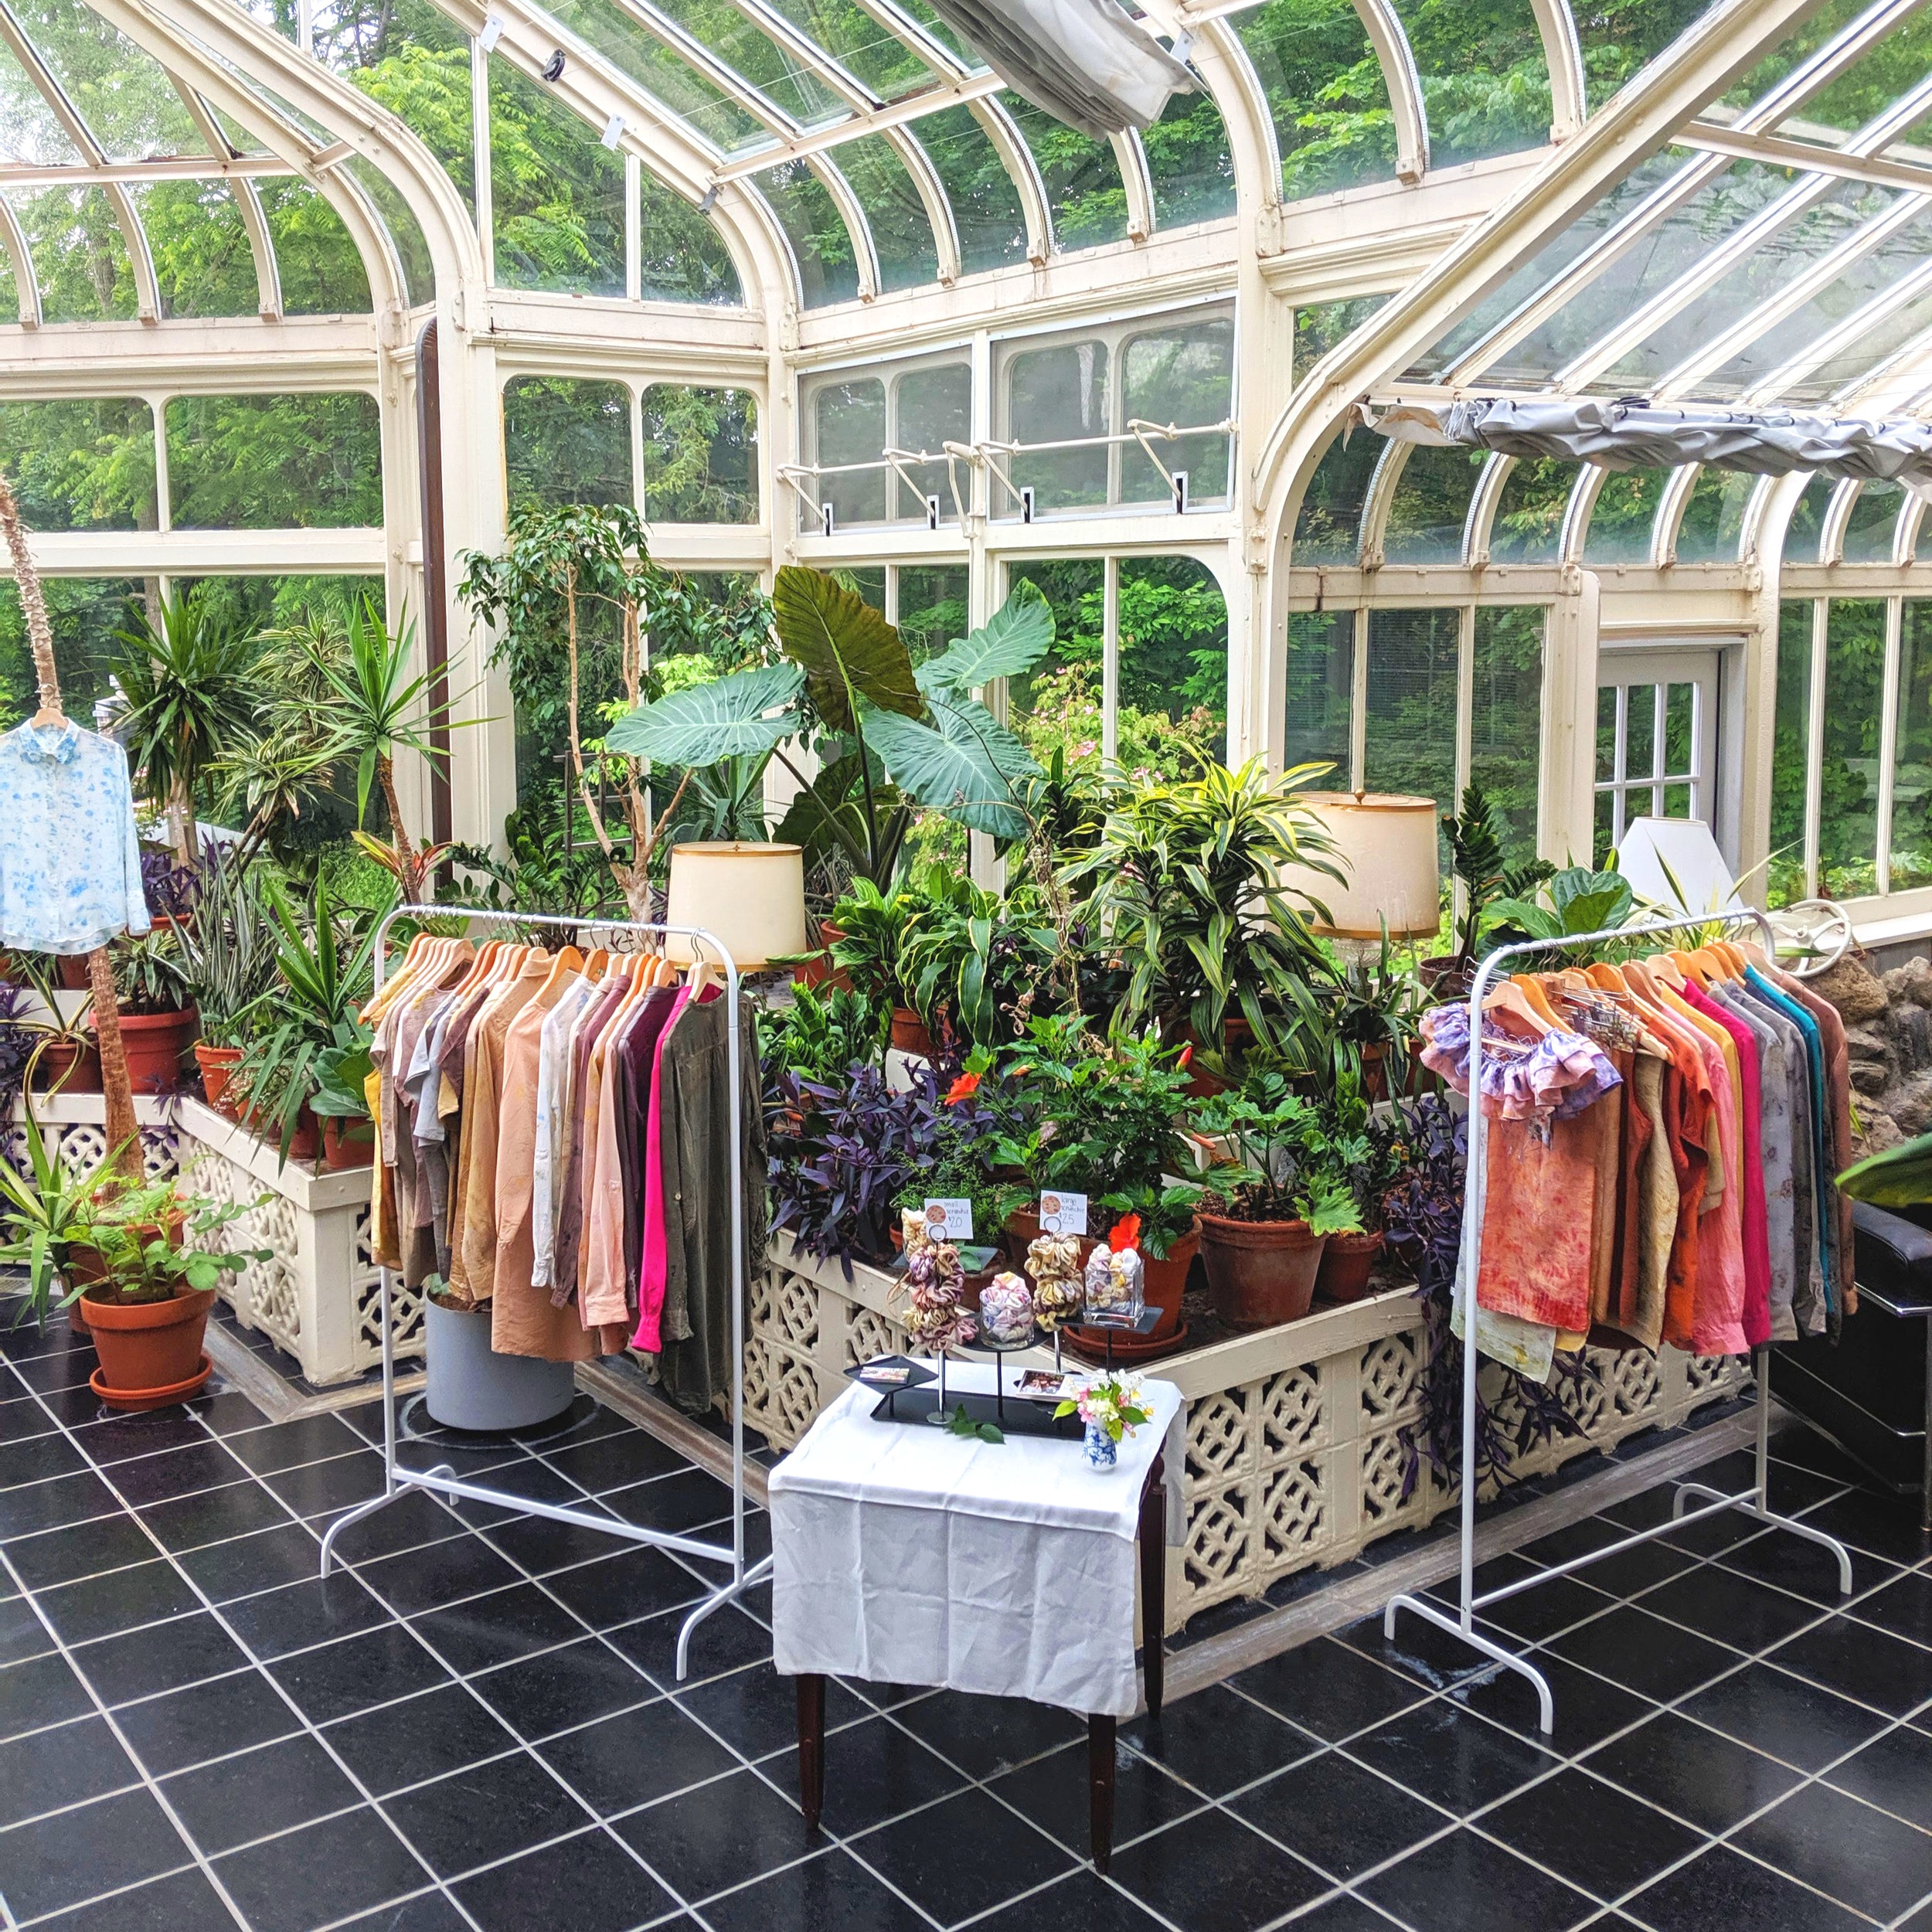
We are so pleased to share that Windeyer Studio has been invited to join the Distillery District’s Sunday market for the next two weekends. For the uninitiated, the Distillery District is a historical neighbourhood and arts and culture hub in Toronto. We can’t wait to bring our flower-dyed silk wares to this fun, bustling space!
The market runs 12-5 pm, and Windeyer will be there August 18 and 25th. For more info, you can check out the Distillery District’s events page (linked here).
Dear friends
We’re looking forward to launching our new collection. Please join us in Toronto on Thursday, June 20, and bring a pal!

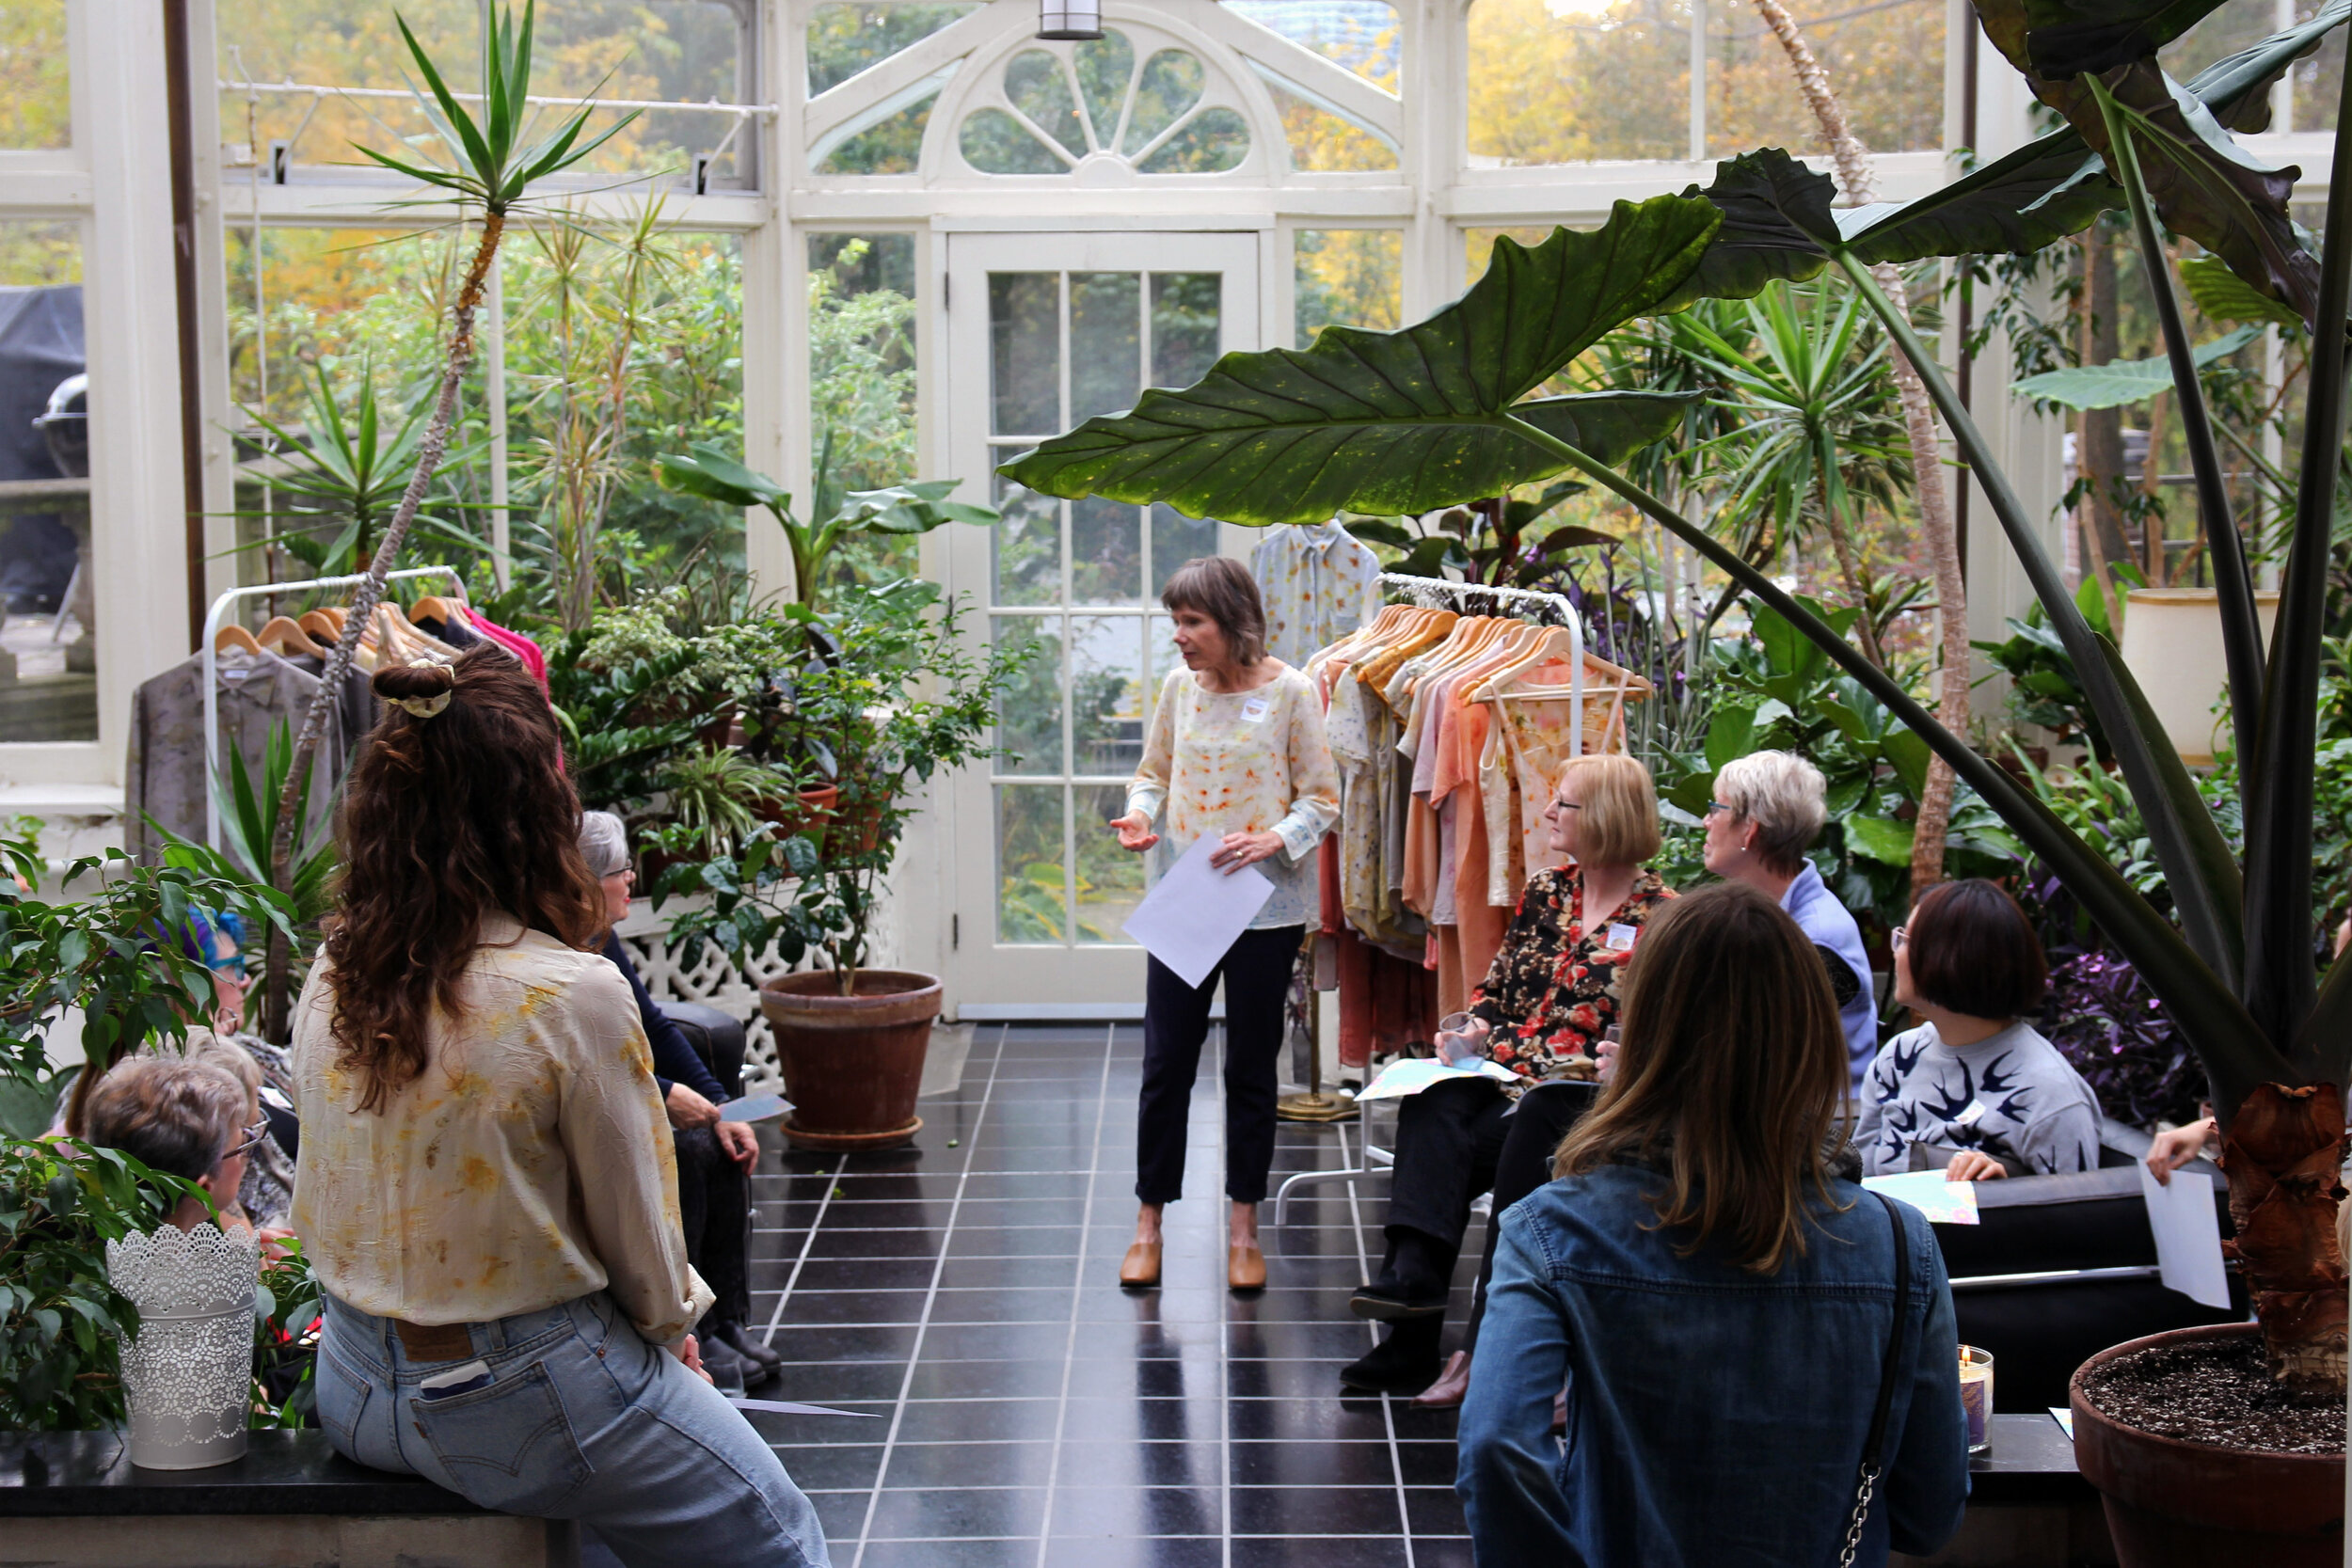
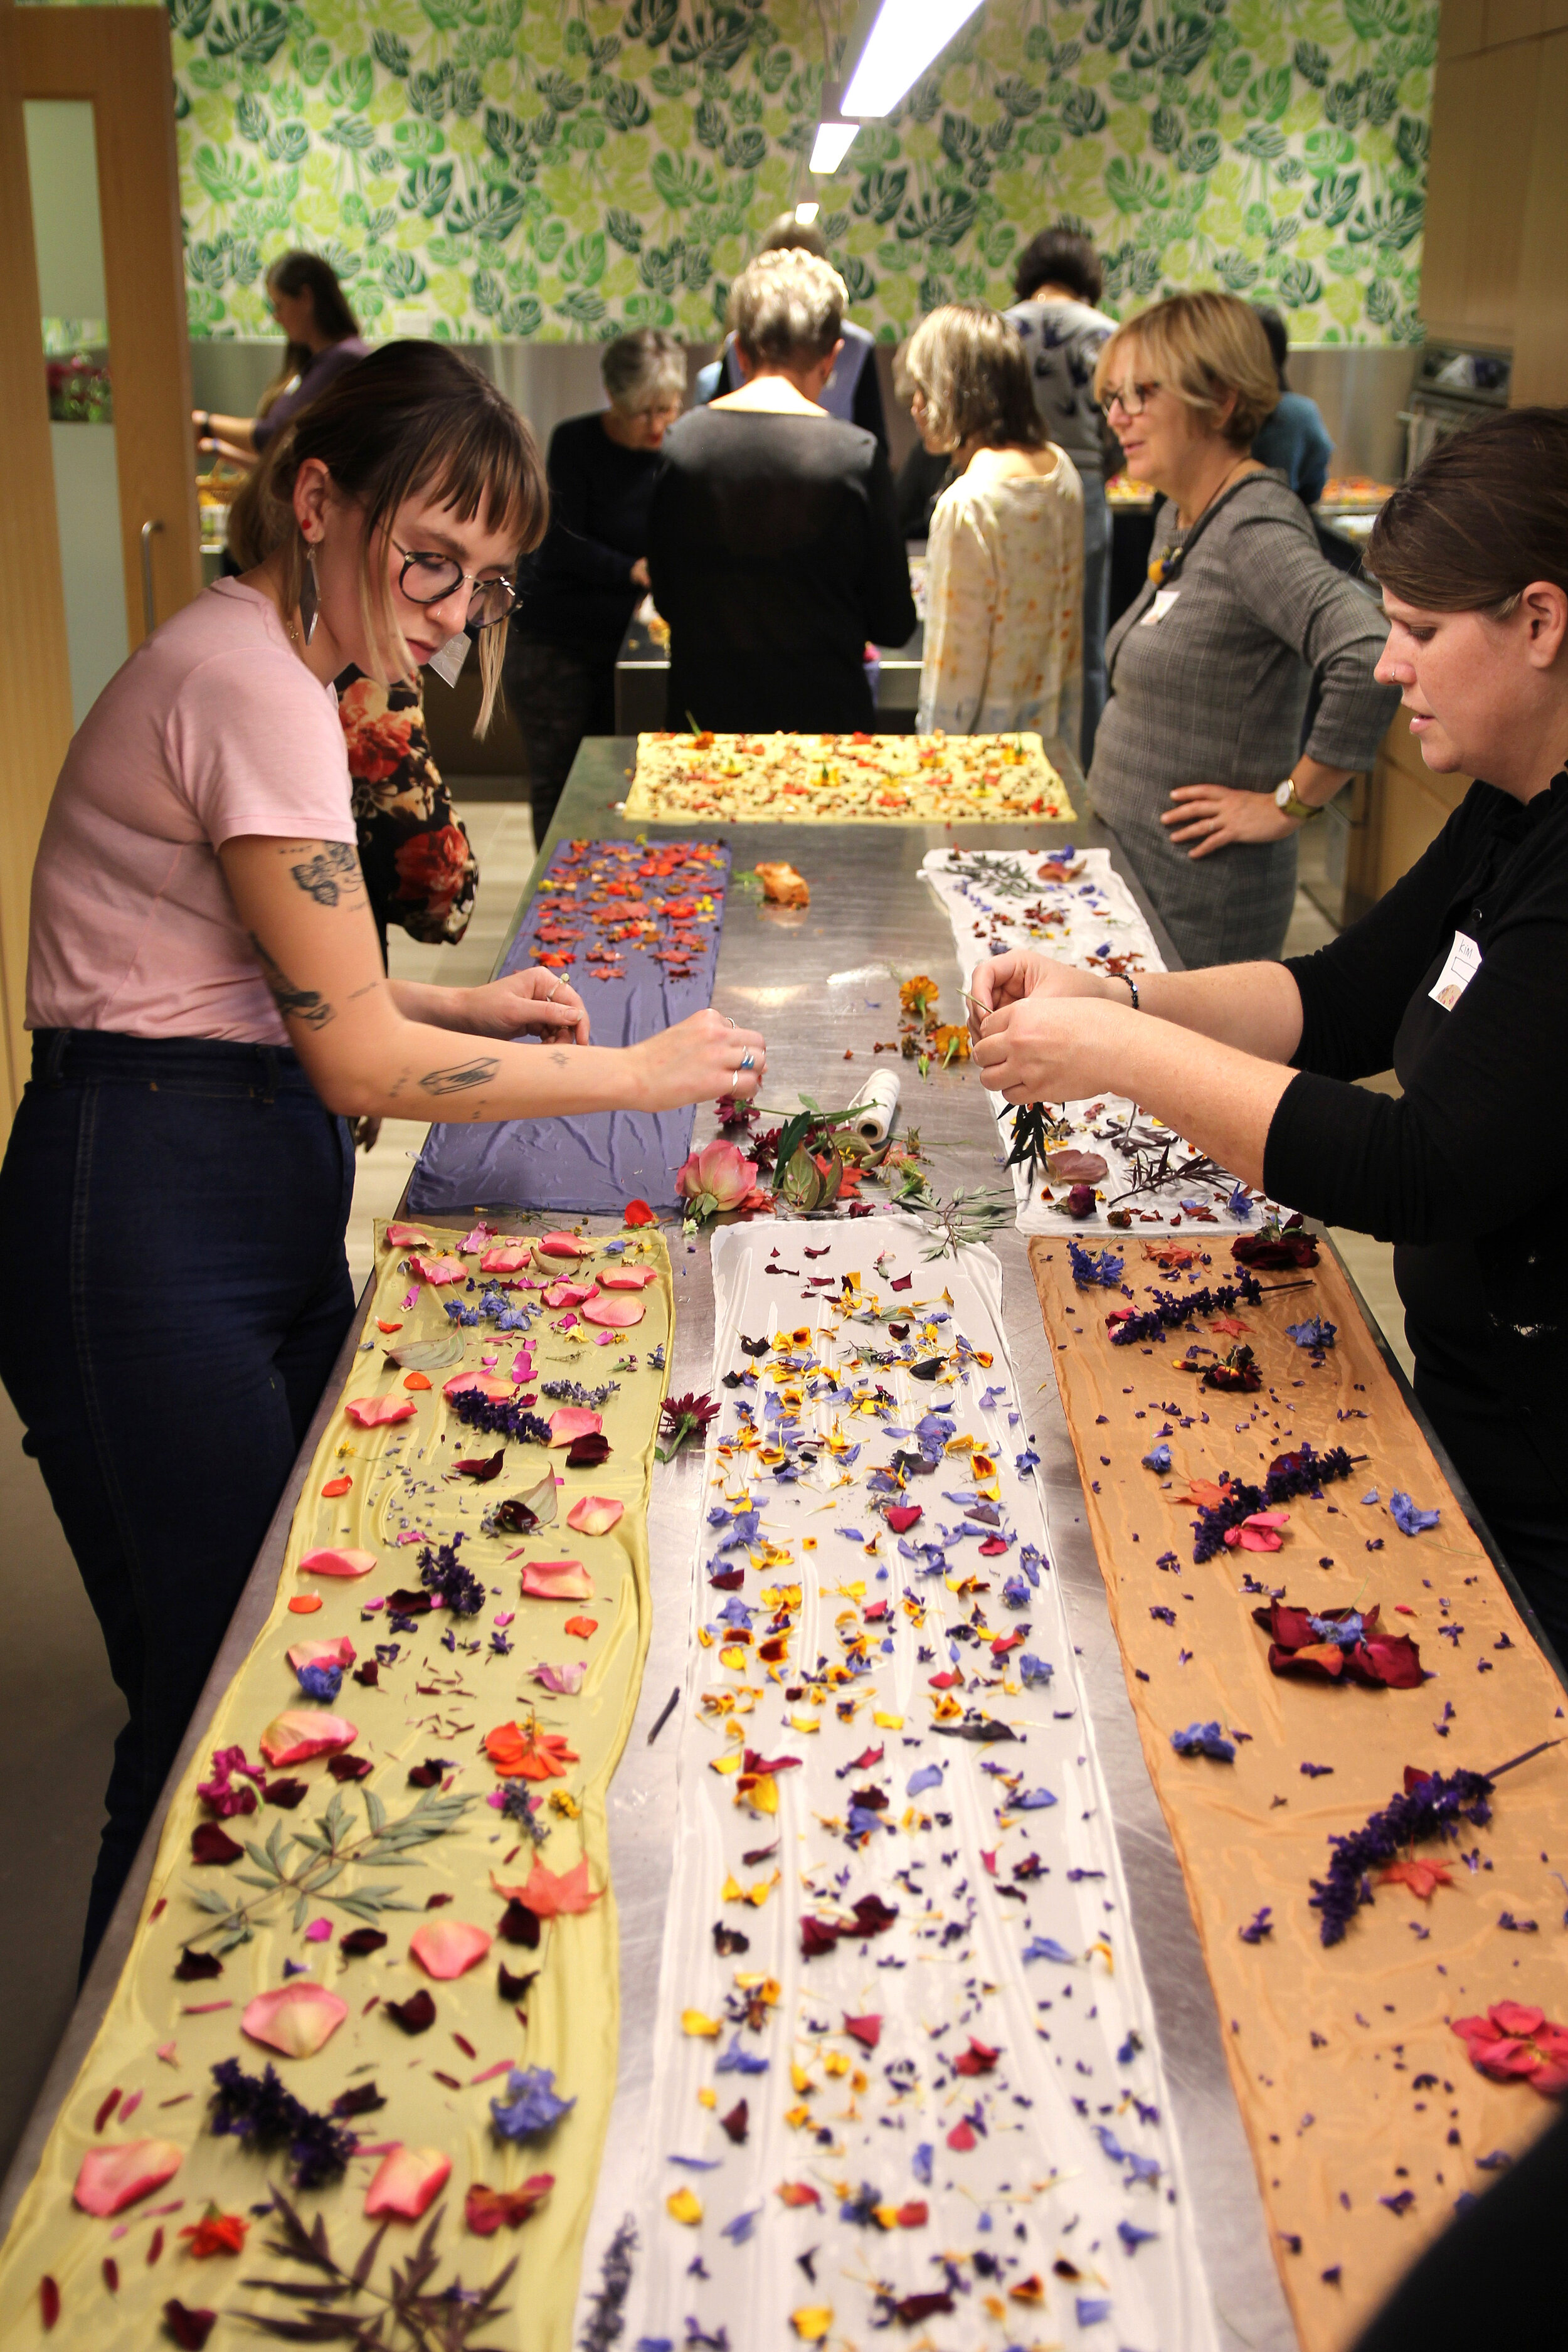
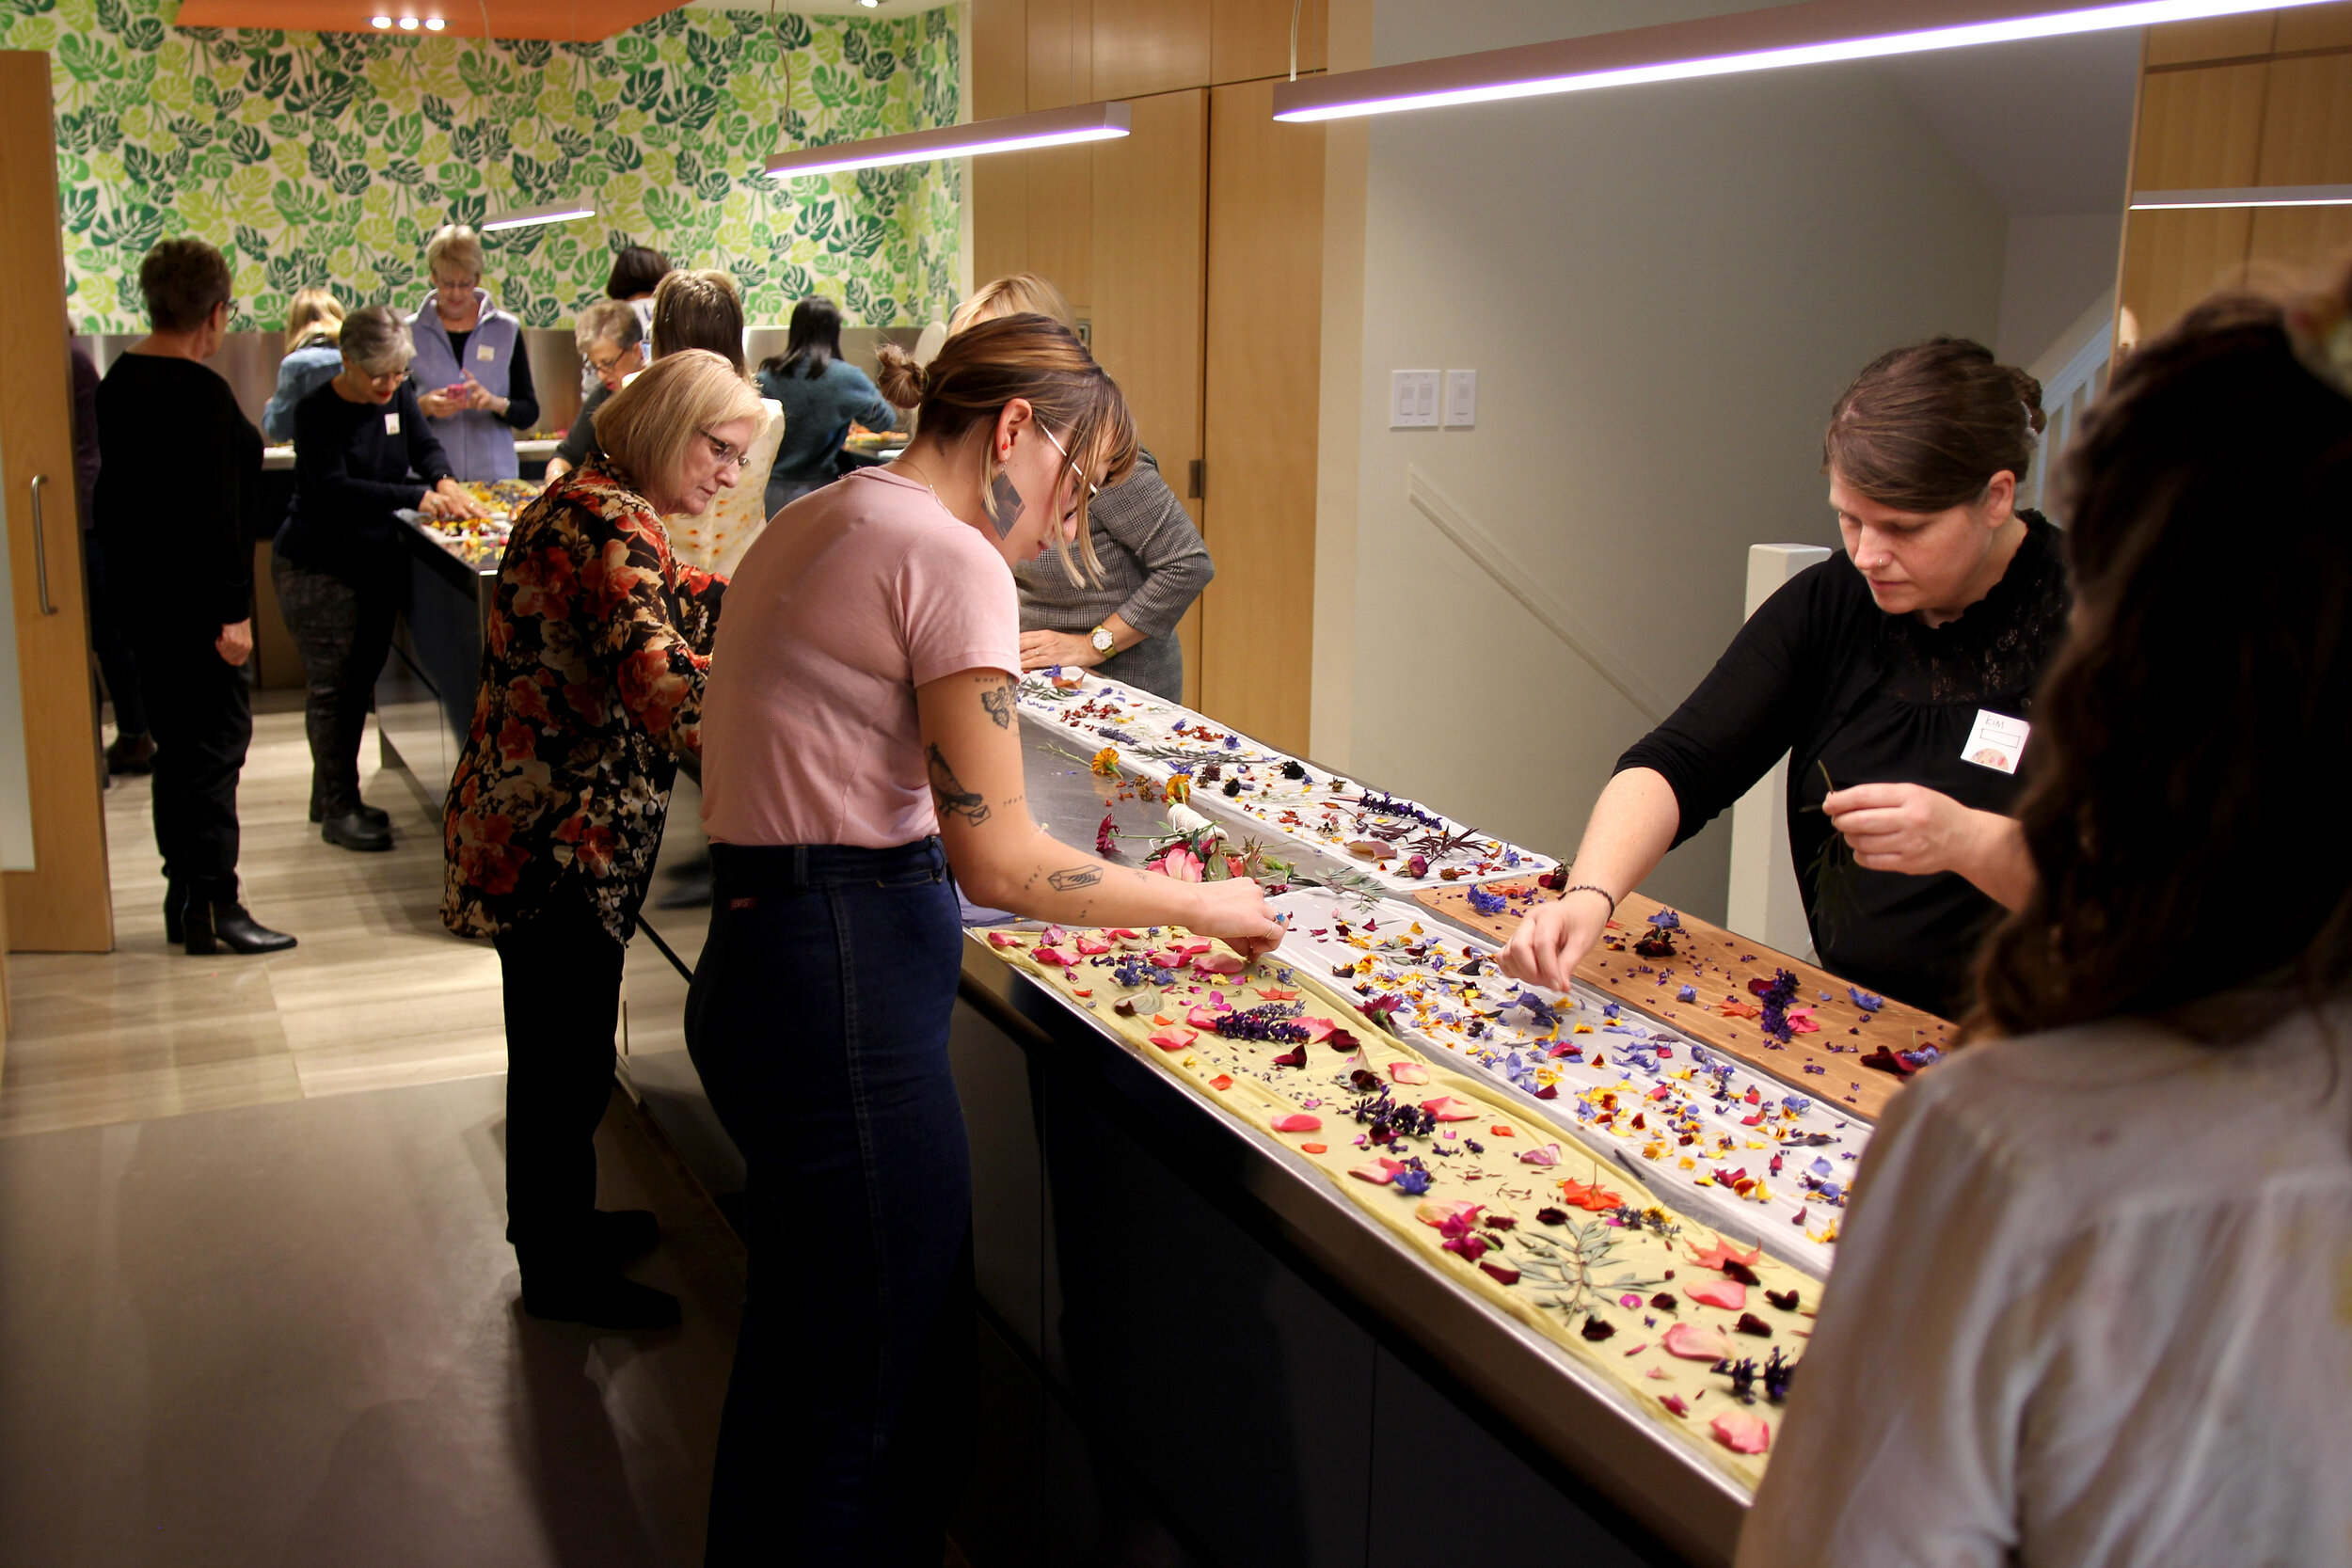
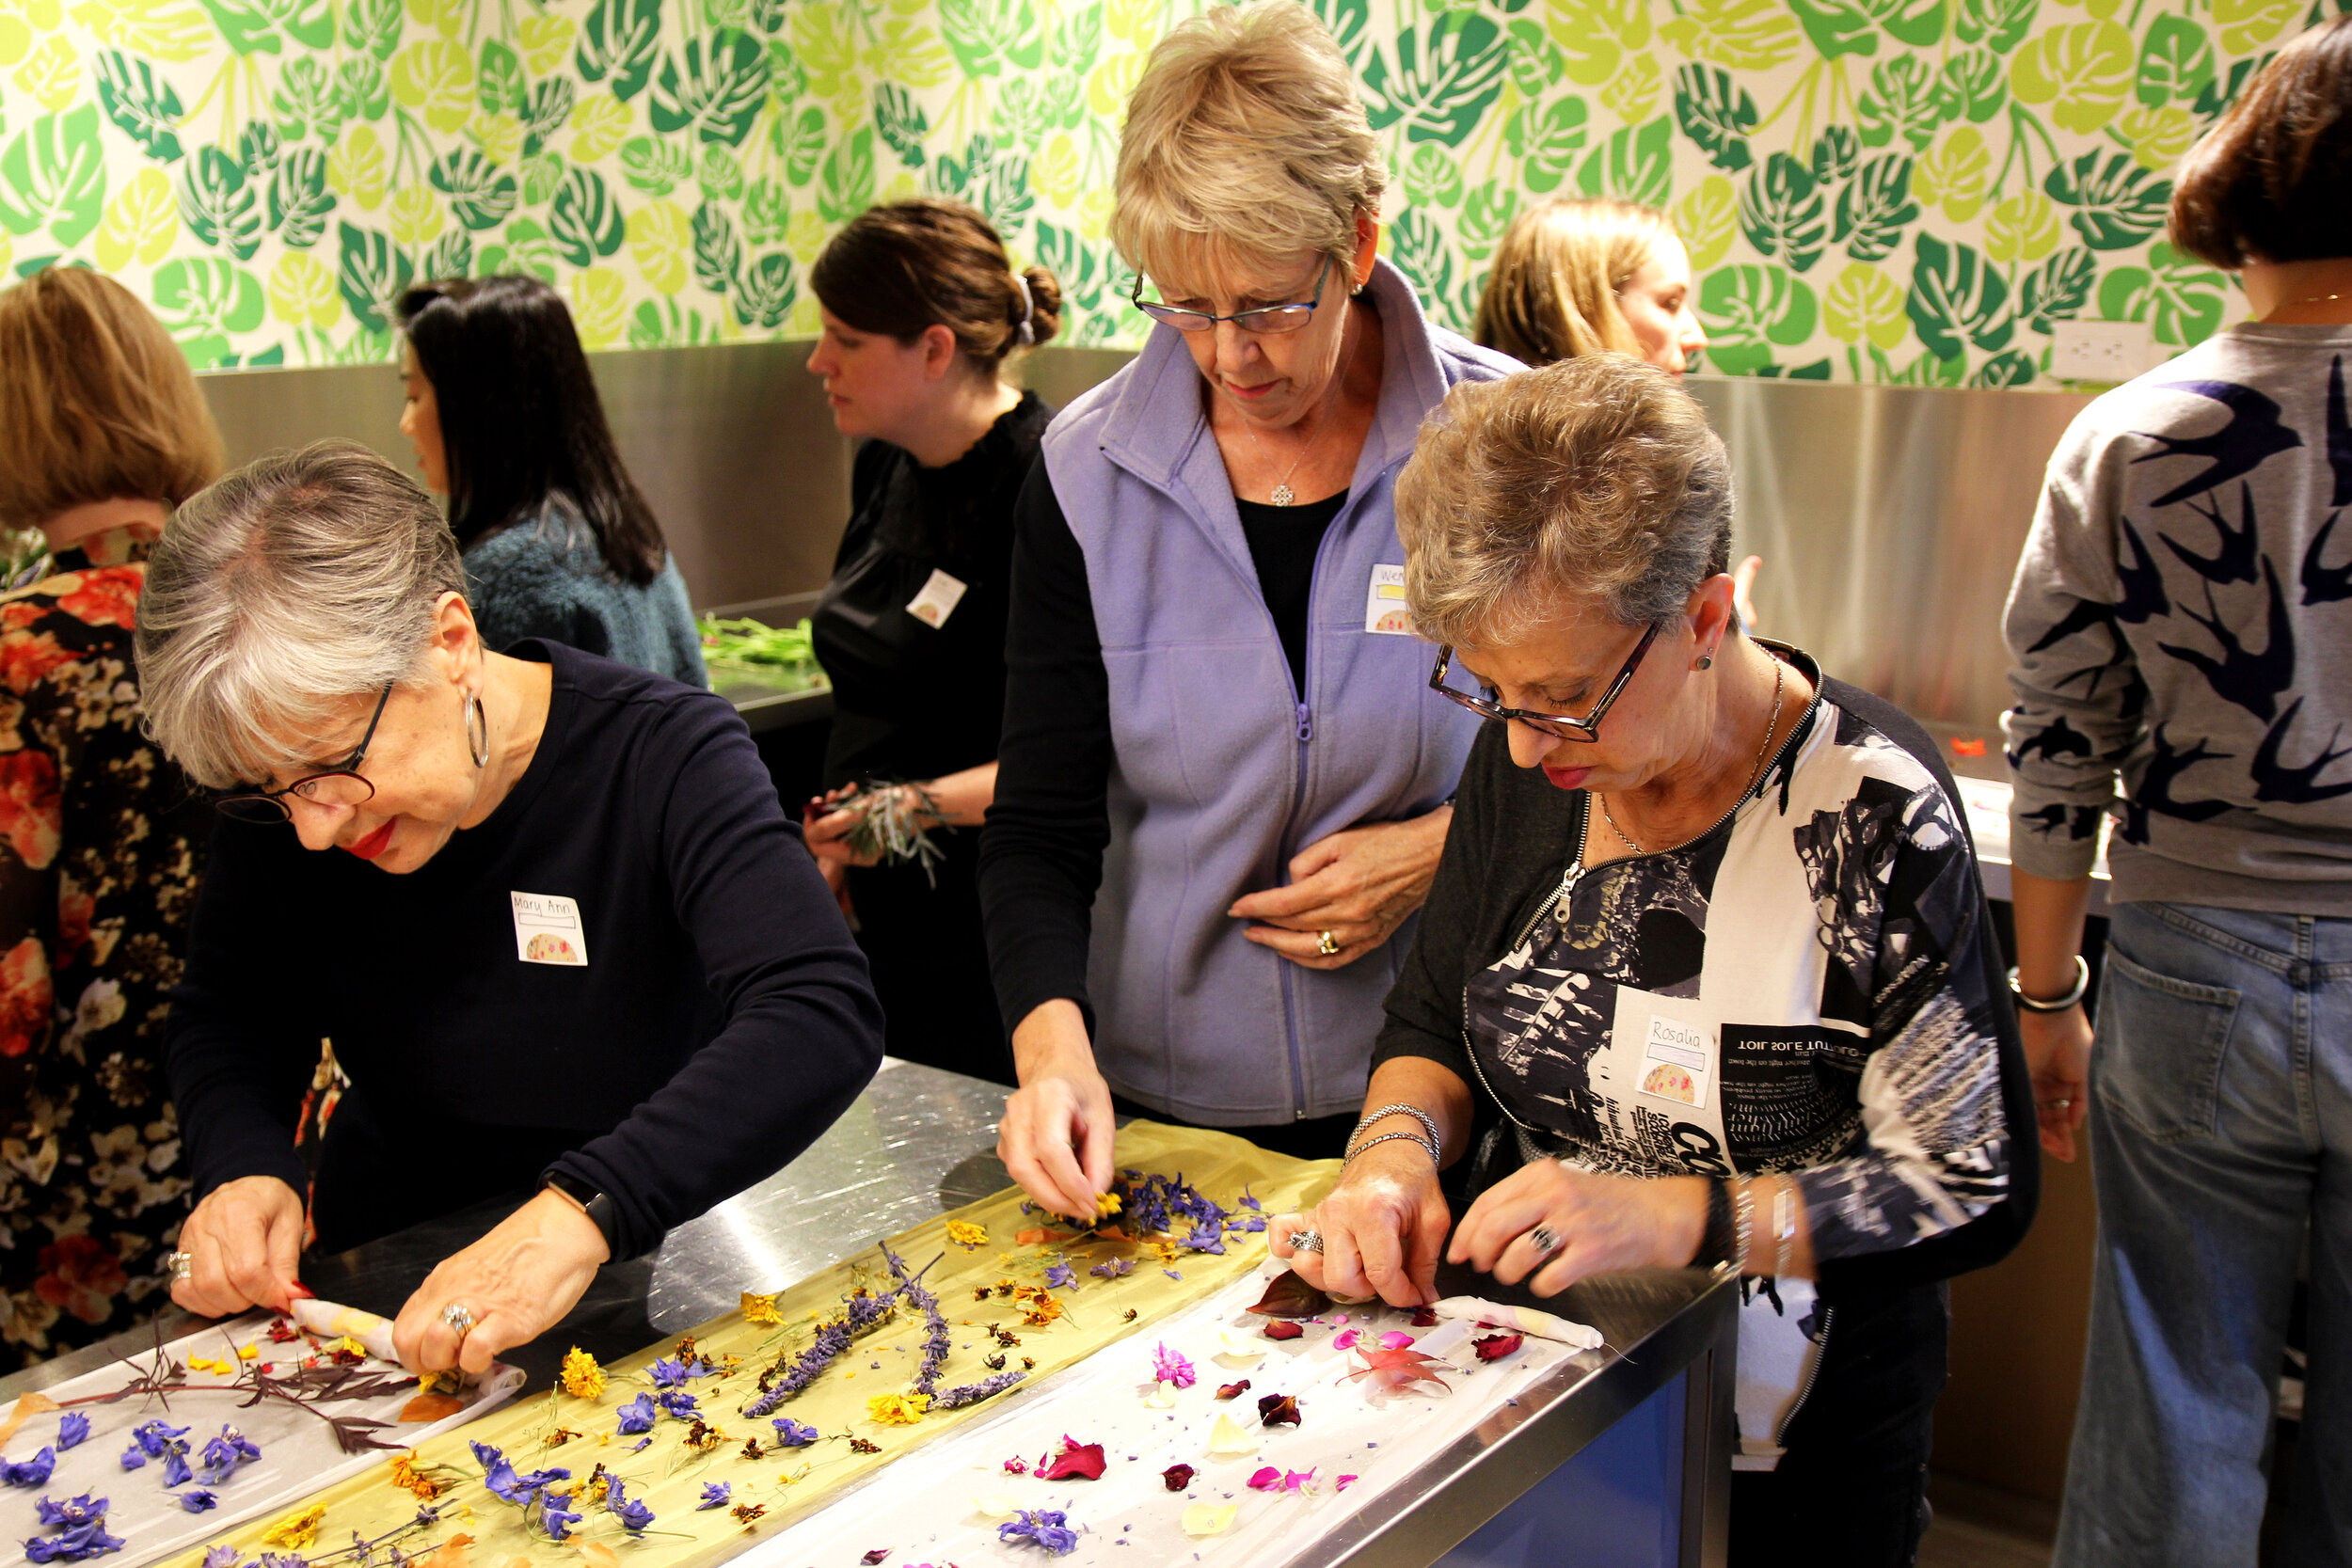
Thank you so much to all the mothers, daughters, aunts, sisters, and in-laws who joined us for our first ever workshop this past Mother’s Day. We couldn’t have asked for a more lovely and keen group, and we were wowed by the beautiful and varied scarves you created. We hope you enjoyed the day as much as we did, and that you’ll wear your scarves with pride!

Introducing our process & sample book to the group
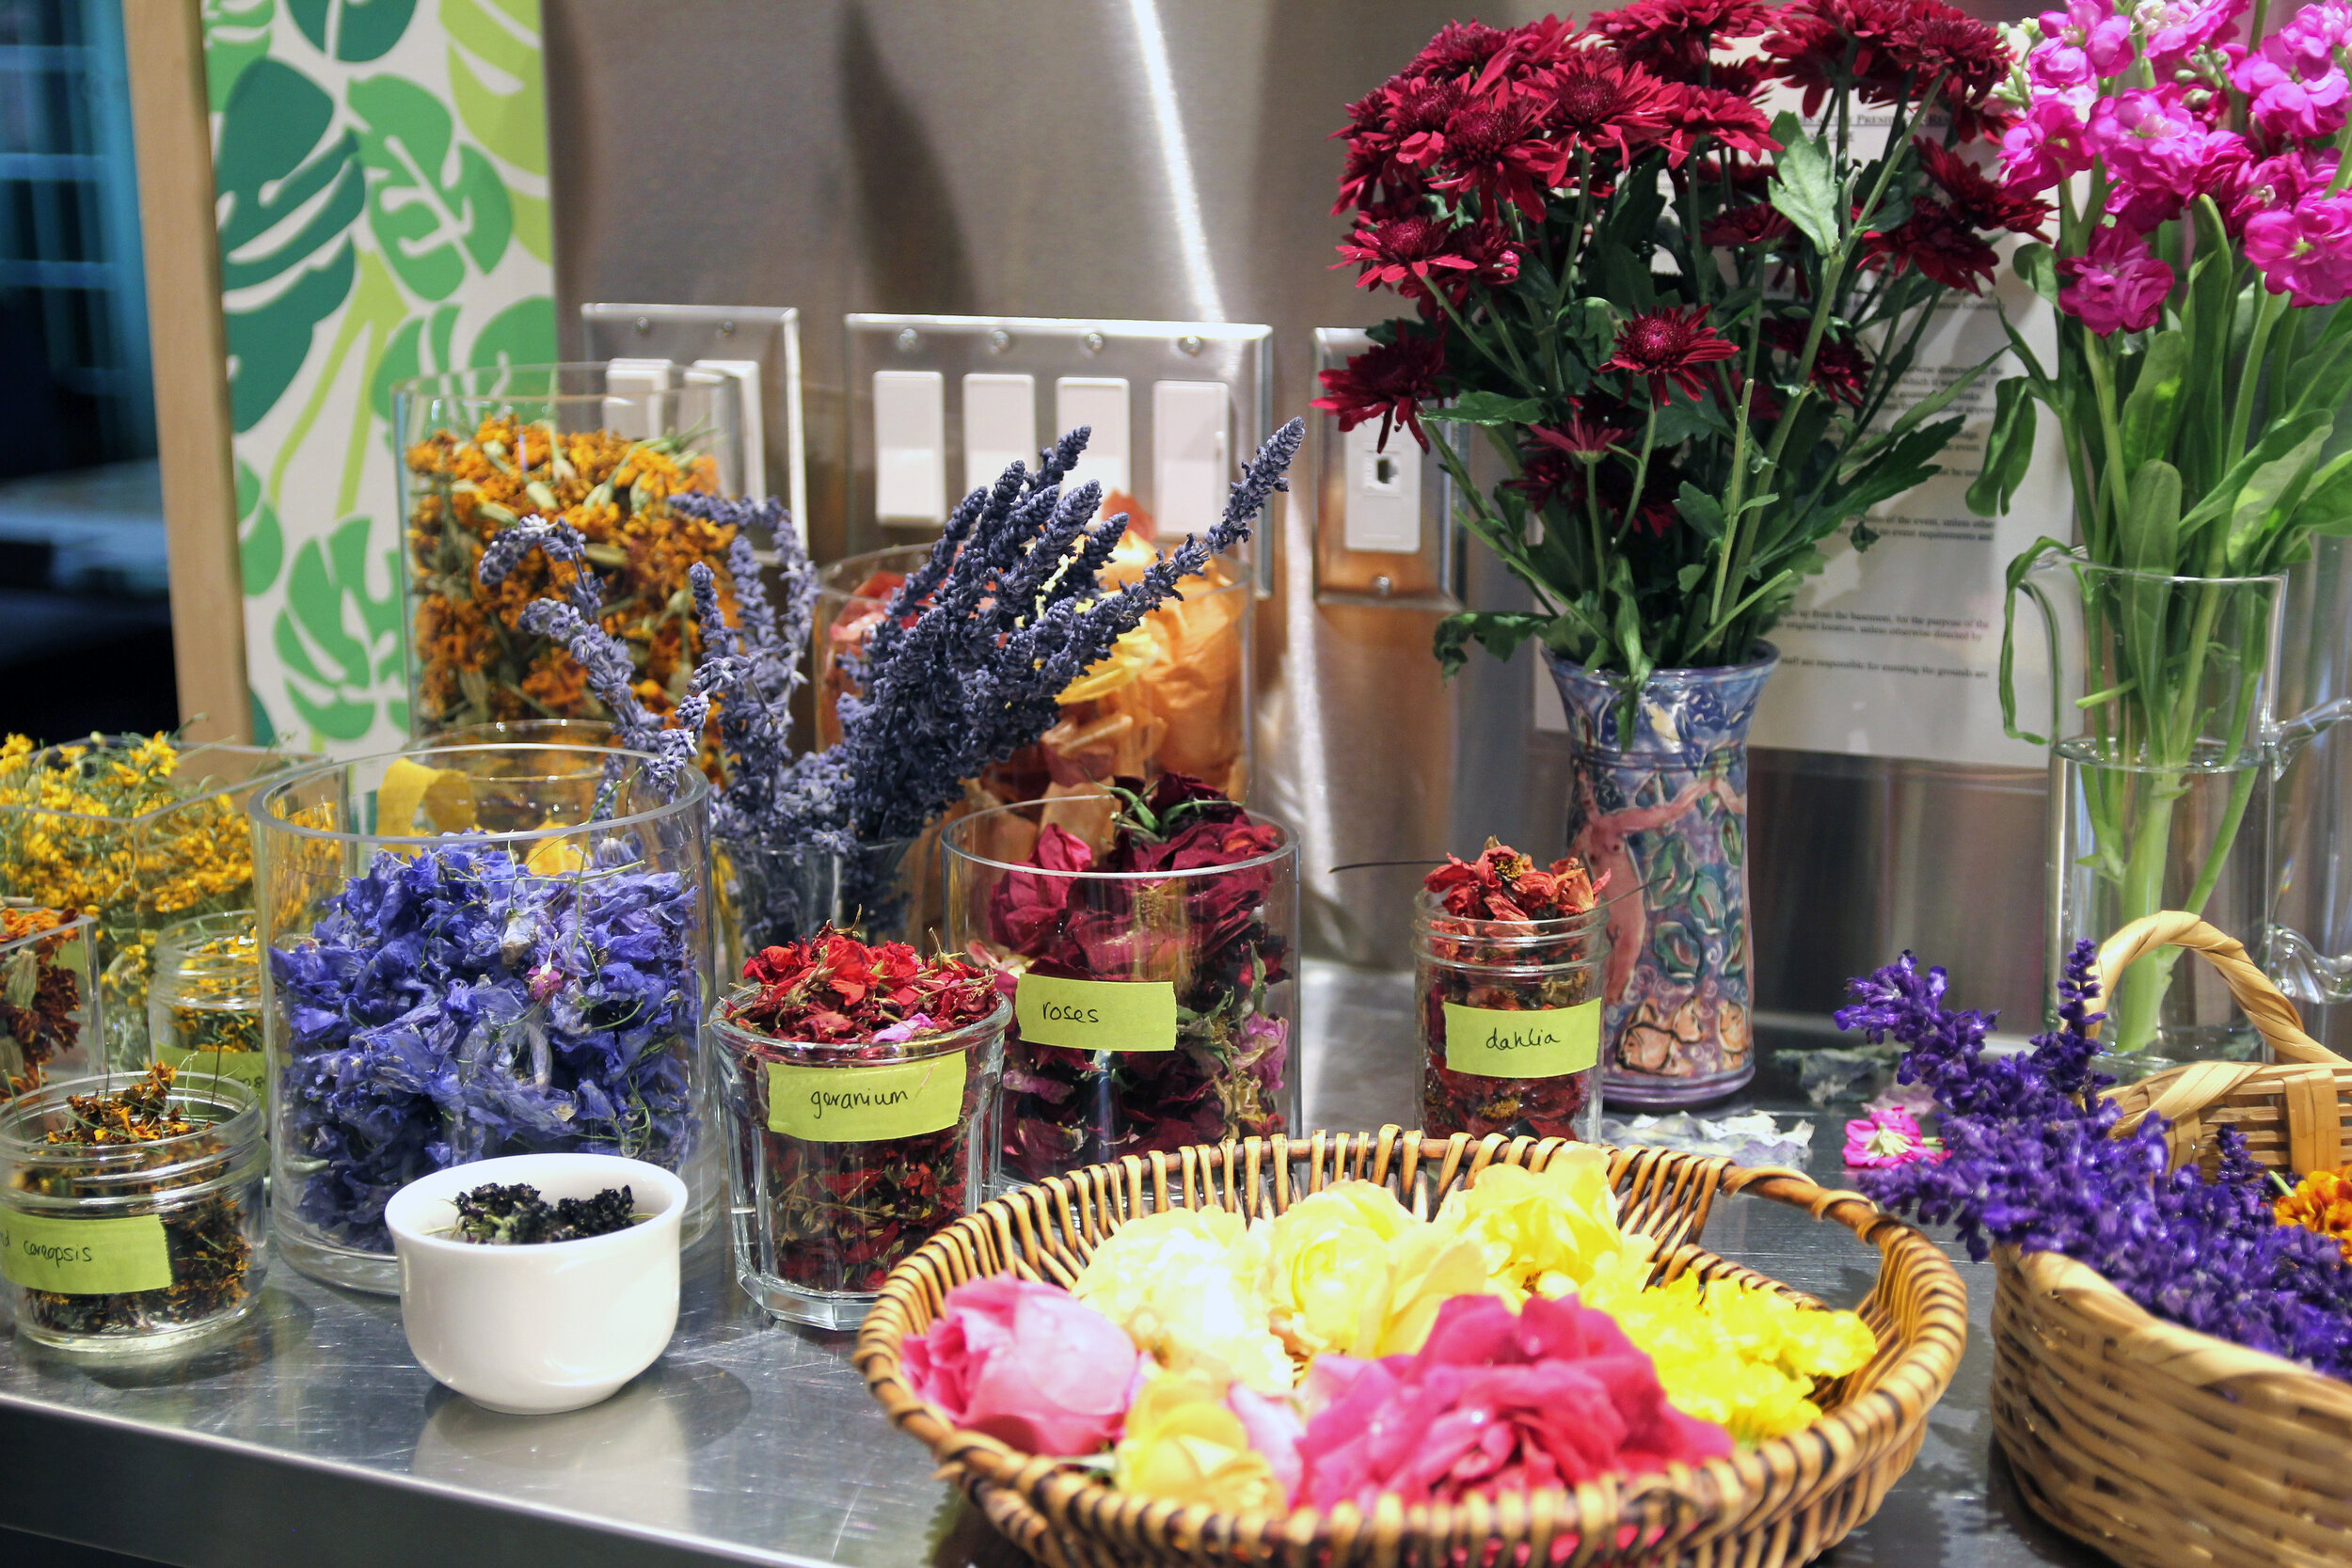
Various botanicals

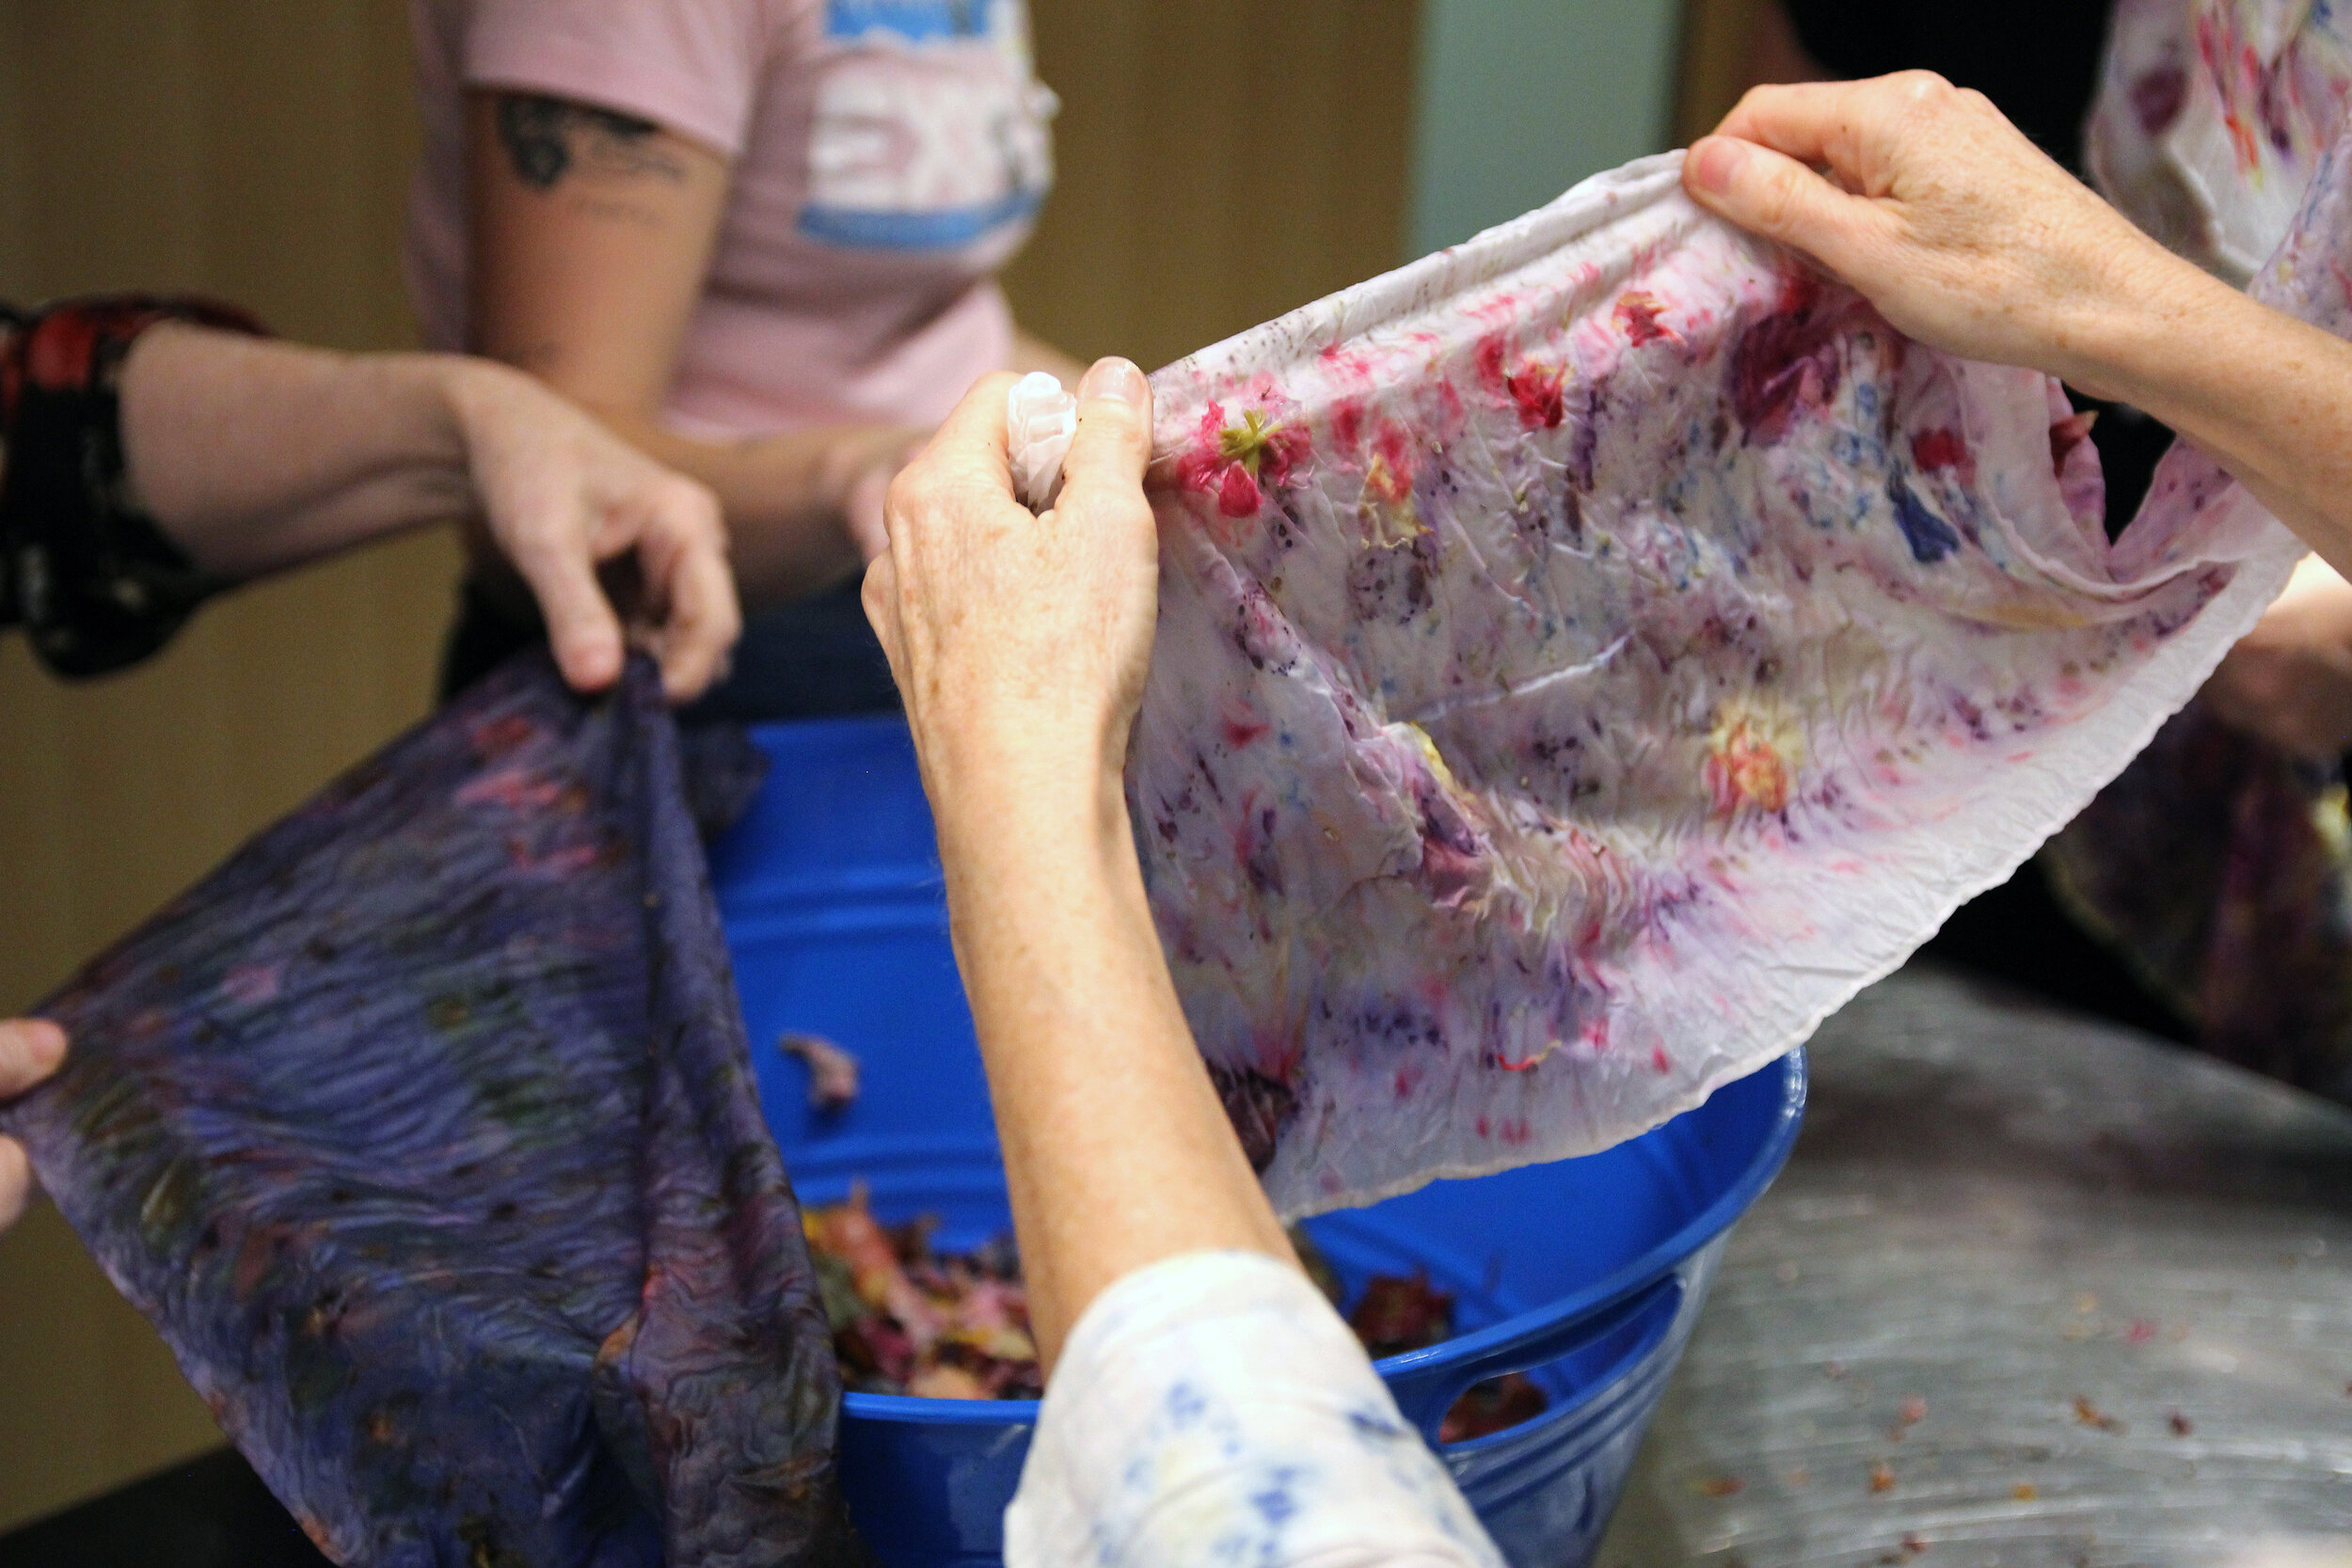
After laying out a selection of flowers, the scarves were rolled tightly

A great opportunity for mothers and daughters to work together..!

Teamwork makes the dream work!

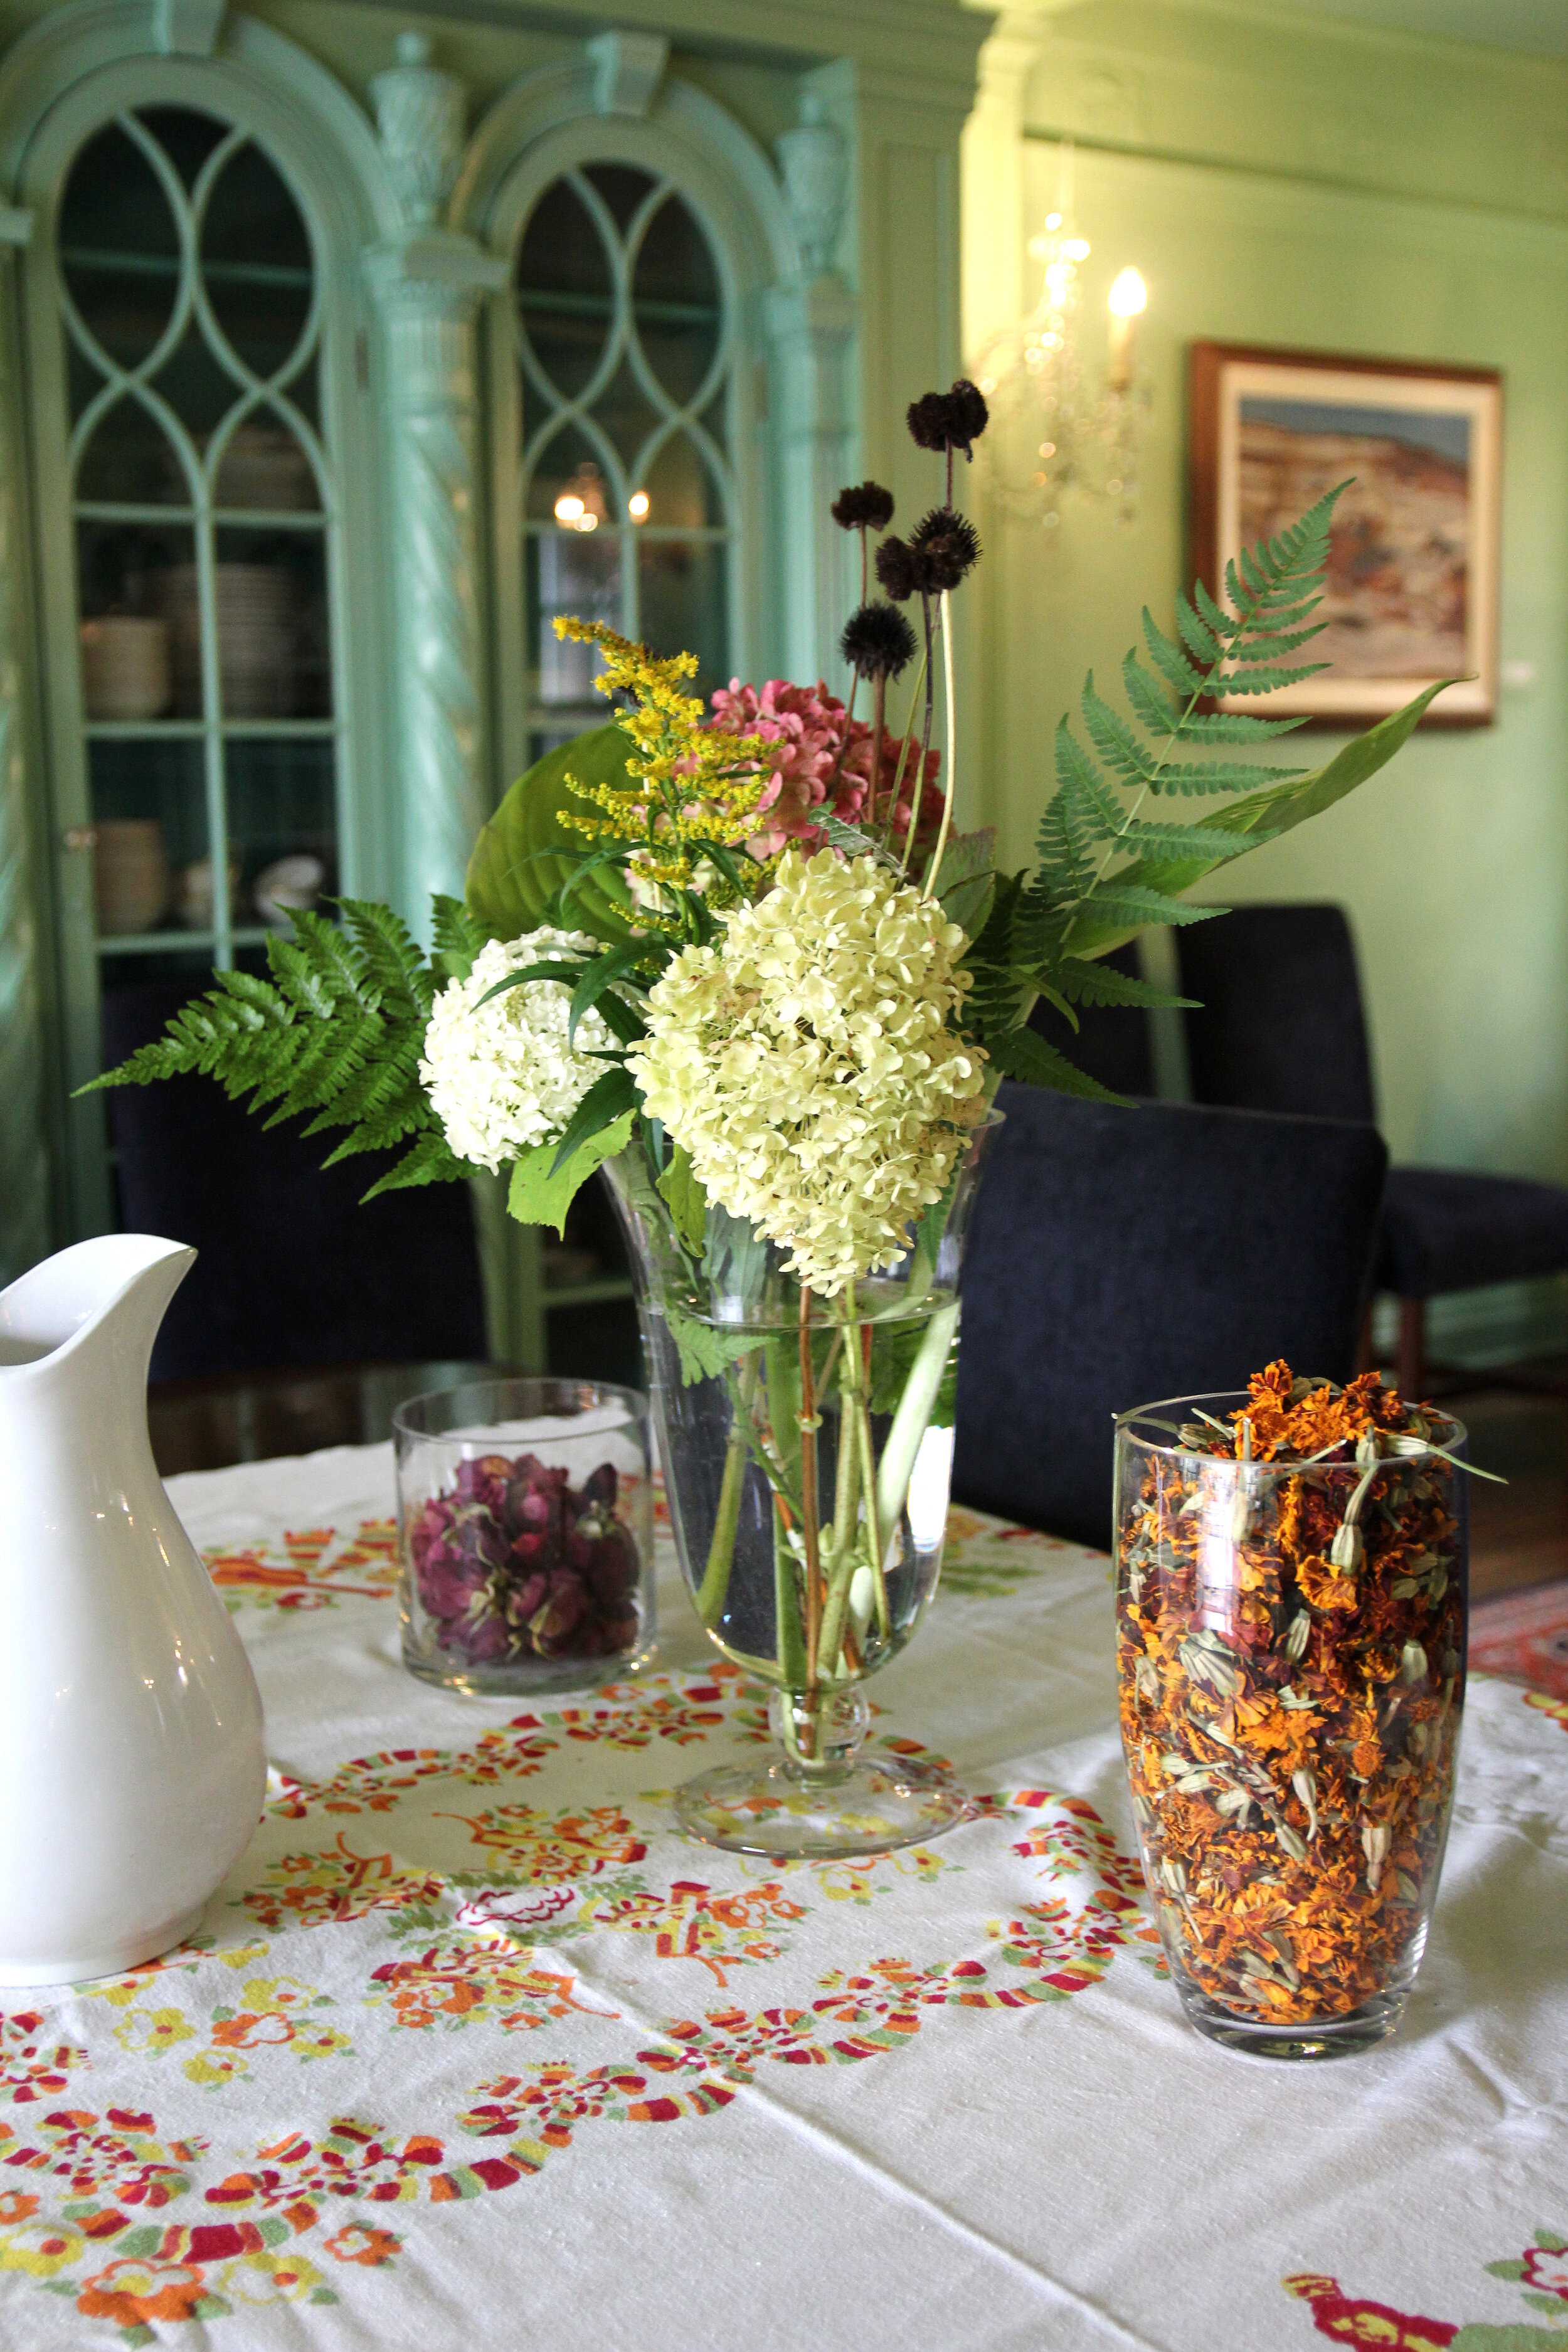
Important tea break

Lavender & violet shortbreads

After a quick steam, the scarves were unrolled to reveal the colours & patterns left by the flowers

Beautiful scarves made by group #1

The beautiful scarves of group #2
We look forward to more workshops in our future! If you’d like to be added to our mailing list to receive news about upcoming workshops, please reach out to us at windeyerstudio@gmail.com. Photos by Cécile Ferandier & Isabel Gertler.
Joanna and Isabel - the mother-daughter team - at Windeyer Studio are pleased to announce that we are hosting a Mother's Day workshop on Sunday, May 12th.
We'll teach you the basics of dyeing with flowers and botanicals, and each participant will take home their own naturally-dyed silk scarf. Afternoon tea and scones will be served in the conservatory!
When: Sunday, May 12th, 3 - 5pm
Where: 93 Highland Avenue, Rosedale
Fee: $80 per participant
There are only 10 spots available, so grab your mom and spend your Mother's Day with us!
Email us at windeyerstudio@gmail.com or DM us via instagram @windeyer_studio with your email address and we'll contact you with additional information.
Despite Toronto's first official snowstorm of the season, the Windeyer launch proceeded and we were thrilled with the number of people who braved the weather to be with us, and to see our line of garments and accessories.
Mothers and daughters, friends and work colleagues joined us - providing us with their thoughts, ideas and support for the line. Thanks to each and everyone of you.
New scrunchies and scarves are in the works for last minute Xmas gifts, and Joanna is sourcing new (technically 2nd hand) items for our next dyeing session
Stay tuned for the release of our next batch of goods - we'll keep you posted!
J&I
We can’t wait to celebrate our launch with you on November 15th!